目次
画像の加工をする際に、 部分的に限定して操作したい場合がよくあります。 GIMP ではその部分を 選択 することで作業をすすめます。 どんな画像もそれぞれに 選択範囲 をひとつ持っています。 GIMP の操作はほとんどすべて画像の選択範囲に対してのみ及ぼされます。
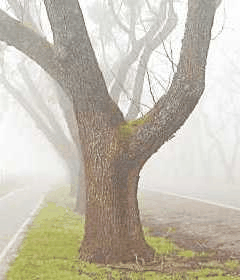
There are many, many situations where creating just the right selection is the key to getting the result you want, and often it is not easy to do. For example, in the above image, suppose you want to cut the tree out from its background, and paste it into a different image. To do this, you need to create a selection that contains the tree and nothing but the tree. It is difficult because the tree has a complex shape, and in several spots is hard to distinguish from the objects behind it.
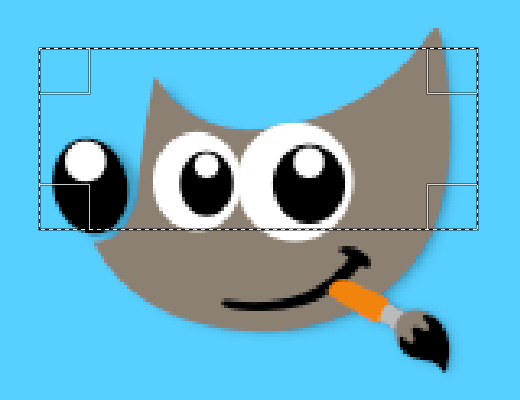
さてここからが大変重要なところですが、 理解するまでにはちょっと骨が折れます。 通常は選択範囲をとると、 その領域は画像上では破線で囲われて見えています。 これを見れば選択とは境界線により区切られた、 内側の選択範囲と外側の非選択範囲をつくるというのがおおよその考え方でしょう。 この概念はたしかにさまざまな場面で有効ですが、 実際は不正確です。
実を言うと選択の実装は チャンネル でできています。 内部構造的には、 選択のチャンネルは赤・緑・青およびアルファのチャンネルとは別に設けられます。 そして画像の各画素 (ピクセル) ごとに、 0 (非選択) から255 (完全選択) までの値を定めることで選択は成り立っています。 こうしたやり方が有利なのは、 画素によっては 0 でも 255 でもない中間の値をとることで 不完全選択 が可能になるからです。 今後は選択と非選択の間のゆるやかな変化を必要とする場面にたびたび遭遇することになるでしょう。
では一体、 選択範囲をつくったときにできる点線は何なのでしょう。
答えは 等高線 です。 この点線は選択の比率の値が半分以上の領域と半分未満の領域との境目を示しています。
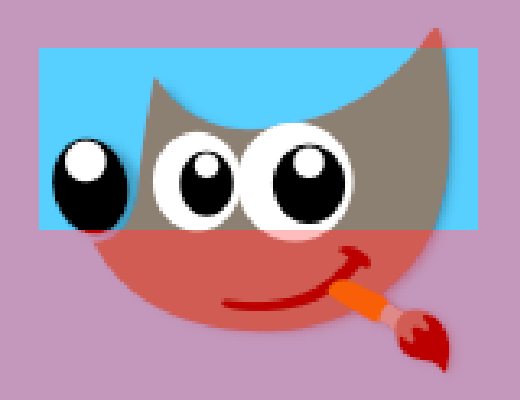
While looking at the dashed line that represents the selection, always remember that the line only tells part of the story. If you want to see the selection in full detail, the easiest way is to click the Quick Mask button in the lower left corner of the image window. This causes the selection to be shown as a translucent overlay atop the image. Selected areas are unaffected; unselected areas are reddened. The more completely selected an area is, the less red it appears.
Many operations work differently in Quick Mask mode, as mentioned in the Quick Mask overview. Use the Quick Mask button in the lower left corner of the image window to toggle Quick Mask mode on and off.
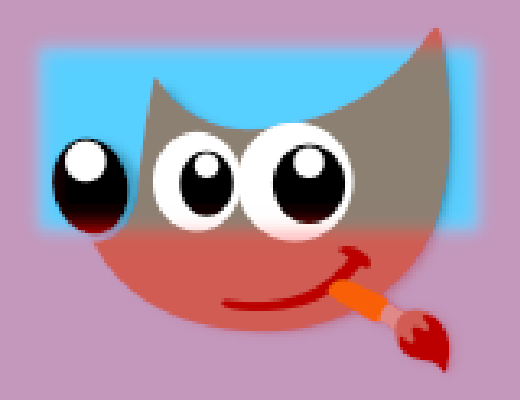
With the default settings, the basic selection tools, such as the Rectangle Select tool, create sharp selections. Pixels inside the dashed line are fully selected, and pixels outside completely unselected. You can verify this by toggling Quick Mask: you see a clear rectangle with sharp edges, surrounded by uniform red. Use the 「Feather edges」 checkbox in the Tool Options to toggle between graduated selections and sharp selections. The feather radius, which you can adjust, determines the distance over which the transition occurs.
If you are following along, try this with the Rectangle Select tool, and then toggle Quick Mask. You will see that the clear rectangle has a fuzzy edge.
切り取って貼り付ける作業には境界をぼかす方法がうってつけです。 貼り付けられた部品が目立たずなめらかににその背後と溶け合います。
It is possible to feather a selection at any time, even if it was originally created as a sharp selection. Use → from the main menu to open the Feather Selection dialog. Set the feather radius and click . Use → to do the opposite—sharpen a graduated selection into an all-or-nothing selection.
![[注記]](images/note.png)
|
注記 |
|---|---|
|
技術的な話題ですが、 境界のぼかしは ガウスぼかし を使用しており、 与えられた量をぼかし半径として選択チャンネルに作用させています。 |
レイヤーは透明度を設定できますが、 選択は同じようにはできません。 しかしガラスのような透明の画像が作れたら非常に便利です。 レイヤーの不透明度の設定はつぎのような手順でできます。
-
単純な選択であれば、 消しゴムツールを使います。 不透明度はお好みで調節できます。
-
For complex selections: go to → and choose one of or . Either of these creates a new layer with the selection called 「Floating Layer」 (「選択範囲のフロート化」). Set the opacity slider in the Layers dialog to the desired opacity. Then anchor the selection: outside the selection, the mouse pointer includes an anchor. When you click while the mouse pointer includes the anchor, the floating selection disappears from the Layers dialog and the selection is at the right place and partially transparent (anchoring works this way only if a selection tool is activated: you can also use the Anchor Layer command in the context menu by right clicking on the selected layer in the Layers dialog).
And, if you use this function frequently: Ctrl-C to copy the selection, and Ctrl-V to paste the clipboard as a new layer. You can now adjust the opacity of the new layer.
-
Another way: use → → to add a layer mask to the layer with the selection, initializing it with the selection. Then use a brush with the desired opacity to paint the selection with black, i.e. paint it with transparency. Then → → . See 「レイヤーマスク」.
-
To make the solid background of an image transparent, add an Alpha channel, and use Fuzzy Select to select the background. Then, use the Color Picker tool to select the background color, which becomes the foreground color in Toolbox. Use the Bucket Fill tool with the selected color. Set the Bucket Fill mode to 「Color Erase」, which erases pixels with the selected color; other pixels are partially erased and their color is changed.
最も単純なのは → する方法で、 選択範囲が完全透過になります。


