Sisällys
Usein kun muokkaat kuvaa, saatat haluta vaikuttaa vain osaan kuvasta. GIMPissä voit vaikuttaa kuvaan valitsemalla osan siitä. Jokaisella kuvalla on siihen liittyvä valinta. Suuri osa GIMPin toiminnoista vaikuttaa vain kuvan valittuihin kohtiin.
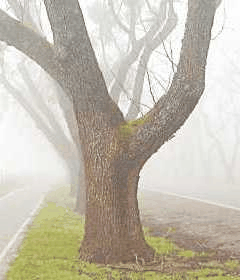
There are many, many situations where creating just the right selection is the key to getting the result you want, and often it is not easy to do. For example, in the above image, suppose you want to cut the tree out from its background, and paste it into a different image. To do this, you need to create a selection that contains the tree and nothing but the tree. It is difficult because the tree has a complex shape, and in several spots is hard to distinguish from the objects behind it.
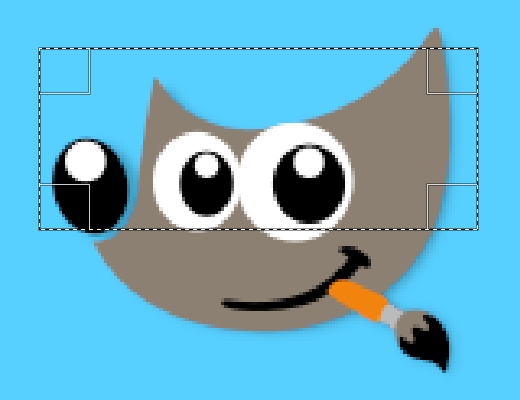
Seuraavaksi on erittäin tärkeä neuvo ja se on tärkeää ymmärtää. Yleensä kun teet valinnan näet sen katkoviina, joka sulkee sisäänsä osan kuvasta. Tämän ideana on se, että valinta on eräänlainen säiliö, joka sulkee valitut osat kuvasta sisälleen ja jättää valitsemattomat kohdat ulos. Tämä valinnan käsite on hyväksyttävä useaan tarkoitukseen, mutta se ei ole totta.
Oikeastaan valinta on suoritettu kanavana. Sisäisen rakenteen termein se on identtinen kuvan puna-, viher-, sini- ja alphakanavien kanssa. Tämän takia valinnalla on määritetty arvo jokaiselle kuvan kuvapisteelle 0 (valitsemattoman) ja 255 (täysin valitun) välimatkalta. Tämän lähestymistavan etuna on se, että se mahdollistaa kuvapisteiden osittaisen valitsemisen antamalla niille arvon 0 ja 255 väliltä. Kuten näet on useita tilanteita, joissa on toivottavaa, että siirtymät tapahtuvat sulavasti valittujen ja valitsemattomien alueiden välillä.
Mikä sitten on valinnan yhteydessä ilmestyvä katkoviiva?
Se on ääriviiva, joka rajaa puoliksi valitut alueet vähemmän kuin puoliksi valituista alueista.
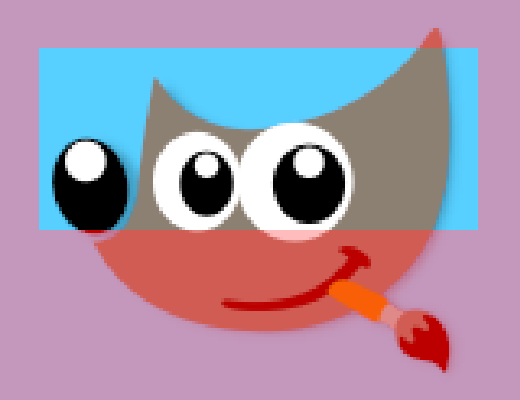
While looking at the dashed line that represents the selection, always remember that the line only tells part of the story. If you want to see the selection in full detail, the easiest way is to click the Quick Mask button in the lower left corner of the image window. This causes the selection to be shown as a translucent overlay atop the image. Selected areas are unaffected; unselected areas are reddened. The more completely selected an area is, the less red it appears.
Many operations work differently in Quick Mask mode, as mentioned in the Quick Mask overview. Use the Quick Mask button in the lower left corner of the image window to toggle Quick Mask mode on and off.
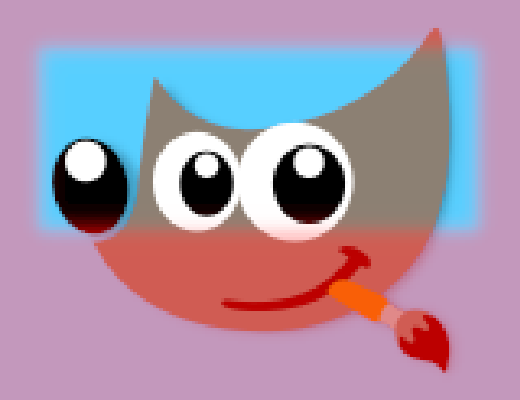
With the default settings, the basic selection tools, such as the Rectangle Select tool, create sharp selections. Pixels inside the dashed line are fully selected, and pixels outside completely unselected. You can verify this by toggling Quick Mask: you see a clear rectangle with sharp edges, surrounded by uniform red. Use the ”Feather edges” checkbox in the Tool Options to toggle between graduated selections and sharp selections. The feather radius, which you can adjust, determines the distance over which the transition occurs.
If you are following along, try this with the Rectangle Select tool, and then toggle Quick Mask. You will see that the clear rectangle has a fuzzy edge.
Reunan pehmennys on hyödyllinen etenkin silloin, kun olet leikkaamassa ja liittämässä sillä se auttaa liitettyä esinettä sekoittumaan sujuvasti ja tunkeilematta ympäristöönsä.
It is possible to feather a selection at any time, even if it was originally created as a sharp selection. Use → from the main menu to open the Feather Selection dialog. Set the feather radius and click . Use → to do the opposite—sharpen a graduated selection into an all-or-nothing selection.
![[Huomaa]](images/note.png)
|
Huomaa |
|---|---|
|
Teknisesti suuntautuneille lukijoille: pehmennys toimii soveltamalla Gaussin sumennusta valinta kanavaan määritetyllä sumennuskehällä. |
Voit määrittää tason peittokyvyn, mutta et voi tehdä sitä suoraan valinnalle. On aika hyödyllistä tehdä kuvan lasista läpinäkyväksi. Voit tehdä tämän käyttämällä seuraavia metodeja:
-
Yksinkertaisille valinnoille, käytä pyyhekumia halutulla peittokyvyllä.
-
For complex selections: go to → and choose one of or . Either of these creates a new layer with the selection called ”Floating Layer” (Kohta 4.5, ”Leijuta”). Set the opacity slider in the Layers dialog to the desired opacity. Then anchor the selection: outside the selection, the mouse pointer includes an anchor. When you click while the mouse pointer includes the anchor, the floating selection disappears from the Layers dialog and the selection is at the right place and partially transparent (anchoring works this way only if a selection tool is activated: you can also use the Anchor Layer command in the context menu by right clicking on the selected layer in the Layers dialog).
And, if you use this function frequently: Ctrl-C to copy the selection, and Ctrl-V to paste the clipboard as a new layer. You can now adjust the opacity of the new layer.
-
Another way: use → → to add a layer mask to the layer with the selection, initializing it with the selection. Then use a brush with the desired opacity to paint the selection with black, i.e. paint it with transparency. Then → → . See Kohta 2.1.4, ”Layer masks”.
-
To make the solid background of an image transparent, add an Alpha channel, and use Fuzzy Select to select the background. Then, use the Color Picker tool to select the background color, which becomes the foreground color in Toolbox. Use the Bucket Fill tool with the selected color. Set the Bucket Fill mode to ”Color Erase”, which erases pixels with the selected color; other pixels are partially erased and their color is changed.
Yksinkertaisin metodi on → komento, joka saa aikaan täyden läpinäkyvyyden ja ei mahdollista Peittokyky asetuksen käyttöä Täyttötyökalulla.


