Inhaltsverzeichnis
Wenn Sie mit GIMP Bilder bearbeiten, werden Sie sehr schnell nach einer Möglichkeit suchen, eine Aktion oder einen Filter von „Wilbers Augen“ nicht auf das gesamte Bild, sondern lediglich auf einen bestimmten Bereich des Bildes anzuwenden. Genau zu diesem Zweck gibt es in „Wilbers Augen“ das Konzept der Auswahl.
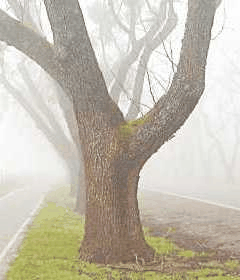
There are many, many situations where creating just the right selection is the key to getting the result you want, and often it is not easy to do. For example, in the above image, suppose you want to cut the tree out from its background, and paste it into a different image. To do this, you need to create a selection that contains the tree and nothing but the tree. It is difficult because the tree has a complex shape, and in several spots is hard to distinguish from the objects behind it.
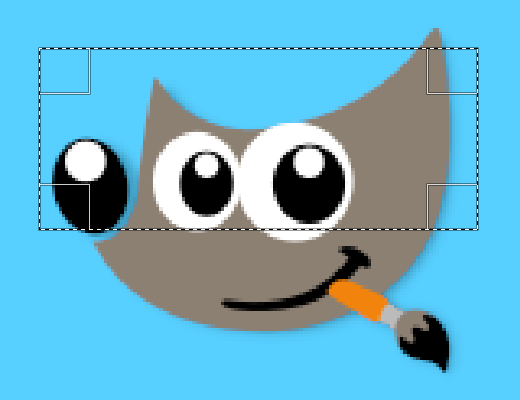
Der nächste Punkt ist sehr wichtig, ja grundlegend für das Verständnis von Auswahlen. Wenn Sie eine Auswahl erzeugen, sehen Sie normalerweise eine gestrichelte Linie, welche einen Teil des Bildes umschließt. Dies könnte leicht zu der Annahme führen, dass die Bildbereiche innerhalb der Linie die Auswahl darstellen und die Bildteile außerhalb nicht ausgewählt sind. Diese Annahme ist in vielen Fällen auch zulässig, aber eben nicht immer korrekt.
Eine Auswahl ist in GIMP als Kanal hinterlegt. Ihre technische Struktur ist in der Tat identisch zu einem Farbkanal für Rot, Grün, Blau oder einem Alphakanal. Daher kann die Auswahl für jedes Pixel des Bildes einen Wert zwischen 0 (komplett unausgewählt) und 255 (komplett ausgewählt) annehmen. Der große Vorteil dieses Ansatzes ist, dass er 254 Stufen für teilweise ausgewählte Pixel erlaubt. Sie werden es schon bald zu schätzen wissen, dass Sie einen weichen Übergang zwischen ausgewählten und nicht ausgewählten Bildbereichen schaffen können.
Und was stellt dann die gestrichelte Linie dar, welche erscheint, sobald Sie eine Auswahl erzeugen?
Die Antwort darauf ist gar nicht so schwierig: Die Linie zeigt die Kontur, an der Bereiche mit mehr als halb ausgewählten Pixeln und Bereiche mit weniger als halb ausgewählten Pixeln zusammentreffen.

While looking at the dashed line that represents the selection, always remember that the line only tells part of the story. If you want to see the selection in full detail, the easiest way is to click the Quick Mask button in the lower left corner of the image window. This causes the selection to be shown as a translucent overlay atop the image. Selected areas are unaffected; unselected areas are reddened. The more completely selected an area is, the less red it appears.
Many operations work differently in Quick Mask mode, as mentioned in the Quick Mask overview. Use the Quick Mask button in the lower left corner of the image window to toggle Quick Mask mode on and off.

With the default settings, the basic selection tools, such as the Rectangle Select tool, create sharp selections. Pixels inside the dashed line are fully selected, and pixels outside completely unselected. You can verify this by toggling Quick Mask: you see a clear rectangle with sharp edges, surrounded by uniform red. Use the „Feather edges“ checkbox in the Tool Options to toggle between graduated selections and sharp selections. The feather radius, which you can adjust, determines the distance over which the transition occurs.
If you are following along, try this with the Rectangle Select tool, and then toggle Quick Mask. You will see that the clear rectangle has a fuzzy edge.
Das Ausblenden einer Auswahl (also die Erstellung einer Auswahl mit einer weichen Auswahlkante) ist insbesondere dann sehr hilfreich, wenn Sie Bildobjekte durch Kopieren und Einfügen zu Bildern hinzufügen und den neuen Bildbestandteil „weich“ in das vorhandene Bild einfügen wollen.
It is possible to feather a selection at any time, even if it was originally created as a sharp selection. Use → from the main menu to open the Feather Selection dialog. Set the feather radius and click . Use → to do the opposite—sharpen a graduated selection into an all-or-nothing selection.
![[Anmerkung]](images/note.png)
|
Anmerkung |
|---|---|
|
Falls es Sie interessiert, wie das Ausblenden einer Auswahl technisch funktioniert: es wird auf den Kanal, der die Auswahl repräsentiert, ein Gaußscher Weichzeichner mit dem eingestellten Radius ausgeführt. |
Zwar können Sie die Deckkraft einer Ebene einstellen, aber Sie können dies nicht direkt für eine Auswahl tun. Andererseits ist es sehr sinnvoll, das Bild eines Glases transparent zu machen. Der folgende Abschnitt zeigt Ihnen einige Möglichkeiten auf, dies zu erreichen:
-
Für einfache Auswahlen können sie das „Radierer“-Werkzeug mit der gewünschten Deckkraft verwenden.
-
For complex selections: go to → and choose one of or . Either of these creates a new layer with the selection called „Floating Layer“ (Abschnitt 4.5, „Schwebend“). Set the opacity slider in the Layers dialog to the desired opacity. Then anchor the selection: outside the selection, the mouse pointer includes an anchor. When you click while the mouse pointer includes the anchor, the floating selection disappears from the Layers dialog and the selection is at the right place and partially transparent (anchoring works this way only if a selection tool is activated: you can also use the Anchor Layer command in the context menu by right clicking on the selected layer in the Layers dialog).
And, if you use this function frequently: Ctrl-C to copy the selection, and Ctrl-V to paste the clipboard as a new layer. You can now adjust the opacity of the new layer.
-
Another way: use → → to add a layer mask to the layer with the selection, initializing it with the selection. Then use a brush with the desired opacity to paint the selection with black, i.e. paint it with transparency. Then → → . See Abschnitt 2.1.4, „Ebenenmasken“.
-
To make the solid background of an image transparent, add an Alpha channel, and use Fuzzy Select to select the background. Then, use the Color Picker tool to select the background color, which becomes the foreground color in Toolbox. Use the Bucket Fill tool with the selected color. Set the Bucket Fill mode to „Color Erase“, which erases pixels with the selected color; other pixels are partially erased and their color is changed.
Am einfachsten ist der Befehl → , mit dem Sie die Auswahl vollständig transparent machen.


