Table des matières
Souvent, quand vous travaillez sur une image, vous voulez que seule une partie en soit affectée. Vous le faites en sélectionnant cette partie. Beaucoup d’opérations dansGIMPne portent que sur des sélections.
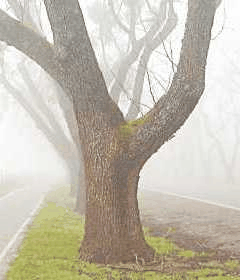
There are many, many situations where creating just the right selection is the key to getting the result you want, and often it is not easy to do. For example, in the above image, suppose you want to cut the tree out from its background, and paste it into a different image. To do this, you need to create a selection that contains the tree and nothing but the tree. It is difficult because the tree has a complex shape, and in several spots is hard to distinguish from the objects behind it.
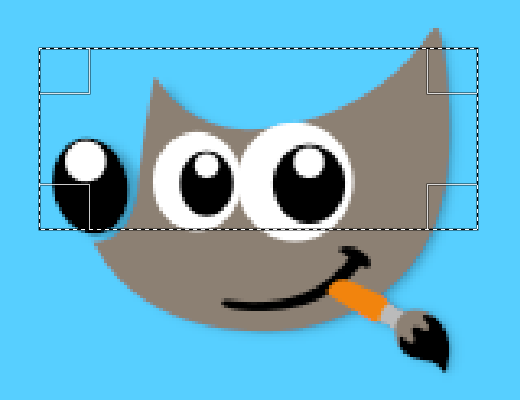
Un point très important, et qu’il est crucial de comprendre. Quand vous créez une sélection, elle est entourée d’une ligne en pointillés qui englobe donc une partie de l’image. Vous pourriez penser que la sélection est une sorte de réceptacle avec la partie sélectionnée de l’image à l’intérieur et la partie non sélectionnée à l’extérieur. Cette idée est valable dans de nombreux cas, mais elle n’est pas vraiment correcte.
En fait, la sélection est mise en œuvre comme un canal. Sa structure est identique à celle des canaux rouge, vert, bleu et alpha d’une image. Chaque pixel de la sélection possède ainsi une valeur définie entre 0 (non sélectionné) et 255 (pleinement sélectionné). Vous comprenez ainsi que certains pixels peuvent être partiellement sélectionnés. Et vous verrez que dans de nombreuses situations, il est souhaitable d’avoir une transition douce entre les régions sélectionnées et non sélectionnées.
Mais alors, que signifie la ligne pointillée qui entoure la sélection ?
C’est une ligne de contour qui sépare les zones sélectionnées à plus de 50% de celles sélectionnées à moins de 50%.
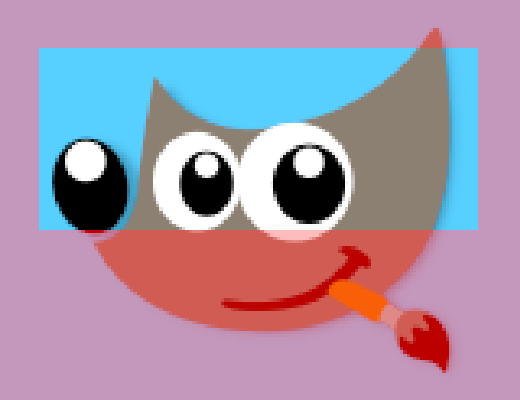
While looking at the dashed line that represents the selection, always remember that the line only tells part of the story. If you want to see the selection in full detail, the easiest way is to click the Quick Mask button in the lower left corner of the image window. This causes the selection to be shown as a translucent overlay atop the image. Selected areas are unaffected; unselected areas are reddened. The more completely selected an area is, the less red it appears.
Many operations work differently in Quick Mask mode, as mentioned in the Quick Mask overview. Use the Quick Mask button in the lower left corner of the image window to toggle Quick Mask mode on and off.
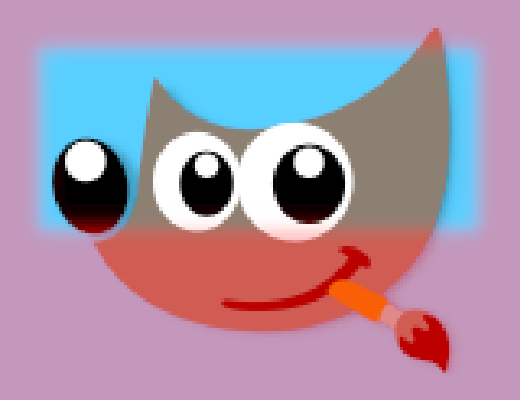
With the default settings, the basic selection tools, such as the Rectangle Select tool, create sharp selections. Pixels inside the dashed line are fully selected, and pixels outside completely unselected. You can verify this by toggling Quick Mask: you see a clear rectangle with sharp edges, surrounded by uniform red. Use the « Feather edges » checkbox in the Tool Options to toggle between graduated selections and sharp selections. The feather radius, which you can adjust, determines the distance over which the transition occurs.
If you are following along, try this with the Rectangle Select tool, and then toggle Quick Mask. You will see that the clear rectangle has a fuzzy edge.
Adoucir est particulièrement utile lors du copier-coller, permettant d’introduire un objet qui se fond progressivement dans son environnement.
It is possible to feather a selection at any time, even if it was originally created as a sharp selection. Use → from the main menu to open the Feather Selection dialog. Set the feather radius and click . Use → to do the opposite—sharpen a graduated selection into an all-or-nothing selection.
![[Note]](images/note.png)
|
Note |
|---|---|
|
Pour les lecteurs intéressés par la technique : Adoucir agit par application d’un flou Gaussien sur le canal de la sélection, selon le rayon spécifié. |
On peut régler l’opacité d’un calque, mais pas directement celle d’une sélection. Il est pourtant souvent nécessaire de rendre transparente l’image d’un objet en verre. Pour y parvenir, on peut utiliser les méthodes suivantes :
-
Pour les sélections simples, on peut se servir de la Gomme, avec le degré d’opacité voulu.
-
For complex selections: go to → and choose one of or . Either of these creates a new layer with the selection called « Floating Layer » (Section 4.5, « Flottante »). Set the opacity slider in the Layers dialog to the desired opacity. Then anchor the selection: outside the selection, the mouse pointer includes an anchor. When you click while the mouse pointer includes the anchor, the floating selection disappears from the Layers dialog and the selection is at the right place and partially transparent (anchoring works this way only if a selection tool is activated: you can also use the Anchor Layer command in the context menu by right clicking on the selected layer in the Layers dialog).
And, if you use this function frequently: Ctrl-C to copy the selection, and Ctrl-V to paste the clipboard as a new layer. You can now adjust the opacity of the new layer.
-
Another way: use → → to add a layer mask to the layer with the selection, initializing it with the selection. Then use a brush with the desired opacity to paint the selection with black, i.e. paint it with transparency. Then → → . See Section 2.1.4, « Masques de calque ».
-
To make the solid background of an image transparent, add an Alpha channel, and use Fuzzy Select to select the background. Then, use the Color Picker tool to select the background color, which becomes the foreground color in Toolbox. Use the Bucket Fill tool with the selected color. Set the Bucket Fill mode to « Color Erase », which erases pixels with the selected color; other pixels are partially erased and their color is changed.
La méthode la plus simple est d’utiliser la commande → qui donne une transparence complète et ne vous permet pas de bénéficier du réglage d’opacité que procure l’outil Remplissage.


