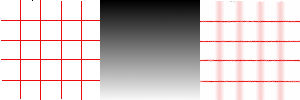
Şekil 17.245. Soldan sağa: özgün görüntü, eşlem, sonuç görüntüsü
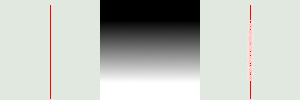
Map has three stripes: a solid black area, a vertical gradient area, a solid white area. One can see, on the resulting image, that image zones corresponding to solid areas of the map, are not blurred. Only the image zone corresponding to the gradient area of the map is blurred.
“LIC” stands for Line Integral Convolution, a mathematical method. This filter is used to apply a directional blur to an image, or to create textures. It could be called “Astigmatism” as it blurs certain directions in the image.
It uses a blur map. Unlike other maps, this filter doesn't use gray levels of this blur map. Filter takes in account only gradient direction(s). Image pixels corresponding to solid areas of the map are ignored.
![[Not]](images/note.png)
|
Not |
|---|---|
|
If the image is in grayscale mode or indexed mode, this menu entry is disabled. |
![[İpucu]](images/tip.png)
|
İpucu |
|---|---|
|
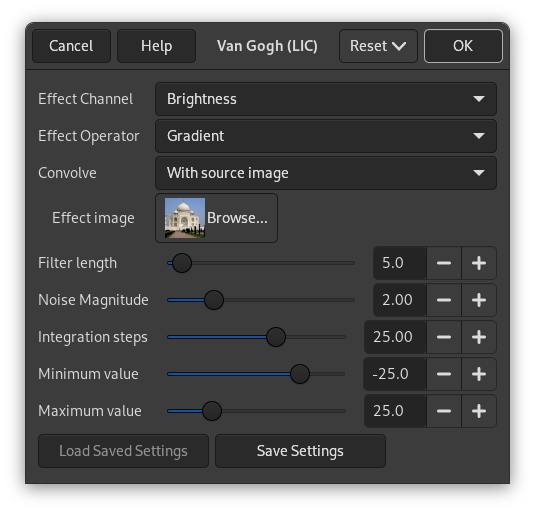
- Etki Kanalı
-
Renk Tonu, Doygunluk ya da Parlaklık (=Değer) seçildiğinde, süzgeç görüntüyü işlemek için bu kanalı kullanır.
- Etki İşleci
-
“Türev” seçeneği “Renk Geçişi” yönünü tersine çevirir:
Şekil 17.247. Türev işlevi örneği
Using a square gradient map, Effect operator is on “Gradient” on the left, on “Derivative” on the right: what was sharp is blurred and conversely.
- Evriştirme
-
İki tür evriştirme kullanabilirsiniz. Ayarlamanız gereken ilk parametre budur:
- Beyaz gürültü ile
-
White noise is an acoustics name. It's a noise where all frequencies have the same amplitude. Here, this option is used to create patterns.
- Kaynak görüntü ile
-
Kaynak görüntü bulanıklaştırılacaktır.
- Etki görüntüsü
-
That's the map for blur or pattern direction. This map must have the same dimensions as the original image. It must be preferably a grayscale image. It must be present on your screen when you call filter so that you can choose it in the drop-list.
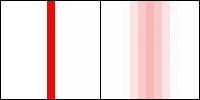
Şekil 17.248. Dikey renk geçişi eşlemiyle bulanıklaştırma
Dikey renk geçişi eşlemiyle dikey çizgiler bulanıklaştırılır.
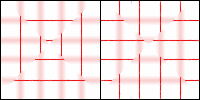
Şekil 17.249. Kare renk geçişi eşlemiyle bulanıklaştırma
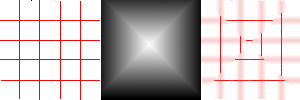
The gradient map is divided into four gradient triangles: each of them has its own gradient direction. In every area of the image corresponding to gradient triangles, only lines with the same direction as gradient are blurred.
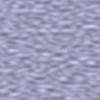
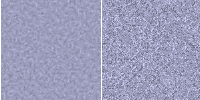
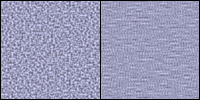
Şekil 17.250. Doku örneği

“Beyaz gürültü ile” seçeneği işaretlidir. Diğerleri öntanımlıdır. Dikey renk geçişi eşlemiyle doku “lifleri” yatay olarak görülür.
- Süzgeç uzunluğu
-
When applying blur, this option controls how important blur is. When creating a texture, it controls how rough texture is: low values result in smooth surface; high values in rough surface.
Şekil 17.251. Bulanıklık üzerinde Süzgeç Uzunluğu işlemi örneği
On the left: a vertical line, one pixel wide (zoom 800%). On the right: the same line, after applying a vertical blur with a Filter Length to 3. You can see that blur width is 6 pixels, 3 pixels on both sides.
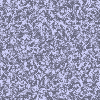
Şekil 17.252. Doku üzerinde Süzgeç Uzunluğu örneği
Solda: Süzgeç Uzunluğu=3 ile doku. Sağda, Süzgeç Uzunluğu=24 ile aynı doku.
- Gürültü Büyüklüğü
-
This options controls the amount and size of White Noise. Low values produce finely grained surfaces. High values produce coarse-grained textures.
- Bütünleştirme adımları
-
This options controls the influence of gradient map on texture.
Şekil 17.254. Doku üzerinde Bütünleştirme Adımları işlemi örneği
Solda: Bütünleştirme Adımları = 2. Sağda: Bütünleştirme Adımları = 4.
- En düşük değer, En yüksek değer
-
Both values determine a range controlling texture contrast: shrunk range results in high contrast and enlarged range results in low contrast.
Şekil 17.255. Doku üzerinde En düşük/En yüksek değer işlemi örneği
En düşük değer = -4,0. En yüksek değer = 5.0.