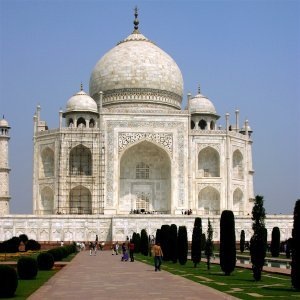
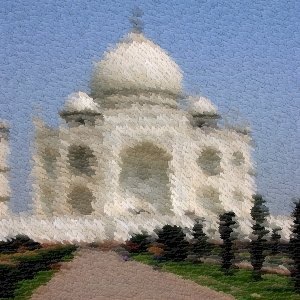
Bu süzgeç Kübizm ve Tuval Uygula süzgeçlerinin yaptıklarını ve daha çoğunu yapabilir. Görüntünüze tablo görünümü verir. Görüntünüz kağıt üzerine ve sizin seçtiğiniz fırçayla yeniden boyanmış gibi olur. Etkin katman ya da seçim üzerinde çalışır.
![[Not]](images/note.png)
|
Not |
|---|---|
|
If the image is in indexed mode, this menu entry is disabled. |
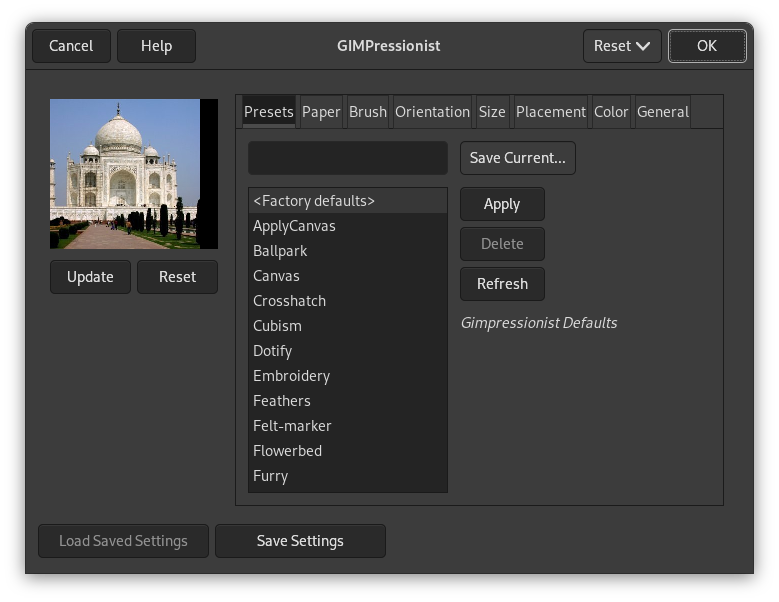
The dialog window consists of a small Preview area on the left, which is always visible, and a huge amount of GIMPressionist options organized in tabs.
All your setting changes will appear in the Preview without affecting the image until you click on . The button refreshes the preview window (it is not automatic, GIMPressionist has so much work to do!), and the button reverts to the original image.
GIMPressionist has a lot of parameters. When combined, they give an astronomical number of possibilities. So, it is important, when an interesting preset has been found, to save it and also to send it to the plug-in author if exceptional. Per contra, the intricacy of all these parameters makes difficult understanding and foreseeing how each one works.
Önayarlar seçenekleri
- Geçerli Ayarları Kaydet
-
Save current parameters. You can give a name in the input box on the left and a short description in the dialog that appears.
- Uygula
-
Seçilen önayarın parametrelerini listeye yükle.
- Sil
-
Seçilen önayarı sil. Yalnızca oluşturduğunuz önayarları silebilirsiniz.
- Yenile
-
Önayar listesini güncelle.
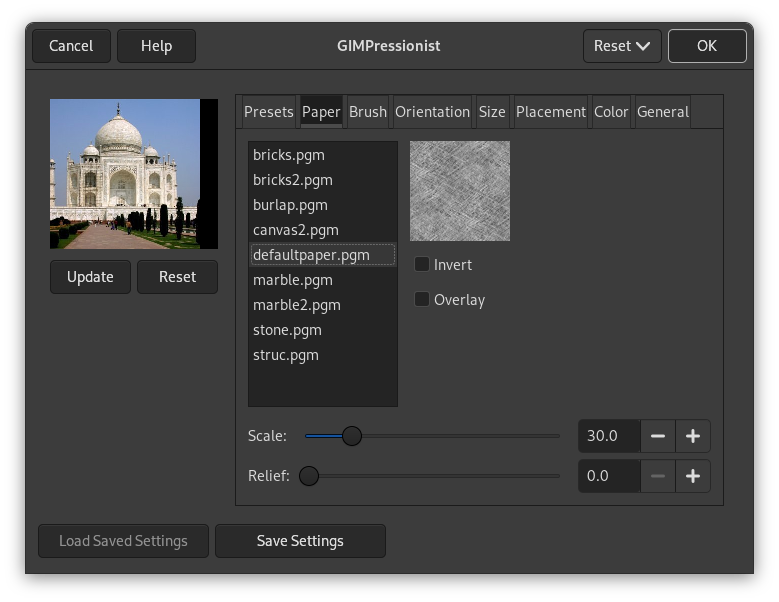
This tab concerns the texture of the canvas your image will be painted on. You have a list of textures and a Preview for the selected texture. A description is displayed on the right for every texture when selected.
Kağıt seçenekleri
- Tersine Çevir
-
Inverts the paper texture: what was a hollow turns to a bump and vice-versa.
- Kaplama
-
Apply the paper as it, without embossing it. It looks like if a transparent paper has been overlaid on the image.
- Ölçekle
-
Specifies the scale of the texture (in % of the original file): controls the graininess of the texture.
- Kabartma
-
Specifies the amount of embossing to apply (3-150).

“Brush” is a general term for any material used to paint. A list of brushes is available with a Preview for the selected one.
Fırça seçenekleri
- Gama
-
Changes the gamma (luminosity) of the selected brush. The gamma correction brightens or darkens midtones.
- Seç
-
You can also use a brush pattern you have created by selecting its image (arrow button on the Select line). This image must be on your screen before you launch the filter to be taken in account. Of course, don't use big images.
If your image has several layers, they also will be displayed in the Select list and can be used as a brush. When selected, the layer appears in the brush preview and the normal brush is deselected.
The button allows you to save the selected brush.
- En-boy oranı
-
Specifies the brush proportions, height (0 -1) and width (0 +1).
- Kabartma
-
Specifies the amount of paint used for each stroke. This may evoke painting with a palette knife.
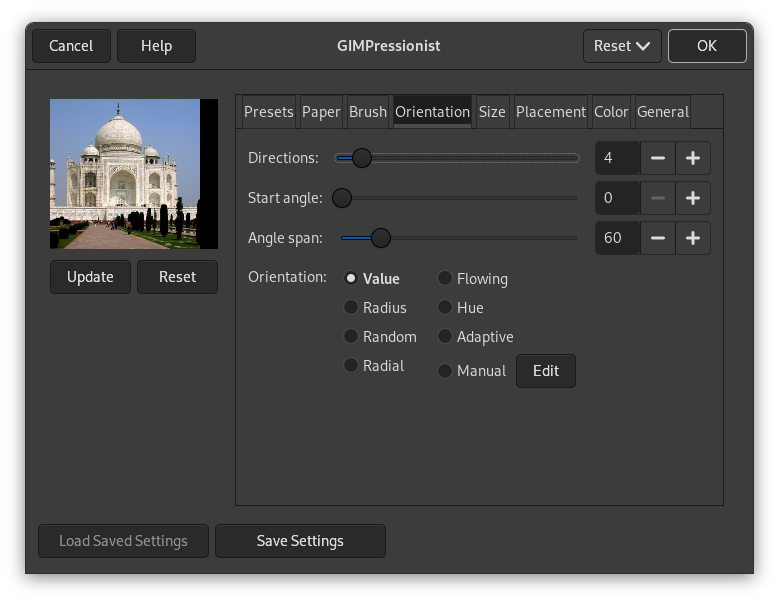
This tab allows to set the orientation of the brush strokes. A painter is not obliged to go over with the same paintbrush angle. To perform some effects, he can vary their orientation.
Yönelim seçenekleri
- Yönler
-
With this option, you can set how many times the brush will pass through a same place, with each time a different direction, resulting in a more and more thick paint.
- Başlangıç açısı
-
Specifies the general direction of the strokes, the angle that the angle range will start from. Directions are often chosen to give some movement to the image.
- Açı aralığı
-
Specifies the angle, the sector, of the stroke “fan”.
- Yönelim
-
Specifies the direction of the brush strokes.
- Değer
-
Let the value (luminosity) of the region determine the direction of the stroke.
- Yarıçap
-
The distance from the center of the image determines the direction of the stroke.
- Rastgele
-
Select a random direction for each stroke.
- Radyal
-
Let the direction from the center determine the direction of the stroke.
- Akış
-
Not a direction question here: the strokes follow a “flowing” pattern.
- Renk tonu
-
Let the hue of the region determine the direction of the stroke.
- Uyarlamalı
-
The brush direction that matches the original image the closest is selected.
- Kılavuz
-
The Edit button opens the Edit orientation Map dialog that allows you to set the directions manually.
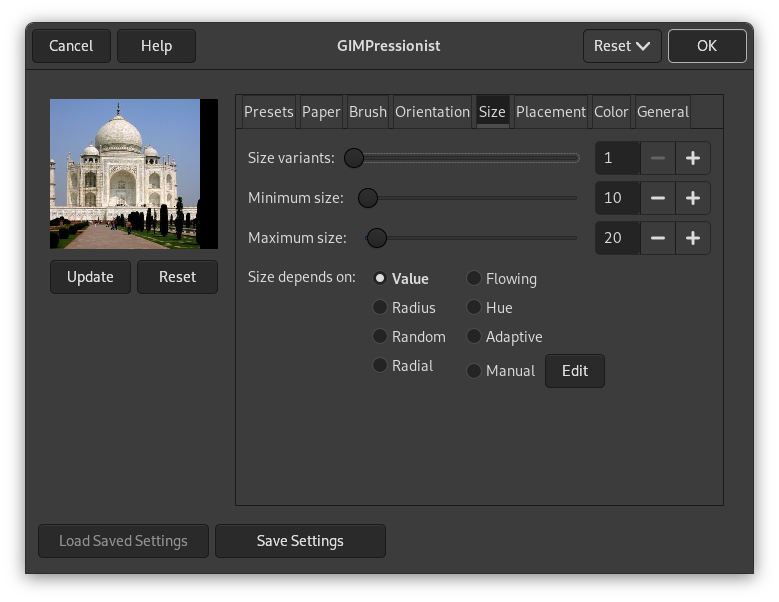
This tab allows you to set the number of brush sizes that will be used to paint, the limits of variation of these sizes and the criterion used to determine them.
Boyut seçenekleri
You can specify how many brush sizes are to be used and their sizes.
- Size variants
-
Kullanılacak fırça boyutu sayısı.
- En küçük boyut, En büyük boyut
-
The brush sizes are between these two values. The greater the size, the greater the length and width of strokes.
- Size depends on
-
You have there options to specify how the size of strokes will be determined.
- Değer
-
Let the value (luminosity) of the region determine the size of the stroke.
- Yarıçap
-
The distance from the center of the image determines the size of the stroke.
- Rastgele
-
Her darbe için rastgele boyut seç.
- Radyal
-
Let the direction from the center determine the size of the stroke.
- Akış
-
Not a length question here: the strokes follow a “flowing” pattern.
- Renk tonu
-
Let the hue of the region determine the size of the stroke.
- Uyarlamalı
-
The brush size that matches the original image the closest is selected.
- Kılavuz
-
Düzenle düğmesi Boyut Haritası Düzenleyicisiʼni açar. Bu, darbe boyutunu sizin belirlemenizi sağlar.
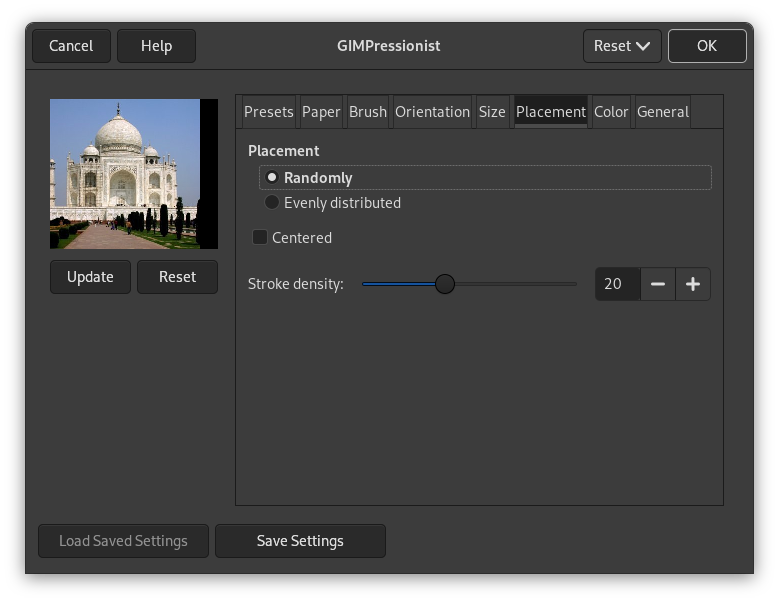
Bu sekmede darbelerin nasıl dağıtılacağını ayarlayabilirsiniz.
Yerleşim seçenekleri
- Yerleşim
-
In the preview of the Orientation Map Editor, all small arrows look like a flow around objects. Inside this flow, strokes may be placed in two different ways:
- Rastgele
-
Places strokes randomly. This produces a more realistic paint.
- Eşit olarak dağıtılmış
-
Strokes are evenly distributed across the image.
- Ortalanmış
-
Fırça darbelerini merkezin etrafına odakla.
- Darbe sıklığı
-
The greater the density the closer the strokes. With a low density, the paper or background may be visible in unstroke areas.
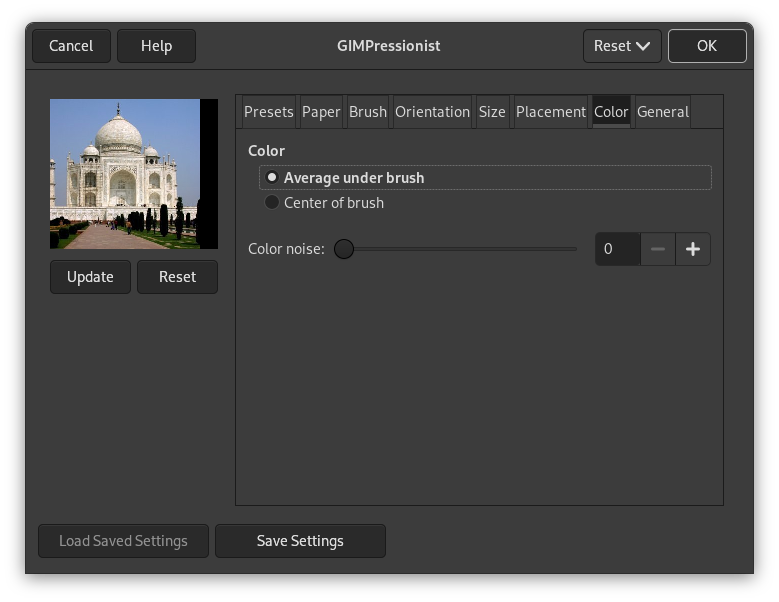
Bu sekmede, darbe renginin ne olacağını ayarlayabilirsiniz.
Renk seçenekleri
- Renk
-
Darbe rengini iki şekilde ayarlayabilirsiniz:
- Fırça altı ortalaması
-
Renk, fırça altındaki tüm piksellerin ortalamasından hesaplanır.
- Fırça merkezi
-
Rengi fırçanın merkezindeki piksellerden örnekler.
- Renk gürültüsü
-
This slider, and its input box, allow you to introduce noise in the stroke color, that will look less homogeneous.
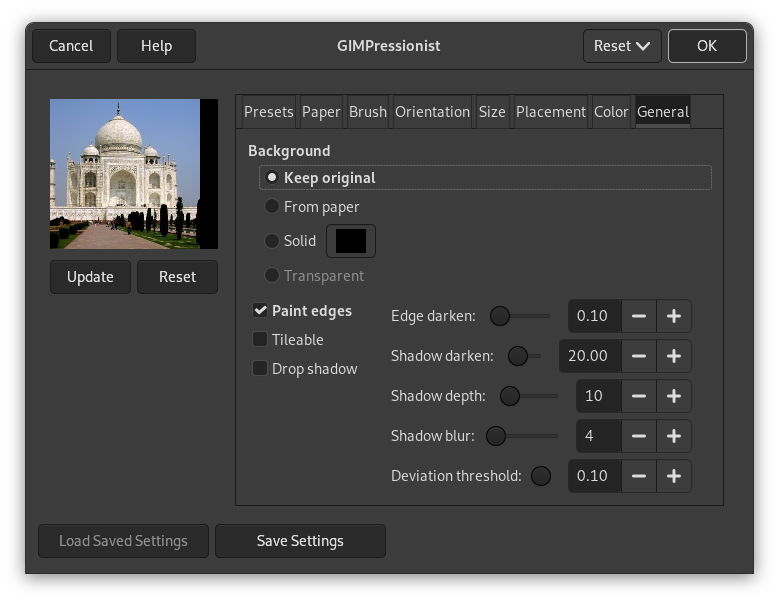
Bu sekmede arka planın ne olacağını ve fırça darbelerinin kabartmasını ayarlayabilirsiniz.
Genel seçenekler
- Arka plan
-
- Aslını koru
-
Özgün görüntüyü arka plan olarak kullanılır.
- Kağıttan
-
Seçilen kağıdın dokusunu arka plan olarak kopyala.
- Düz
-
By clicking on the color button you can select a solid colored background.
- Saydam
-
Use a transparent background. Only the painted strokes will be visible. This option is available only if your image has an alpha channel.
- Kenarları boya
-
If it is disabled, a thin border will not be painted around the outside border of the image.
- Döşenebilir
-
If checked, the resulting image will be seamlessly tileable. The right side will match the left side and the top will match the bottom. This is interesting if your image will be repeatedly used in a Web background.
- Gölge
-
Her fırça darbesine gölge etkisi ekle.
- Kenar koyulaştır
-
Her fırça darbesinin kenarlarının ne kadar koyulaştırılacağı. Bu, boya kabartmasını ya da kalınlığını artırır.
- Gölge koyulaştır
-
Fırça gölgesinin ne kadar koyulaştırılacağı.
- Gölge derinliği
-
How far apart from the object the drop shadow should be.
- Gölge bulanıklığı
-
Gölgenin ne kadar bulanıklaştırılacağı.
- Sapma eşiği
-
Fırça boyutunun uyarlanabilir seçimleri için kurtarma değeri.
Yönelim Eşlemi Düzenleyicisi GIMPressionist süzgecinin ekidir. Yönelim sekmesindeki düğmesine tıklayarak ulaşabilirsiniz. Bu düzenleyici ile, süzgeççe sağlanan fırça darbelerinin yönünü ayarlayabilirsiniz.
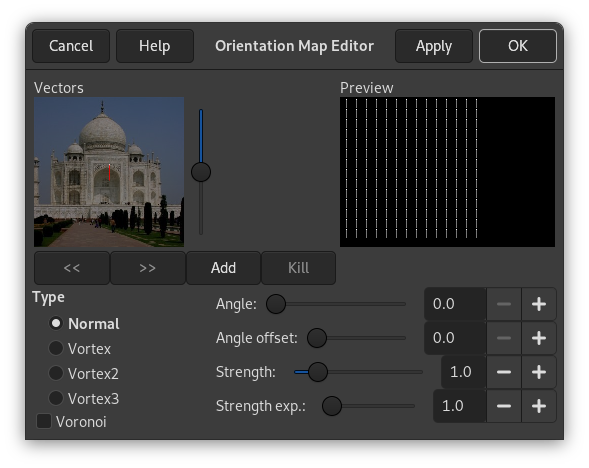
You can place one or several vectors. You can set their direction and their strength. They will act on the corresponding area of the image.
- Vektörler
-
In the left window (Vectors) you can manage your vectors. By default, a vector is at center. Vectors are red when they are active, and gray when they are not with a white point at tip.
-
By clicking on the button, you add a vector at center of the window, whereas clicking with the mouse puts it where you click.
-
Clicking with the mouse displaces the selected vector to the clicked point.
-
When clicking with the mouse , the selected vector points to where you have clicked.
-
ve düğmelerine tıklamak odağı bir vektörden diğerine kaydırır.
-
The Kill button allows you to delete the selected vector.
![[İpucu]](images/tip.png)
İpucu With the scroll bar on the right of the Vectors panel, you can set the image brightness. This can be very useful if the image is very dark/bright and you can't see vectors well.
-
- Ön izleme
-
This Preview gives you an idea of the action of the various vectors. The slider on the right border lets you change the luminosity of this preview.
- Tür
-
You have four types to arrange the brush strokes within the selected vector domain: Normal, Vortex, Vortex2, and Vortex3. Describing them is difficult, but you can see the result in the Preview.
- Voronoi
-
A Voronoi's diagram consists in partitioning a plane with n master points into n polygons where each polygon has only one of these n master points and where any given other point of the polygon is closer to the master point than to any other. So each polygon limit is midway between two master point. Here is an example of a Voronoi's diagram:
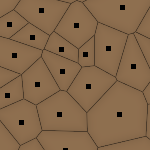
Here, when this option is checked, only the vector closest to a given point of the image influences this point.
- Açı
-
Direction of the selected vector. This slider has the same action as right-clicking (see above).
- Açı konumu
-
This slider allows you to change the angle of all vectors.
- Kuvvet
-
This slider acts on the influence domain of the selected vector. This influence lowers with distance. Strength is showed with the vector length.
- Kuvvet kats.
-
This slider acts on the length of all vectors, and so changes the strength of all brush strokes.
Boyut Eşlemi Düzenleyicisi GIMPressionist süzgecinin ekidir. Boyut sekmesindeki düğmesine tıklayarak ulaşabilirsiniz. Bu düzenleyici ile, süzgeççe sağlanan fırça darbelerinin boyutunu ayarlayabilirsiniz.
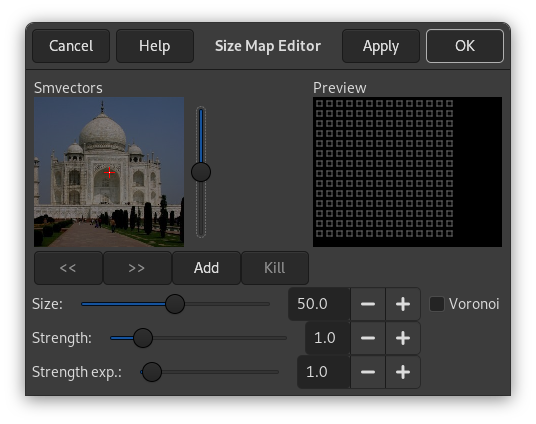
You can place one or several vectors. You can set their strength. They will act on the corresponding area of the image.
- Smvektörleri
-
In this window you can place your vectors. By clicking on the button, you add a vector at the center of the window, whereas clicking with the mouse puts it where you click. Vectors are red when selected, and gray when they are not, with a white point at tip.
Clicking with the mouse displaces the selected vector to the clicked point.
Clicking on the mouse has no evident action.
ve düğmelerine tıklamak odağı bir vektörden diğerine kaydırır.
düğmesi seçilen vektörü silmenizi sağlar.
İpucu With the scroll bar on the right of the Vectors panel, you can set the image brightness. This can be very useful if the image is very dark/bright and you can't see vectors well.
- Ön izleme
-
This Preview gives you an idea of the action of the different vectors. The size of squares represent the size of the brushes and their strength.
- Boyut
-
Change the size of the brush strokes in the selected vector domain.
- Kuvvet
-
This slider acts on the influence domain of the selected vector. This influence lowers with distance.
- Kuvvet kats.
-
Darbenin katsayısını değiştir.
- Voronoi
-
Açıklama için Yönelim Eşlemi Düzenleyicisi bölümüne bakın.


