| 4. Dialogvindauge relaterte til bilethandsaminga | ||
|---|---|---|

|
Kapittel 15. Dialogvindauge |  |
| 4. Dialogvindauge relaterte til bilethandsaminga | ||
|---|---|---|
|
|
Kapittel 15. Dialogvindauge | |
Bufferar er ei form for mellombels lagring av biletdata laga når du klippar ut eller kopierer delar av ei teikneflate (eit lag, ei lagmaske osv.). Kommandoane nedanfor er tilgjengelege frå menyen for å lagra eit bilete til ein buffer:
→ → Denne kommandoen kuttar ut den merkte delen frå den gjeldande teikneflata (oftast eit lag) og legg han i bufferen. Viss det ikkje er eit utval, vert heile teikneflata brukt. Du vert beden om å gje bufferen eit namn. Biletet vert fjerna frå utvalet når operasjonen er utført.
→ → Denne kommandoen kopierer den merkte delen frå den gjeldande teikneflata (oftast eit lag) og legg han i bufferen. Viss det ikkje er eit utval, vert heile teikneflata brukt. Du vert beden om å gje bufferen eit namn. Biletet vert fjerna frå utvalet når operasjonen er utført.
→ → Denne kommandoen kopierer den merkte delen frå alle synlege teikneflater og legg dei i bufferen. Viss det ikkje er eit utval, vert heile biletet brukt. Du vert beden om å gje bufferen eit namn.
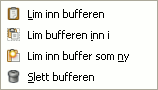
→ → Denne menykommandoen opnar dialogvindauget Bufferar. For å lima inn ein buffer, vel ei av handlingane frå ein knapp eller frå sprettoppmenyen. Begge vert forklarte nedanfor.
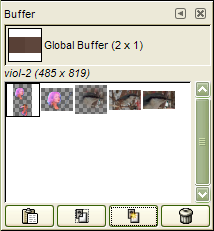
Bufferdialogvindauget viser innhaldet i alle dei namngjevne bufferane og gjev deg lov til å arbeida på desse på ulike måtar. Øvst i dialogvindauget vert innhaldet i den «globale bufferen» (innhaldet i utklippstavla) vist, men du kan ikkje gjera noko med denne. Det er ikkje ei grense for kor mange namngjevne bufferar du kan ha, men dei brukar opp minnet i maskinen.
![[Obs]](images/caution.png)
|
Obs |
|---|---|
|
Dei namngjevne bufferane vert ikkje lagra til neste økt. Dersom du lukkar GIMP, forsvinn bufferane. Den einaste måten å bevara dei på, er å lima dei inn i eit bilete. |
Dette er eit dokkpanel. Sjå nærare om dette i Del 2.3, «Dialogvindauge og dokkpanel».
Du har tilgang til det:
frå hovudmenyen: → → ,
frå hovudmenyen: → → ,
frå fanemenyen i kva dokkpanel som helst ved å klikka på fana  og velja → .
Dersom minst eitt dialogvindauge er ope, kan du i menyen finna ei liste over løyste vindauge. Du kan i tilfelle lyfta banedialogvindauget frå biletmenyen: → .
Dersom du klikkar på ein buffer i dialogvindauget, vert han den gjeldande bufferen, dvs. han som vert brukt ved kommandoane i sprettoppmenyen for bufferane. Dersom du dobbeltklikkar på ein buffer, vert innhaldet i han limt inn i det gjeldande biletet som eit flytande utval. Dette er ein rask måte å utføra kommandoen «Lim inn buffer» på.
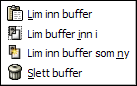
Nedst i dialogvindauget er det fire knappar. Desse gjer akkurat det same som buffermenyen som kjem fram dersom du høgreklikkar på den gjeldande menyen.
Frå fanemenyen i bufferdialogvindauget kan du velja mellom to ulike visingsformer: , som viser bufferen i nettopp tabellform, og , som viser bufferane linje for linje der kvar linje viser ei førehandsvising av bufferinnhaldet, namnet og storleik i pikslar. Sjå i Del 2.3, «Dialogvindauge og dokkpanel» korleis du kan tilpassa førehandsvisinga.
![[Tips]](images/tip.png)
|
Tips |
|---|---|
|
Tastekombinasjonen Ctrl + F opnar ei søkefil. Sjå Vis som liste/rutenett |
Du kan endra storleiken på førehandsvisinga av bufferen i dialogvindauget ved hjelp av undermenyen «storleik på førehandsvisinga» i fanemenyen.
Nedst i dialogvindauget finn du fire knappar:
Denne vil lima den gjeldande bufferen inn i det gjeldande biletet som eit flytande utval på same måte som når du brukar den vanlege Lim inn-kommandoen.
Når Shift-tasten er halde nede, vert bufferen limt inn på same staden som i den opphavlege plasseringa.
Denne vil lima innhaldet i den gjeldande bufferen inn i det gjeldande utvalet som eit flytande utval. Den einaste skilnaden mellom denne og den ordinære kommandoen Lim inn i utvalet er at han brukar den valde bufferen i staden for den globale utklippstavla.
Når Shift-tasten er halde nede, vert bufferen limt inn på same staden som i originalplasseringa.
Denne knappen opprettar eit nytt lag i det gjeldande biletet og limer innhaldet i bufferen inn i dette biletet. Den einaste skilnaden mellom denne og den ordinære kommandoen Lim inn som nytt bilete er at den valde bufferen vert brukt i staden for den globale utklippstavla.
Når Shift-tasten er halde nede, vert laget oppretta på same staden som i bufferen.
Denne kommandoen opprettar eit nytt bilete med eitt biletlag ut frå innhaldet i den spesifiserte bufferen. Den einaste skilnaden mellom denne og Lim inn som nytt bilete er at han brukar den valde bufferen i staden for den generele utklippstavla.
Denne knappen slettar den gjeldande bufferen utan varsling. Du kan likevel ikkje sletta den globale bufferen.