| 3.12. Paste as | ||
|---|---|---|

|
3. Meniu „Keisti“ |  |
| 3.12. Paste as | ||
|---|---|---|
|
|
3. Meniu „Keisti“ | |
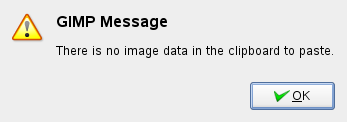
This command pastes the clipboard contents. Of course, you must use the „Copy“ command before, so that you have something in the clipboard. Else you will be prompted a warning:
or, if there is something you have forgotten, it will be pasted! There is no way to empty the clipboard.
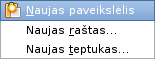
This command leads to the sub-menu:
The command creates a new layer in the active image and pastes the image data from the Clipboard into it. If the data are not rectangular or square in shape, any regions that do not extend to the edge of the canvas are left transparent (an Alpha channel is automatically created). Of course, you have to Copy your selection before you use this command.
The command creates a new layer in the active image and pastes the clipboard contents at exact coordinates the contents was originally copied from.
This feature is available for both the regular clipboard and named buffers.
The command creates a new image and pastes the image data from the Clipboard into it. If the data is not rectangular or square in shape, any regions outside the selection are left transparent (an alpha channel is automatically created). Of course, you have to copy your selection before you use this command, so that you get an image with the same dimensions as the selection.
This command has the same action as the → → command.
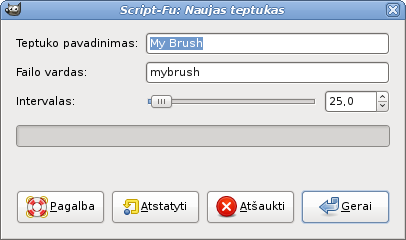
Ši komanda atveria dialogo langą, kuriame galite nurodyti naujo teptuko pavadinimą. Šis teptukas atsiranda Teptukų dialoge.
Brush name is the name as it will be in the „Brushes“ Dialog.
Naujas teptukas yra išsaugotas kaip Failo vardas (su plėtiniu .gbr) jūsų asmeniame brushes aplanke.
Intervalas: kai teptukas nubrėžia liniją, jis iš tikro pakartotinai antspauduoja teptuko piktogramą. Jeigu teptuko antspaudai yra labai arti, jums jie atrodo kaip vientisa linija.
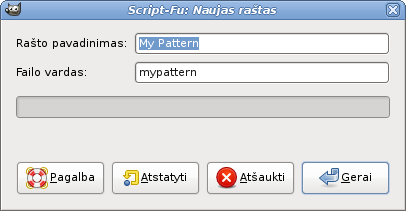
Ši komanda atveria dialogo langą, leidžiantį pavadinti jūsų naują raštą. Raštas rodomas Raštų dialoge.
Rašto pavadinimas – tai pavadinimas, kuris bus rodomas Raštų dialoge.
Naujasis raštas yra išsaugomas kaip Failo vardas (su plėtiniu .pat) jūsų asmeniniame patterns aplanke.