| 3.2. Teptukų dialogas | ||
|---|---|---|

|
3. Su paveikslėlio turiniu susiję dialogai |  |
| 3.2. Teptukų dialogas | ||
|---|---|---|
|
|
3. Su paveikslėlio turiniu susiję dialogai | |
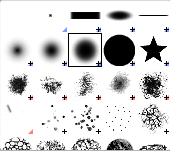
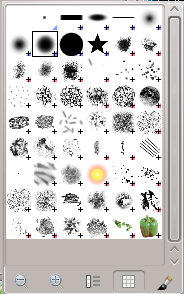
The „Brushes“ dialog is used to select a brush, for use with painting tools: see the Brushes section for basic information on brushes and how they are used in GIMP. The dialog also gives you access to several functions for manipulating brushes. You can select a brush by clicking on it in the list: it will then be shown in the Brush/Pattern/Gradient area of the Toolbox. GIMP comes now with 56 brushes, different from each other, because the size, the ratio and the angle of every brush can be set in the tool options dialog. You can also create custom brushes using the Brush Editor, or by saving images in a special brush file format.
The „Brushes“ dialog is a dockable dialog; see the section Skyrius 2.3, „Dialogai ir dokai“ for help on manipulating it.
You can access it:
from the Toolbox, by clicking on the brush symbol in the Brush/Pattern/Gradient area (if you have checked the „Show active brush, pattern and gradient“ option in the toolbox preferences).
From an image menu: → → ;
from the Tab menu in any dockable dialog by clicking on
 and selecting
→ .
and selecting
→ .
from the Tool Options dialog for any of the paint tools, by clicking on the Brush icon button, you get a popup with similar functionality that permits you to quickly choose a brush from the list; if you click on the button present on the right bottom of the popup, you open the real brush dialog.
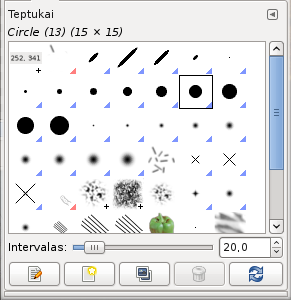
The simplified „Brushes“ dialog
Šiame lange yra penki mygtukai, aiškiai aprašyti jų paaiškinimuose, kurie parodomi virš jų palaikius pelės žymiklį:
Mažesnės peržiūros
Didesnės peržiūros
Žiūrėti kaip sąrašą
Žiūrėti kaip tinklelį
Atverti teptuko pasirinkimo dialogą
Atminkite, kad priklausomai nuo jūsų nustatymų, iškeliamame lange pasirinktas teptukas gali būti pritaikytas tik dabartiniam aktyviam įrankiui, o ne visiems piešimo įrankiams. Daugiau informacijos galite rasti sekcijoje Įrankių parinkčių nustatymai.
Kortelės meniu galite pasirinkti tarp ir . Tinklelio veiksenoje teptukų formos išdėstytos stačiakampiame masyve, todėl vienu metu galima matyti daug teptukų formų ir greitai rasti pageidaujamą. Sąrašo veiksenoje šios formos yra išrikiuotos sąraše, šalia jų parašant jų pavadinimus.
Kortelės meniu esanti parinktis Peržiūros dydis leidžia pakeisti teptukų peržiūrų dydį.
Dialogo viršuje yra dabartinio pasirinkto teptuko pavadinimas, dydis pikseliais.
Centre parodomas visų prieinamų teptukų tinklelio rodinys, kuriame dabartinis pasirinktas teptukas yra apibrauktas.
Iš esmės šis dialogas vienodai veikia tiek Sąrašo, tiek Tinklelio veiksenoje, išskyrus vieną dalyką:
Du kartus spustelėję teptuko pavadinimą galėsite jį redaguoti. Tačiau atminkite, kad galite pervadinti tik savo pačių sukurtų arba įdiegtų teptukų pavadinimus. Jeigu bandysite pervadinti su programa GIMP įdiegtą teptuką, galėsite redaguoti jo pavadinimą, tačiau vos tik paspausite klavišą Enter arba spustelėsite kur nors kitur, bus atstatytas pradinis pavadinimas. Tai bendra taisyklė: negalite pervadinti kartu su programa GIMP įdiegtų išteklių: teptukų, raštų, gradientų, ir t. t.; tik savo pačių sukurtus.
When you click on a brush preview, it becomes the current brush and it gets selected in the brush area of Toolbox and the Brush option of painting tools. When you double-click on a brush preview, you will activate the Brush Editor. You can also click on buttons at the bottom of the dialog to perform various actions.
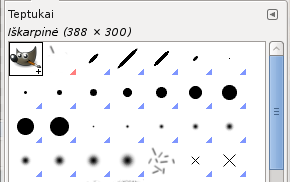
Kiekvieno teptuko peržiūros apatiniame dešiniajame kampe esančių mažų simbolių reikšmės:
Mažas mėlynas kampas yra normalaus dydžio teptukams. Juos galite dublikuoti.
A small cross means that the brush preview is in a reduced size. You can get it in normal size by maintaining left click on it.
Raudonas kampas rodomas animuotiems teptukams. Jį spustelėjus kairiuoju pelės mygtuku ir palaikius, bus parodyta jo animacija.
You can use tags to reorganize the brushes display. See Skyrius 3.7, „Tagging“.
Šio dialogo apačioje rasite kelis mygtukus:
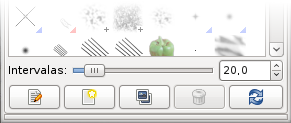
This slider lets you set the distance between consecutive brush marks when you trace out a brushstroke with the mouse pointer. Spacing is a percentage of the brush width.
This activates the Brush Editor. Pressing the button will open the Editor for any brush. It only works, however, for parametric brushes: for any other type, the Editor will show you the brush but not allow you to do anything with it.
Spustelėjus šį mygtuką sukuriamas naujas parametrinis teptukas, mažos išlietos apskritos formos, ir atveriama Teptukų rengyklė, kad galėtumėte jį pakeisti. Naujas teptukas automatiškai išsaugomas jūsų asmeniniame aplanke brushes.
Šis mygtukas įjungtas tik, jeigu dabar pasirinktas teptukas yra parametrinis teptukas. Jeigu taip, sukuriame teptuko kopija ir atveriame Teptukų rengyklė, kad galėtumėte jį pakeisti. Rezultatas automatiškai išsaugomas jūsų asmeniniame aplanke brushes.
This option is active for parametric brushes only. This removes all traces of the brush, both from the dialog and the folder where its file is stored, if you have permission to do so. It asks for confirmation before doing anything.
Jeigu pridedate teptukus savo asmeniniame aplanke brushes arba bet kuriame kitame aplanke, kuriame ieškoma teptukų, spustelėjus šį mygtuką atnaujinamas teptukų sąrašas, kad šiame dialoge būtų prieinami nauji įrašai.
New option in GIMP-2.10.10: you can edit this image, copy it and Edit>Paste as>New brush. This is different from Skyrius 3.2.3, „Teptukų rengyklė“ that allows to modify an existing brush.
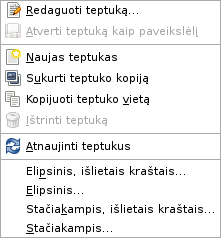
Šių mygtukų atliekamas funkcijas taip pat galima pasiekti dialogo iškeliamame meniu, kurį galima aktyvuoti bet kurioje teptukų tinklelio / sąrašo vietoje spustelėjus dešinįjį pelės mygtuką, arba Kortelės meniu pasirinkus viršutinį elementą .
Right clicking on a brush preview opens a context menu. This menu has now some options which let you create elliptical and rectangular brushes. These brushes can be feathered, but they are not parametric brushes.
Most of the commands of this submenu are described with the Buttons, except for the following.
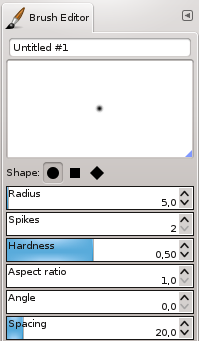
The Brush Editor allows you to view the brush parameters of a brush supplied by GIMP, and you can't change them. You can also create a custom brush: click on the New Brush button to activate the functions of the brush editor; you can select a geometrical shape, a circle, a square or a diamond. This editor has several elements:
Dialogo juosta: kaip ir su visais dialogų langais, spustelėjus mažą trikampį parodomas meniu, leidžiantis nurodyti Teptukų rengyklės padėtį.
Antraštės juosta: nurodyti jūsų teptuko pavadinimą.
Peržiūros sritis: teptuko pakeitimai šioje peržiūroje rodomi realiu laiku.
Parametrai:
Galimos formos: apskritimas, kvadratas ir rombas. Juos galite pakeisti naudodamiesi šiomis parinktimis:
Atstumas tarp teptuko centro ir krašto, pločio kryptimi. 10 pikselių spindulio kvadratas turės 20 pikselių kraštą. 5 pikselių spindulio rombas bus 10 pikselių pločio.
Šis parametras yra naudingas tik naudojant kvadratą ir rombą. Naudojant kvadratą, padidinus smaigalių skaičių gaunamas daugiakampis. Naudojant rombą, gaunama žvaigždė.
Šis parametras valdo teptuko ribų išliejimą. Naudojant reikšmę = 1.00 gaunamas aštrių kraštų teptukas (0.00-1.00).
Šis parametras valdo teptuko pločio / aukščio santykį. Naudojant rombą, kurio spindulys 5 pikseliai, o perspektyva = 2, gausite suplotą rombą, kurio plotis 10 pikselių, o aukštis 5 pikseliai (1.0-20.0).
Šis kampas – tai kampas tarp teptuko pločio krypties, kuri paprastai yra horizontali, ir horizontalios krypties, prieš laikrodžio rodyklę. Didinant šią reikšmę teptuko plotis sukamas prieš laikrodžio rodyklę (nuo 0° iki 180°).
Teptukui brėžiant liniją iš tiesų pakartotinai paliekama ta pati teptuko piktograma. Jeigu teptuko žymės yra labai arti viena kitos, gali atrodyti, jog tai yra vientisa linija: tą galite gauti, kai intervalo reikšmė = 1. (nuo 1.00 iki 200.0).
The Brush Editor has a context menu, that can be reached from the little triangle dock menu, then choosing . It only has one option.
When you use the Copy or Cut command on an image or a selection of it, a copy appears as a new brush in the upper left corner of the „Brushes“ dialog. This brush will persist until you use the Copy command again. It disappears when you close GIMP.
![[Pastaba]](images/note.png)
|
Pastaba |
|---|---|
|
You can save this clipboard brush by using the → → as soon as it appears in the „Brushes“ dialog. (See Skyrius 3.12.4, „Įdėti kaip naują teptuką“.) |