This filter converts a panorama into a small planet. All images don't fit this filter. The ideal image is a 360° x 180° image, also known as equirectangular image. We will see that it is possible to use normal images also.
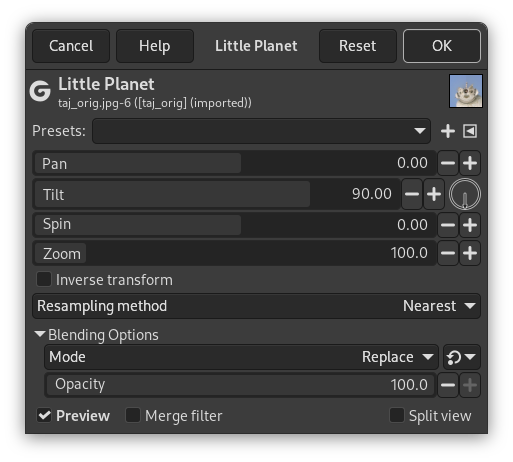
Eigenschaften
- Presets, „Input Type“, Clipping, Blending Options, Vorschau, Merge filter, Split view
-
![[Anmerkung]](images/note.png)
Anmerkung These options are described in Abschnitt 2, „Gemeinsame Funktionsmerkmale“.
- Schwenken
-
Horizontal camera panning. If „Inverse transform“ option is checked, the „pan“ option moves line of sight horizontally. Else, it works as „Spin“ option.
- Tilt
-
Vertical camera panning. Moves line of sight upwards/downwards.
- Spin
-
Spin angle around camera axis. Rotates planet around line of sight.
- Zoom
-
Zoom level. Zooms planet in/out.
- Inverse transform
-
Do the inverse mapping; useful for touching up zenith, nadir or other parts of panorama.
- Resampling method
-
Interpolation methods are described in Interpolation
„Cubic“ may give better result.
![[Tipp]](images/tip.png)
|
Tipp |
|---|---|
|
You can find free equirectangular images at https://commons.wikimedia.org/wiki/Category:360°_panoramas_with_equirectangular_projection. |
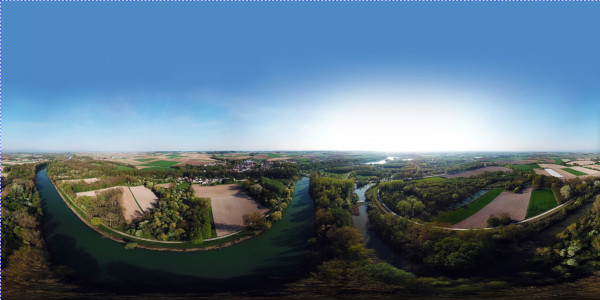
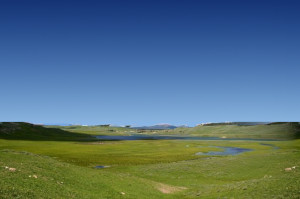
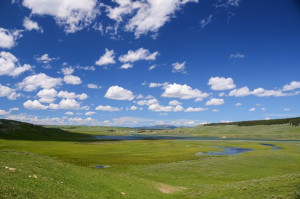
Ettling_Isar_panorama.jpg by © Simon Waldherr under CC by-sa 4.0
GIMP opened this 16000×8000 pixels original image in a 1000×500 px frame at zoom 6.25. This is a screenshot scaled to 600×300 px. Note the empty sky, the horizon perfectly horizontal, the vanishing perspective.
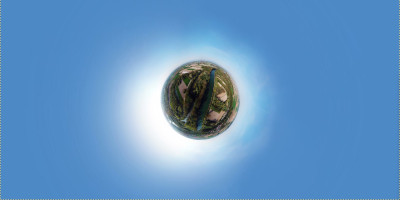
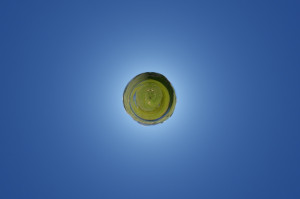
Filter angewendet
Your panorama rarely satisfies conditions necessary for this filter, especially if you cut it off a larger image. The Little Planet filter brings left and right image sides together, and creates an unwanted sharp limit if sides are different. An uneven horizon gives an irregular circle. A blue empty sky occupying the upper half of the image and a horizontal horizon are perfect. Usually, you will have to prepare your panorama before using filter.
-
Wipe sky: with Color Picker, darker blue to toolbox foreground and lighter blue to toolbox background. Rectangular selection of sky including a small part of horizon. In the selection, draw a Gradient from top to bottom.
-
Wählen Sie den linken Rand des Bildes.
-
Kopieren Sie die Auswahl und fügen Sie sie als neue Ebene ein.
-
Q shortcut to open the Align tool.
-
Click on new layer (superimposed on selection area): new layer limits appear. Align new layer to image right side.
-
Select>None.
-
Spiegeln Sie die neue Ebene horizontal.
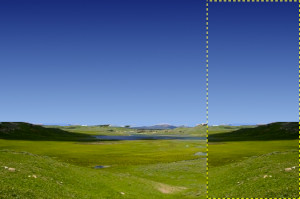
New layer aligned to image right side and flipped: left and right image sides are now the same. Sky wiped out. Horizon horizontalized.
-
Fügen Sie eine schwarze Ebenenmaske zu der neuen Ebene hinzu.
-
Apply a black-to-white gradient to layer mask.
-
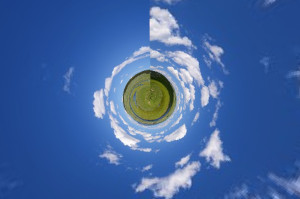
Wenden Sie das Filter »Kleiner Planet« an.