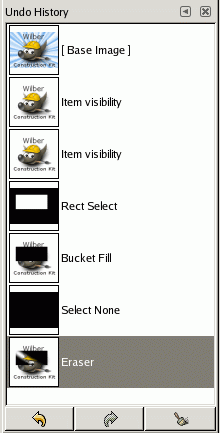
This dialog shows you a list of the actions you have most recently performed on an image, with a small sketch that attempts to illustrate the changes produced by each. You can revert the image to any point in its Undo History simply by clicking on the right entry in the list. For more information on GIMP's Undo mechanism and how it works, see the section on Undoing.
This dialog is a dockable dialog; see the section Section 2.3, “Dialogs and Docking” for help on manipulating it.
You can access it:
-
from the main menu: → → .
-
from the Tab menu in any dockable dialog by clicking the tab menu button
 and selecting
→ .
and selecting
→ .
The most basic thing you can do is to select a point in the Undo History by clicking on it in the list. You can go back and forth between states in this way as much as you please, without losing any information or consuming any resources. In most cases, the changes are very fast.
![[Tip]](images/tip.png)
|
Tip |
|---|---|
|
Ctrl+F opens a search field. See View as List |
The button bar at the bottom offers the following functionality:
-
 Undo
Undo
-
This button has the same effect as choosing → from the menu, or pressing Ctrl+Z; it reverts the image to the next state back in the undo history.
-
 Redo
Redo
-
This button has the same effect as choosing → from the menu, or pressing Ctrl+Y; it advances the image to the next state forward in the Undo History.
-
 Clear Undo History
-
This button removes all contents from the undo history except the current state. If you press it, you are asked to confirm that you really want to do this. The only reason for doing it would be if you are very constrained for memory.
![[Note]](images/note.png)
Note In a tab, this dialog is represented by

Note You can set the number of undo levels in System Resources.


