| 4. Dialoguri legate de gestionarea imaginilor | ||
|---|---|---|

|
Cap. 15. Dialogs |  |
| 4. Dialoguri legate de gestionarea imaginilor | ||
|---|---|---|
|
|
Cap. 15. Dialogs | |
Buffers are a kind of temporary storage for image data, created when you cut or copy part of a drawable (a layer, layer mask, etc.). The following commands are available from the menu to save an image to a buffer:
→ → This command cuts the selected part from the current drawable (usually a layer) and places it in a buffer. If there is no selection the whole drawable will be used. You will be asked to give the buffer a name. The image will be removed from the selection after this is done.
→ → This command copies the selected part from the current drawable (usually a layer) and places it in a buffer. If there is no selection the whole drawable will be used. You will be asked to give the buffer a name.
→ → This command copies the selected part from all the visible drawables and places it in a buffer. If there is no selection the whole image will be used. You will be asked to give the buffer a name.
→ → This menu command opens the Buffers Dialog. To actually paste a buffer, choose one of the buttons from this dialog, or the context menu. Both of which will be explained below.
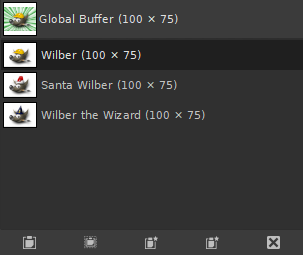
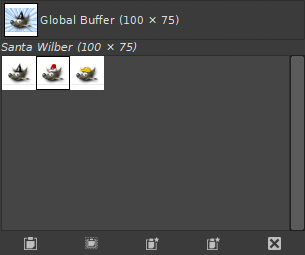
The „Buffers” dialog shows you the contents of all existing named buffers, and allows you to operate on them in several ways. It also shows you, at the top, the contents of the Global Buffer (the contents of the clipboard). This Global Buffer is merely a display: you can't do anything with it. There is no hard limit on the number of named buffers you can create, except that it will consume a share of your available computer memory.
![[Atenție]](images/caution.png)
|
Atenție |
|---|---|
|
Named buffers are not saved across sessions: they will be gone when you close GIMP. The only way to save their contents is to paste them into images. |
Acest dialog este un dialog andocabil; a se vedea secţiunea Secțiune 2.3, „Dialoguri și andocare” pentru ajutor privind manevrarea.
Puteți să îl accesați:
from the main menu: → → ;
from the main menu: → → ;
din meniul tab în orice dialog andocabil făcând clic pe  cu selectarea → .
În meniul , există o listă de ferestre detașabile care apare numai în cazul în care cel puțin un dialog rămâne deschis. În acest caz, puteți lua dialogul„ Zonă de tampon ” din imagine-meniu: → .
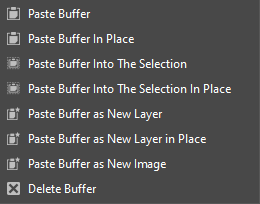
Clicking on a buffer in the display area makes it the active buffer, i.e., the one that will be used for paste commands executed from the Buffers context menu, or the buttons at the bottom of the dialog. Double-clicking on a buffer causes its contents to be pasted to the active image as a floating selection; this is a quick way of executing the „Paste Buffer” command.
At the bottom of the dialog are five buttons. The operations they perform can also be accessed from the Buffers Menu that you get by right clicking on the active buffer.
În meniul tab pentru dialogul „zone de tampon”, puteți alege între și . În modul grilă, tampoanele sunt prevăzute într-o matrice dreptunghiulară. În modul listă, acestea sunt aliniate vertical, fiecare rând indicând o miniatură a conținutului tamponului, numelui său și dimensiunilor sale în pixeli.
![[Indicație]](images/tip.png)
|
Indicație |
|---|---|
|
Ctrl+F deschide un câmp de căutare. A se vedea Vizualizare ca listă; Vizualizare ca grilă |
Aveți posibilitatea să modificați dimensiunea previzualizărilor tampon în dialogul utilizând submeniul „Dimensiune previzualizare” din meniul tab al dialogului.
În partea de jos a dialogului găsiți câteva butoane:
Această comandă Lipește conținutul tamponului selectat în imaginea activă, ca o selecție plutitoare. Singura diferență între acest lucru și comanda obișnuită Lipire este că utilizează tampon selectat, în loc de tamponul din Clipboard-ul global.
With the Shift key pressed, it pastes the buffer at its original location.
Această comandă Lipește conținutul tamponului selectat în selecția imaginii active, ca selecție plutitoare. Singura diferență între acest lucru și comanda obișnuită Lipește zona tampon în selecție este că utilizează tamponul selectat,în loc de zona Clipboard global.
With the Shift key pressed, it pastes the buffer into the active selection at its original location.
This command creates a new layer in the active image out of the contents of the selected buffer. The only difference between this and the ordinary Paste as New Image command is that it uses the selected buffer rather than the content of the global clipboard buffer.
With the Shift key pressed, it creates the layer at the original location of the buffer.
Această comandă creează o nouă imagine cu un singur strat din conținutul tamponului selectat. Singura diferență între acest lucru și comanda obișnuită Lipește ca imagine nouă este că utilizează tamponul selectat, în locul conținutului tampon Clipboard-ul global.
Această comandă șterge tamponul denumit selectat, fără solicitare de confirmare. Nu aveți posibilitatea să ștergeți tamponul global.