| 8. The „Colors“ Menu | ||
|---|---|---|

|
Kapitola 16. Nabídky |  |
| 8. The „Colors“ Menu | ||
|---|---|---|
|
|
Kapitola 16. Nabídky | |
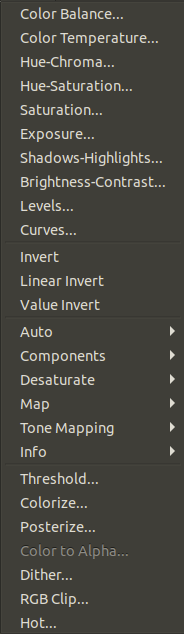
This section describes the menu, which contains commands that affect the color of the image.
![[Poznámka]](images/note.png)
|
Poznámka |
|---|---|
|
Besides the commands described here, you may also find other entries in the menu. They are not part of GIMP itself, but have been added by extensions (plug-ins). You can find information about the functionality of a Plugin by referring to its documentation. |
The GEGL based filters in the menu have several options in common. Some of these options are only shown under certain conditions.

Presets give you a quick way to select previously saved settings for the filter you are using. If you have saved presets before, you can select them from the list, or else you can save the current settings by pressing the „+“ button.
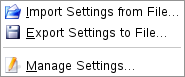
The
![]() button opens a tab menu:
button opens a tab menu:
which lets you Import Settings from File or Export Settings to File, and gives you access to the Manage Save Settings dialog:
|
|
Poznámka |
|---|---|
|
The input type dropdown list is only visible when a selection is active, and the filter allows choosing the input. |
Use the selection as input If this option is selected, the filter only uses pixels inside the selection as input for the filter.
Use the entire layer as input If this option is selected, the input of the filter is the entire layer. The output will only affect the selection. The layer outside the selection remains unchanged.
|
|
Poznámka |
|---|---|
|
The clipping dropdown list is only visible when the current layer has an alpha channel, no selection is active, and the filter operation can change the layer size. |
This setting determines what to do when the result of this filter is larger than the original layer.
Adjust The layer will be automatically resized as necessary when the filter is applied. This is the default.
Clip The result will be clipped to the layer boundary.
When you expand this option by clicking the +, you can choose the blend Mode to be used when applying the filter, and the Opacity. These work the same as the layer blending options.

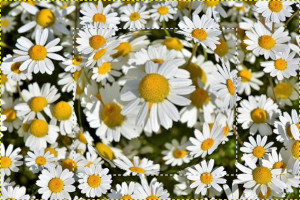
Preview: this option is checked by default and displays changes directly on canvas.
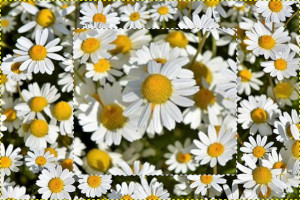
Split view: if this option is checked, the image window is divided in two parts. On the left side it shows the effect of the filter applied, and on the right side it shows the image without filter.
|
|
Poznámka |
|---|---|
|
You can click-and-drag the line that divides the preview to move it, and Ctrl-click to make the line horizontal, or to switch it back to vertical. |