Şekil 17.123. Aynı görüntü, Aydınlatma Etkileri süzgeci uygulanmadan önce ve sonra
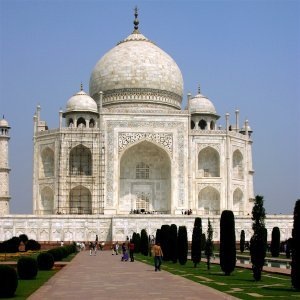
Özgün görüntü
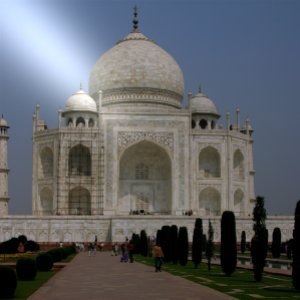
Filter applied
This filter simulates the effect you get when you light up a wall with a spot. It doesn't produce any drop shadows and, of course, doesn't reveal any new details in dark zones.
![[Not]](images/note.png)
|
Not |
|---|---|
|
If the image is in grayscale mode or indexed mode, this menu entry is disabled. |
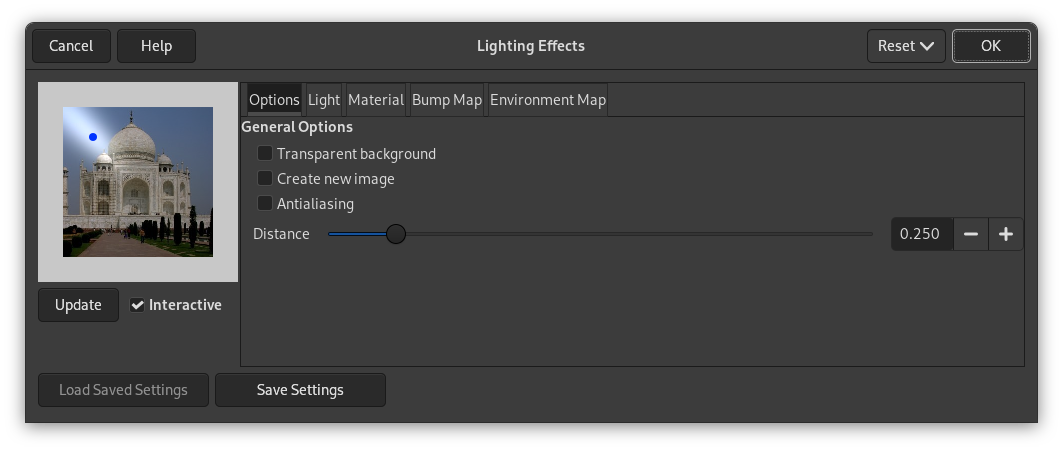
- Ön izleme
-
When Interactive is checked, parameter setting results are interactively displayed in preview without modifying the image until you click on OK button.
If Interactive is not checked, changes are displayed in preview only when you click on the button. This option is useful with a slow computer.
Diğer tüm seçenekler sekmelerde düzenlenmiştir:
- Saydam arka plan
-
Makes destination image transparent when bumpmap height is zero (height is zero in black areas of the bumpmapped image).
- Yeni görüntü oluştur
-
Süzgeci uygularken yeni görüntü oluştur.
- Antialiasing
-
Enabling this setting allows you to remove or reduce the aliasing effect that can show up on borders.
For more information, see Anti-aliasing in the Glossary.
- Uzaklık
-
You can specify the distance of the light source from the center of the image with this slider. The range of values is from 0.0 to 2.0.
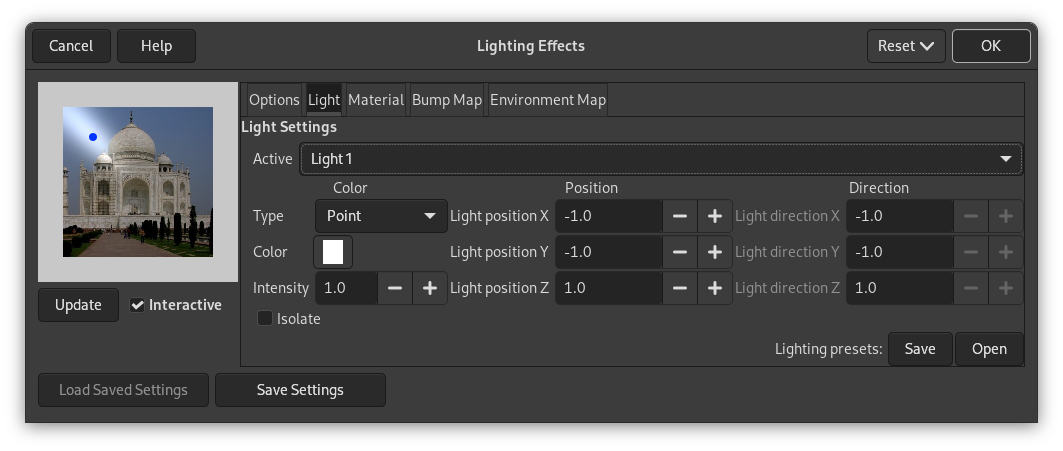
In this tab, you can set light parameters. With Light 1 to Light 6 you can create six light sources and work on each of them separately.
- Tür
-
The filter provides several light types in a drop-down list:
- Hiçbiri
-
This deletes the light source (light may persist).
- Yönlü
-
The blue point is linked to preview center by a line which indicates the direction of light.
- Nokta
-
Displays a blue point at center of preview. You can click and drag it to move light all over the preview.
- Spot
-
Displays a blue point that cannot be moved. This light has a fixed direction.
- Renk
-
When you click on the color swatch, you bring a dialog up where you can select the light source color.
- Yoğunluk
-
With this option, you can set light intensity.
- Konum
-
Determines the light point position according to three coordinates: X coordinate for horizontal position, Y for vertical position, Z for source distance (the light darkens when distance increases). Values are from -1 to +1.
- Yön
-
This option should allow you to fix the light direction in its three X, Y and Z coordinates.
- Yalıt
-
With this option, you can decide whether all light sources must appear in the Preview, or only the source you are working on.
- Işıklandırma önayarları
-
You can save your settings with the and get them back later with the .
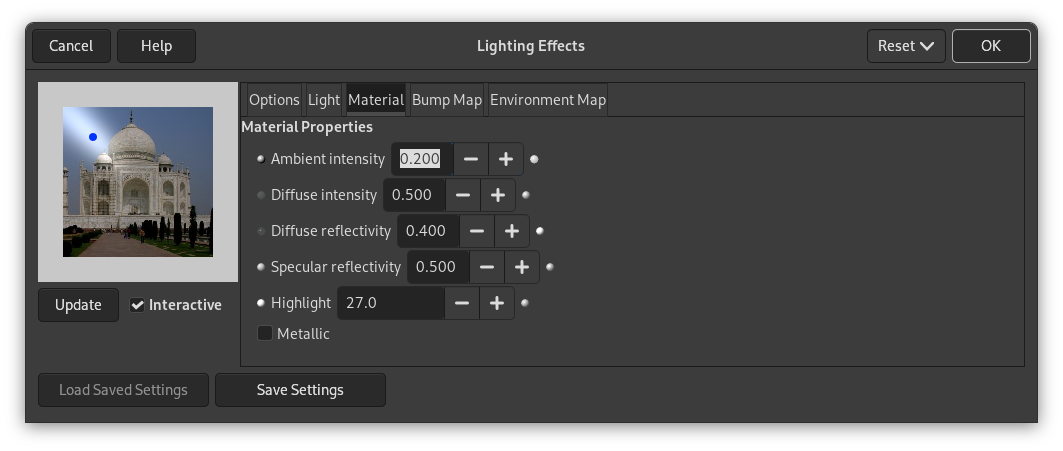
These options don't concern light itself, but light reflected by objects.
Small spheres, on both ends of the input boxes, represent the action of every option, from its minimum (on the left) to its maximum (on the right). Help pop ups are more useful.
- Çevre yoğunluğu
-
This option, also known as glowing, controls the amount of the original color to show where no direct light falls.
- Yayma yoğunluğu
-
This option, also known as brightness, controls the intensity of the original color to show when hit directly by a light source.
- Yayma yansıtıcılığı
-
This option controls how intense the light from the original color will be reflected.
- Dik açılı yansıtıcılık
-
This option controls how intense the highlight will be.
- Vurgu
-
This option adjusts the polish or highlight. Higher values make the highlight more focused.
- Metalik
-
When this option is checked, surfaces look metallic.
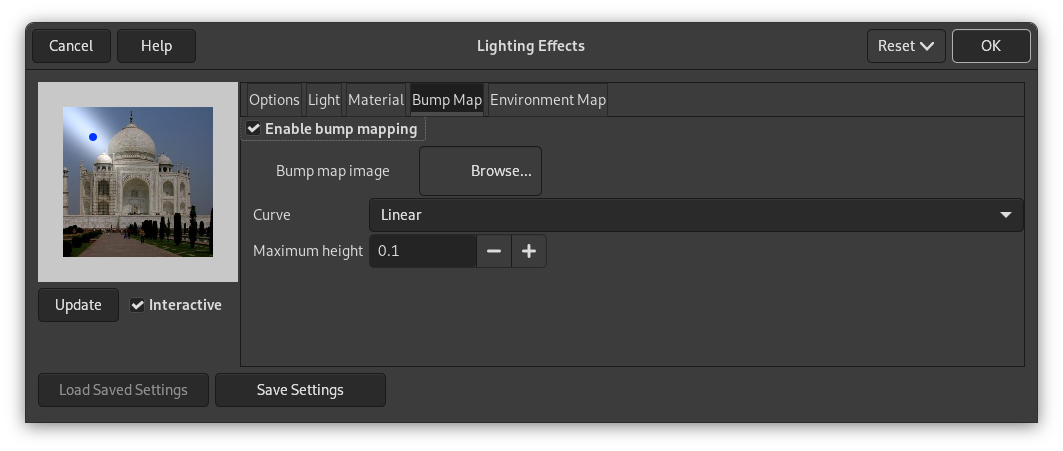
Bu sekmede, görüntüye rahatlama sağlayan süzgeç seçeneklerini ayarlayabilirsiniz. Bkz. Bump mapping .
- Derinlik etkisi eşlemini etkinleştir
-
With this option, bright parts of the image will appear raised and dark parts will appear depressed. The aspect depends on the light source position.
- Derinlik etkisi eşlemi görüntüsü
-
Select a grayscale image to use as a bump map. See the Bump Map filter for more information.
- Eğri
-
This option defines the method that will be used when applying the bump map; that is, the bump height is a function of the specified curve. Four curve types are available: Linear, Logarithmic, Sinusoidal and Spherical.
- En çok yükseklik
-
This is the maximum height of bumps.
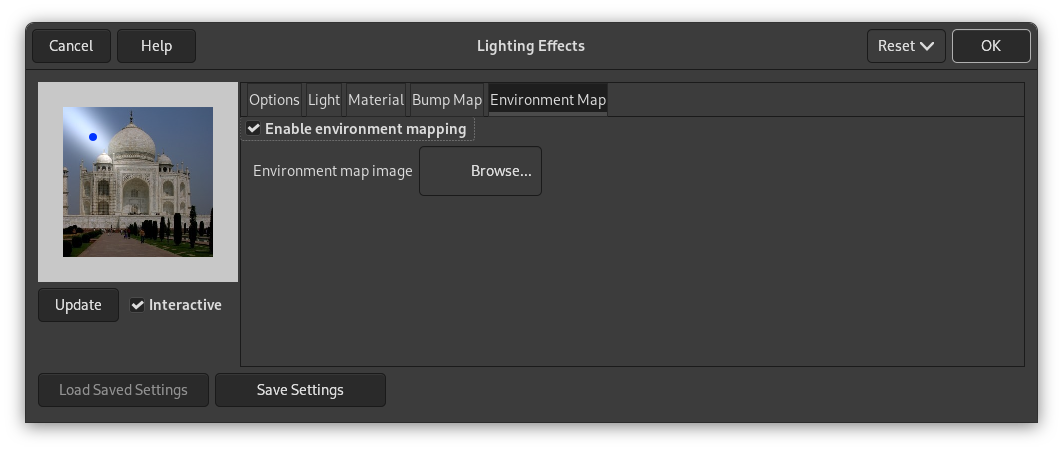
- Ortam eşlemini etkinleştir
-
When you check this box, the following option is enabled:
- Environment map image
-
Select a RGB image to be used as environment map. Please note that for this option to work you should load another image with GIMP before using it.
Örnek şurada bulunabilir: [BUDIG01].


