| 2.2. Окно изображения | ||
|---|---|---|

|
2. Главные окна |  |
| 2.2. Окно изображения | ||
|---|---|---|
|
|
2. Главные окна | |
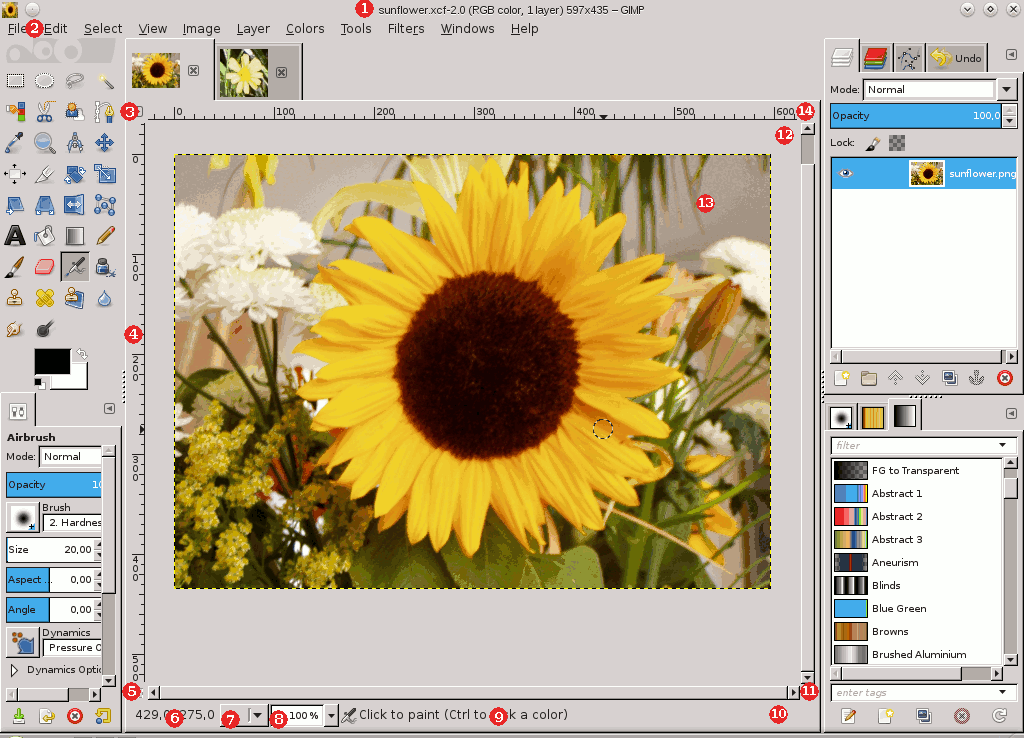
GIMP user interface is now available in two modes: multi-window mode (default), and single-window mode (optional, through → . But, if you quit GIMP with this option enabled, GIMP will open in single mode next time).
In single-window mode, no new window is added: images and dialogs are added in tabs. Please see Single Window Mode.
When you start GIMP without any image open, the image window seems to be absent in single-window mode, while, in multi-window mode, an image window exists, even if no image is open.
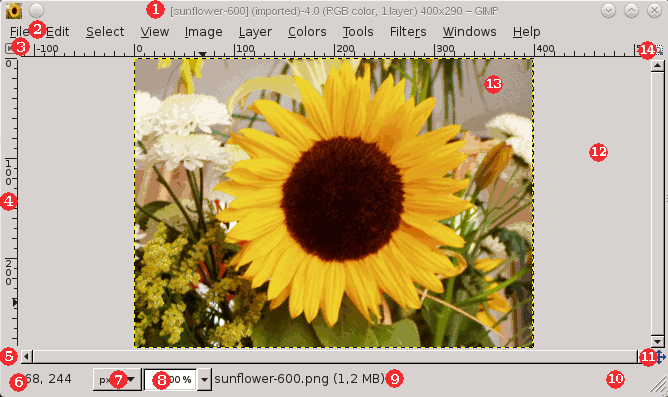
We will begin with a brief description of the components that are present by default in an ordinary image window. Some of the components can be removed by using commands in the View menu.
![[Замечание]](images/note.png)
|
Замечание |
|---|---|
|
Despite Single-window Mode, we will use «image window» for «image area». |
Title Bar: The Title Bar in an image window without an image displays «GNU Image Manipulating Program». An image window with an image displays the image name and its specifications in the title bar according to the settings in Preference Dialog. The Title Bar is provided by the operating system, not by GIMP, so its appearance is likely to vary with the operating system, window manager, and/or theme — in Linux systems, this title bar has a button to display the image window on all your desktops. You also have this button in toolbox window and layer window.
If you have opened a non-xcf image, it is «(imported)» as a .xcf file and its original name appears in the status bar at the bottom of the image window.
When an image is modified, an asterisk appears in front of title.
Image Menu: Directly below the Title Bar appears the Menu bar (unless it has been suppressed). The Image Menu provides access to nearly every operation you can perform on an image. You can also right-click on an image to display a pop-up image menu, [1], or by left-clicking on the little «arrow-head» symbol in the upper left corner, called Menu Button, described just below. Many menu commands are also associated with keyboard shortcuts as shown in the menu. You can define your own custom shortcuts for menu actions, if you enable Use Dynamic Keyboard Shortcuts in the Preferences dialog.
Menu Button: Click the Menu Button to display the Image Menu in a column,(essential in full screen mode). If you like to use keyboard shortcuts, use Shift+F10 to open the menu.
Линейка: В схеме по умолчанию линейки показаны сверху и слева от изображения, отображая координаты внутри изображения. Если желаете, вы можете выбрать, в каких единицах измерения отображаются координаты. По умолчанию используются пикселы, но вы можете изменить их на другие единицы измерения с помощью настроек, описанных ниже.
Одно из основных действий для использования линеек это создание направляющих. Если вы щёлкните на линейке и перетащите на окно изображения, будет создана направляющая линия, которая поможет вам аккуратно располагать предметы. Направляющие могуть быть перемещены с помощью щелчка по направляющей и перетаскиванием, или они могут быть удалены перетаскиванием за пределы изображения. В изображении может быть много направляющих одновременно.
In ruler area, the mouse pointer position is marked with two small arrow-heads pointing vertically and horizontally.
Переключатель быстрой маски: В левом нижнем углу окна изображения расположена небольшая кнопка, которая включает или выключает быструю маску, которая является альтернативным, и часто черезвычайно полезным методом просмотра выделенной области внутри изображения. Для дополнительной информации смотрите разделБыстрая маска.
Координаты указателя: В левом нижнем углу окна расположена прямоугольная область, используемая для отображения текущих координат указателя (положение мыши, если вы используете мышь), когда указатель расположен в пределах границ изображения. Используются те же единицы измерения, что и для линеек.
Меню единиц: По умолчанию, единицы измерения, используемые для линеек и других целей - точки. Их можно изменить на дюймы, сантиметры и другие единицы при помощи этого меню. При изменении имейте ввиду, что установка режима «Точка за точкой» в меню изображения влияет на то, каким образом отображение масштабируется. За дополнительной информацией обратитесь к главе Точка за точкой.
Zoom Button: There are a number of ways to zoom the image in or out, but the Zoom Button is perhaps the simplest. You can directly enter a zoom level in the text box for precise control.
Status Area: The Status Area is at the bottom of the image window. By default, the Status Area displays the original name of the image.xcf file, and the amount of system memory used by the image. Please use → → → to customize the information displayed in the Status Area. During time-consuming operations, the status area temporarily shows the running operation and how complete the operation is.
|
|
Замечание |
|---|---|
|
Note that the memory used by the image is very different from the image file size. For instance, a 70Kb .PNG image may occupy 246Kb in RAM when displayed. There are two primary reasons the difference in memory usage. First, a .PNG file is compressed format, and the image is reconstituted in RAM in uncompressed form. Second, GIMP uses extra memory, and copies of the image, for use by the Undo command. |
Кнопка отмены: Если вы запустили сложную, занимающую время операцию (обычно дополнение), кнопка «Отмена» временно появится в правом нижнем углу окна. Нажатие на эту кнопку немедленно отменит операцию.
|
|
Замечание |
|---|---|
|
Существует несколько плагинов, которые плохо реагируют на отмену, возможно оставляя за собой испорченные части изображения. |
Navigation Control: This is a small cross-shaped button at the lower right corner of the image display. Click and hold (do not release the mouse button) on the navigation control to display the Navigation Preview. The Navigation Preview has a miniature view of the image with the displayed area outlined. Use the Navigation Preview to quickly pan to a different part of the image—move the mouse while keeping the button pressed. The Navigation Window is often the most convenient way to quickly navigate around a large image with only a small portion displayed. (See Navigation Dialog for other ways to access the Navigation Window). (If your mouse has a middle-button, click-drag with it to pan across the image).
Inactive Padding Area: When the image dimensions are smaller than the image window, this padding area separates the active image display and the inactive padding area, so you're able to distinguish between them. You cannot apply any Filters or Operations in general to the inactive area.
Изображение: Наиболее важная часть окна изображения это конечно, само изображение. Оно занимает центральную область окна, окружённое жёлтой пунктирной линией, в отличие от нейтрального серого цвета фона. Вы можете изменять уровень масштабируемости несколькими способами, включая настройки масштабирования, описанные ниже.
Image Window Resize Toggle: Without enabling this feature, if you change the size of the image window by click-and-dragging border limits, the image size and zoom does not change. If you make the window larger, for example, then you will see more of the image. If this button is pressed, however, the image resizes when the window resizes so that (mostly) the same portion of the image is displayed before and after the window is resized.
![[Подсказка]](images/tip.png)
|
Подсказка |
|---|---|
|
Drag and drop an image into the Toolbox window from a file browser to open the image in its own Image window or tab. Dragging an image file into the Layer dialog adds it to the image as a new layer. |
Image size and image window size can be different. You can make image fit window, and vice versa, using two keyboard shortcuts:
Ctrl+J: this command keeps the zoom level; it adapts window size to image size. The Shrink Wrap command does the same.
Ctrl+Shift+J: this command modifies the zoom level to adapt the image display to the window.