| 4. Narzędzia przekształcania | ||
|---|---|---|
 |
Rozdział 13. Tools |  |
Jest to zestaw ośmiu narzędzi, służących do zmiany obrazu, jego części, zaznaczenia, warstwy lub ścieżki. Każde narzędzie przekształcania posiada okno opcji i okno informacyjne, służące do zmiany ustawień.
Niektóre z opcji są wspólne dla kilku narzędzi i są one opisane poniżej. Opcje, charakterystyczne dla poszczególnych narzędzi zostały opisane w rozdziałach poświęconych danemu narzędziu.
Program GIMP daje możliwość wyboru elementu obrazu, nad którym będzie pracowało narzędzie.
![[Uwaga]](images/note.png)
|
Uwaga |
|---|---|
|
Remember that the Transform option persists when you quit the tool. |
When you activate the first button
 the tool works on the active layer. If no selection exists in
this layer, the whole layer will be transformed.
When you activate the second button
 the tool works on the selection contour only (the whole layer
contour if no selection).
When you activate the third button,
 the tool works on the path only.
Direction sets which way or direction a layer is transformed:
The „Normal (Forward)” mode will transform the image or layer as one might expect. You just use the handles to perform the transformation you want. If you use a grid (see below), the image or layer is transformed according to the shape and position you put the grid into.
„Corrective (Backward)” inverts the direction. Primarily used with the Rotation tool to repair digital images that have some geometric errors (a horizon not horizontal, a wall not vertical...). See Sekcja 4.5, „Obrót”.
This drop-down list lets you choose the method and thus the quality of the transformation:
The color of each pixel is copied from its closest neighboring pixel in the original image. This often results in aliasing (the „stair-step” effect) and a coarse image, but it is the fastest method. Sometimes this method is called „Nearest Neighbor”.
The color of each pixel is computed as the average color of the four closest pixels in the original image. This gives a satisfactory result for most images and is a good compromise between speed and quality. Sometimes this method is called „Bilinear”.
The color of each pixel is computed as the average color of the eight closest pixels in the original image. This usually gives the best result, but it naturally takes more time. Sometimes this method is called „Bicubic”.
The Lanczos3 method uses the Sinc mathematical function and performs a high quality interpolation.
You can set the default interpolation method in the Tools Options Preferences dialog.
Po przekształceniu obraz może stać się większy. Opcja ta przycina przekształcony obraz do rozmiarów obrazu wyjściowego.
You can choose between several ways to clip:
Rysunek 13.94. Original image for examples
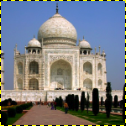
Original image
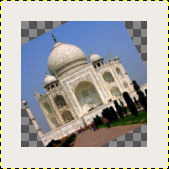
Rotation applied with „Adjust”
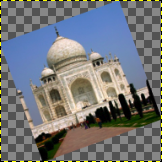
Rotation applied with „Adjust” and canvas enlarged to layer size
With Adjust: the layer is enlarged to contain all the rotated layer. The new layer border is visible; the whole layer becomes visible by using the → command.
With Clip: all what exceeds image limits is deleted.
Rysunek 13.96. Example for Crop to result
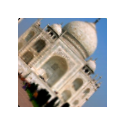
Rotation 45° with Crop to result
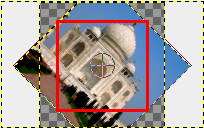
The crop limit is marked with red. No transparent area is included.
If this option is selected, the image is cropped so that the transparent area, created by the transform operation in corners, will not be included in the resulting image.
This option works like the one described before, but makes sure, that the aspect ratio is maintained.
W programie GIMP istnieje możliwość wyboru jednego spośród czterech wariantów podglądu:
tworzy ramkę wokół obrazu z uchwytami w rogach. Ruchy wpływają na nią tylko na podglądzie, a efekt przekształcania wpływa na zawartość lub na ścieżki zaznaczenia zgodnie z wybranym trybem przekształcenia.
nakłada siatkę na obraz wraz z czterema uchwytami. Przeciąganie ma wpływ tylko na podglądzie, a efekt przekształcenia wpływa na zawartość lub na ścieżkę zaznaczenia zgodnie z wybranym trybem przekształcenia.
w tym wypadku na podglądzie widoczna jest kopia obrazu ze ścieżką pokazaną powyżej obrazu. Przeciągnięcia mają wpływ na kopię i położony poniżej obraz jest pokazywany.
oba obracają się jednocześnie.
Wybranie opcji Siatka aktywuje listę z możliwymi dwoma opcjami: Ilość linii siatki określa ogólną liczbę linii siatki. Odstęp między liniami siatki określa odległość pomiędzy liniami.
This slider lets you set the preview opacity.
![[Uwaga]](images/note.png)
|
Uwaga |
|---|---|
|
W czasie przekształcania ścieżki, opcje podglądu nie są aktywne: aktywna jest tylko Obwódka. |