| 2.3. Zaznaczenie eliptyczne | ||
|---|---|---|
 |
2. Narzędzia zaznaczania |  |
| 2.3. Zaznaczenie eliptyczne | ||
|---|---|---|
| |
2. Narzędzia zaznaczania | |
Narzędzie służy do zaznaczania obszarów eliptycznych na obrazie, z wygładzaniem lub bez. Więcej informacji na temat zaznaczania obszarów w programie GIMP znaleźć można na Zaznaczanie. Opcje wspólne dla wszystkich narzędzi zaznaczania zostały opisane na Narzędzia zaznaczania.
This tool is also used for rendering a circle or ellipse on an image. To render a filled ellipse, create an elliptical selection, and then fill it using the Bucket Fill tool. To create an elliptical outline, the simplest and most flexible approach is to create an elliptical selection and then stroke it. However, the quality of anti-aliasing with this approach is rather crude. A higher quality outline can be obtained by creating two elliptical selections with different sizes, subtracting the inner one from the outer one; however this is not always easy to get right. The command → makes it easy.
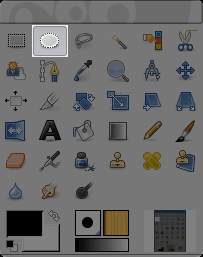
You can access to the Ellipse Selection Tool in different ways:
From the image menu bar → → ;
klikając ikonę
 na pasku narzędzi
By using the keyboard shortcut E.
![[Uwaga]](images/note.png)
|
Uwaga |
|---|---|
|
Klawisze modyfikujące, wspólne dla wszystkich Narzędzi zaznaczania opisane zostały na Narzędzia zaznaczania. Poniżej opisano klawisze, charakterystyczne tylko dla „Zaznaczenia prostokątnego”. |
Pressing the key after starting your selection, and holding it down until you are finished, causes your starting point to be used as the center of the selected ellipse, instead of a corner of the rectangle that may contain it. Note that if you press the Ctrl key before starting to make the selection, the resulting selection will be subtracted from the existing selection.
Pressing the Shift key after starting your selection, and holding it down until you are finished, constrains the selection to be a circle. Note that if you press the Shift key before starting to make the selection, the resulting selection will be added to the existing selection.
Jednoczesne przytrzymanie obu klawiszy spowoduje nałożenie się ich efektów, tworząc okrąg, którego środkiem jest punkt kliknięcia. Przytrzymanie klawiszy przed rozpoczęciem zaznaczania spowoduje przecięcie nowego zaznaczenia z już istniejącym. Kursor odpowiednio się zmienia.
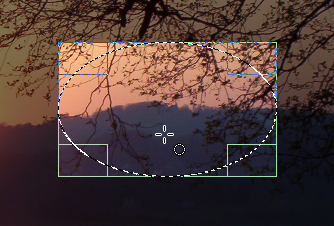
When this tool is selected the mouse pointer comes with a circle icon as soon as it is over the image. A drag-and-drop allows you to get an ellipse (or a circle) within a rectangular box. When the mouse button is relaxed, a dotted line („marching ants”) outlines the elliptic selection. It's not necessary to adjust the selection with care; you can resize it easily later.
When the pointer is moving on the canvas, the pointer and selection aspects change. You can change the size of the selection by using handles. See Tool handling within the rectangular chapter.
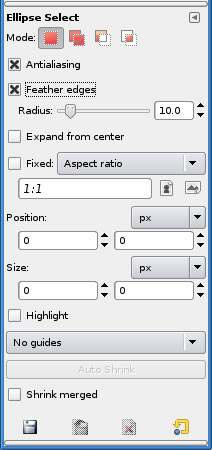
Normally, tool options are displayed in a window attached under the Toolbox as soon as you activate a tool. If they are not, you can access them from the image menu bar through → → which opens the option window of the selected tool.
|
|
Uwaga |
|---|---|
|
Оpis opcji wspólnych dla wszystkich narzędzi zaznaczania znajduje się na Narzędzia zaznaczania. Poniżej opisane zostały jedynie opcje charakterystyczne dla Zaznaczenia prostokątnego. |
Common select options.
Opcje te działają dokładnie w ten sam sposób, jak te opisane dla Zaznaczenia prostokątnego. Więcej informacji w Sekcja 2.2.4, „Tool Options”.