| 4.4. Каdrowanie i zmiana rozmiaru | ||
|---|---|---|
 |
4. Narzędzia przekształcania |  |
| 4.4. Каdrowanie i zmiana rozmiaru | ||
|---|---|---|
| |
4. Narzędzia przekształcania | |
Narzędzie służy do przycinania obrazu lub warstwy. Najczęściej jest ono używane w celu usunięcia brzegów lub niepotrzebnych części obrazu, aby łatwiej było się skupić na głównych obszarach obrazu. Narzędzie jest także przydatne do uzyskania obrazu o określonych wymiarach.
Aby skorzystać z narzędzia należy kliknąć wewnątrz obrazu i przy pomocy kursora zaznaczyć prostokątny obszar (przy wciąż wciśniętym LPM). Kliknięcie spowoduje pojawienie się okna dialogowego, wskazującego rozmiar kadrowanego obszaru i pozwalającego na przeprowadzenie różnych operacji. Aby zmienić rozmiar, wystarczy przeciągnąć rogi powstałego obszaru lub zmienić wartości w oknie. Skadrowanie nastąpi po kliknięciu we wnętrzu obrazu lub kliknięciu przycisków Каdruj lub Zmień rozmiar w oknie.
When the mouse becomes the moving cross-hair, you can use the keyboard arrow keys to move the crop rectangle. Holding the Shift key down allows to move by increments of 25 pixels.
You can use Guides to position the crop area. Make sure that the → option is checked.
![[Uwaga]](images/note.png)
|
Uwaga |
|---|---|
|
You can see the aspect ratio in the status bar: 
|
You can activate this tool in different ways:
From the image menu bar → → ,
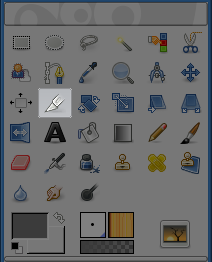
by clicking the tool icon:
 in the ToolBox,
by using the keyboard shortcut Shift+C.
When you maintain click on the crop rectangle, handles disappear and
holding down the Ctrl key toggles to the Extend from Center option,
holding down the Shift key toggles to the Fixed option, which makes some dimensions fixed.
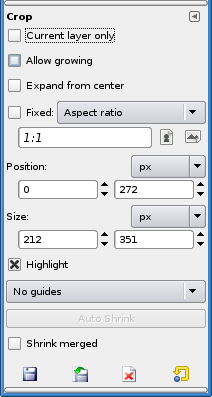
Normally, tool options are displayed in a window attached under the Toolbox as soon as you activate a tool. If they are not, you can access them from the image menu bar through → → which opens the option window of the selected tool.
Przy zaznaczonym polu narzędzie pracuje jedynie na warstwie aktywnej.
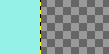
This option allows the crop or resize to take place outside the image (or layer), and even the canvas. So, you can give the size you want to the resulting image. Transparency will be used if there is no material to crop.
Rysunek 13.108. Example for „Allow Growing”
An image on a big canvas
The option is checked. The crop rectangle extends outside the canvas.
The resulting image.
When this option is checked, the crop rectangle expands from the first pixel you clicked taken for center. You can toggle this option with Ctrl while drawing the crop rectangle.
Opcja pozwala na zachowanie proporcji pomiędzy szerokością a wysokością.
Aspect ratio: That's the default possibility. Width and Height keep the same ratio they have in the original image, when drawing the crop rectangle.
Width / Height: Only Width or Height will remain fixed. The value of this dimension can be set in the text box below; it defaults to 100 pixels.
Size: Both Width and Height will be fixed. Their values can be set in the text box below, in the form „150x100” for example. The crop rectangle will adopt this values as soon as you click the image. On the right, two buttons let you choose a (widthwise) or (upright) format for the crop rectangle.
These two text boxes show the position (horizontal on the left, vertical on the right) of the upper left corner of the crop rectangle in real time and you can change it manually too. It is stated in pixels, but you can change the unit thanks to the drop-down list of the button. The coordinate origin is the upper left corner of the canvas (not of the image).
These two text boxes show the size (horizontal on the left, vertical on the right) of the crop-rectangle in real time and you can change it manually too. It is stated in pixels, but you can change the unit thanks to the drop-down list of the button.
This option toggles the dark outside area intended for highlighting the crop rectangle.
All kinds of guides are described in Sekcja 2.2, „Zaznaczenie prostokątne”
The Auto Shrink button will attempt to locate a border, in the active layer, from which to draw dimensions from. This option only works well with isolated objects contrasting sharply with background.
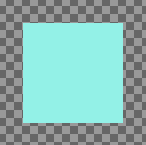
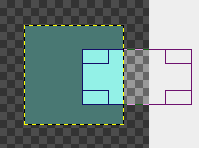
Rysunek 13.109. Example for „Autoshrink”
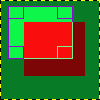
An image with a sharp limit in it and a crop rectangle.
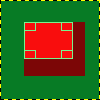
After clicking the Autoshrink button, the crop rectangle has been shrunk to fit the sharp limits.
This option works the same, with Auto Shrink or not. It uses the pixel information from all visible layers, rather than just from the active layer.