| 15.19. Particle Trace | ||
|---|---|---|
 |
15. Alpha to Logo Filters |  |
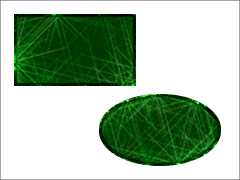
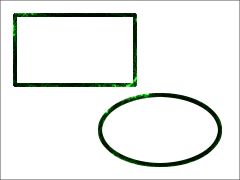
Figure 16.343. Examples for the “Particle Trace” filter

“Particle Trace” applied

Applied with “Edge only” option
To get such images, open a new image with a transparent background, create selections and fill them with green, apply filter.
This filter adds an effect, reminding of particle traces in a bubble chamber of nuclear physics, to the active layer alpha.
![[Warning]](../images/warning.png)
|
Warning |
|---|---|
|
The image will always be resized to the active layer's size. |
The filter is derived from the “Particle Trace” script ( → → in the toolbox), which creates the following text effect:

The “Particle Trace” Script-Fu script.
The filter adds noise to the alpha and then turns the spots into sparkles. Then it adds a feathered white shadow.
Actually this option is the text layer's border of the “Particle Trace” Script-Fu Logo (hence the misleading name). Here it determines the width of the white shadow's feathering.
This option sets the amount of light points produced by the Noise filter and thus the amount of points converted to sparkles. The value ranges from from 0.0 to 1.0, but some values may be not useful:
Along the edge of the alpha, a new area will be created with radius “Edge width” (compare Section 7.13, “ Border ”). This area will also be filled with the “Base color”, but will be a bit darker.
If checked, the filter effect will be applied to the edge of the alpha channel only and the area of the alpha channel will be cleared.
This color is used to fill the area defined by the active layer's alpha channel. It defaults to a very dark green. As usual, clicking on the color swatch button opens a color selector where you can choose any other color.
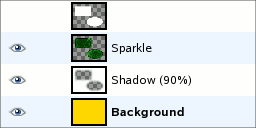
This color is used to fill a new background layer. Note that above the background layer there is a white shadow layer which has opacity set to 90%, so you will see the background color only partially. If the “Edge only” option is enabled, the area of the alpha channel will be cleared and you will see the background color. Again, when you click on the color swatch button, a color selector pops up where you can select any color.

The active layer (top) and the filter layers below