| 4.2. Alinhar | ||
|---|---|---|

|
4. Ferramentas de transformação |  |
| 4.2. Alinhar | ||
|---|---|---|
|
|
4. Ferramentas de transformação | |
The Align tool is useful to align the image layers with various image objects. When this tool is selected, the mouse pointer turns to a small hand. By clicking on an element of a layer in the image, you choose the layer which will be moved (with Shift + click, you can choose several layers to be aligned); this focused layer has small squares in corners and is called source. Then buttons in the dialog become active (they remain active during all the GIMP session): they allow you to select the target, i.e other layer, selection, path, the source will be aligned with.
Você pode ativar a ferramenta de Alinhar de várias formas:
from the image-menu, through: → → ,
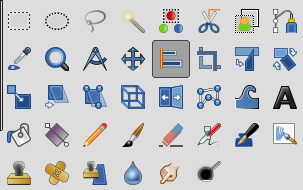
by clicking on the tool icon:
![]() in the toolbox,
in the toolbox,
Ou usando o atalho de teclado Q.
Você pode selecionar várias camadas segurando a tecla Shift pressionada enquanto clica nas camadas.
![[Dica]](images/tip.png)
|
Dica |
|---|---|
|
Algumas vezes é mais fácil escolher múltiplas camadas usando o “elástico”: clique e arraste para desenhar um retângulo englobando as camadas que você deseja escolher. Todas as camadas que estavam completamente dentro do retângulo estão selecionadas. Note que fazendo assim não existe nenhum alvo do tipo“Primeiro item” aos quais as demais camadas possam ser alinhadas. |
Normalmente, as opções da ferramenta são exibidas assim que você ativa uma ferramenta em uma caixa localizada abaixo da caixa de ferramentas. Se isso não acontecer, você pode acessar as mesmas através do menu na janela da imagem em → →
In this drop down list, you select the target, the image object the layer will be aligned with.
Primeiro item: O primeiro item selecionado quando se seleciona múltiplas camadas usando a tecla Shift. Perceba que não há um “Primeiro item ” quando você seleciona múltiplas camadas usando o elástico.
Image: the image is the target.
Selection: the selection is the target.
Active layer: the active layer, in the layer dialog, is the target.
Active Channel: the active channel, containing a selection you made before, is the target.
Active Path: the active path is the target.
These buttons become active when a target is selected.
 : to
align left edge of source with left edge of target.
: to
align left edge of source with left edge of target.
 : to
align center of source on the
vertical middle line of target.
: to
align center of source on the
vertical middle line of target.
 : to
align right edge of source with right edge of target.
: to
align right edge of source with right edge of target.
 : to
align top edge of source with top edge of target.
: to
align top edge of source with top edge of target.
 : to
align center of source on the
horizontal middle line of target.
: to
align center of source on the
horizontal middle line of target.
 : to
align bottom edge of source with bottom edge of target.
: to
align bottom edge of source with bottom edge of target.
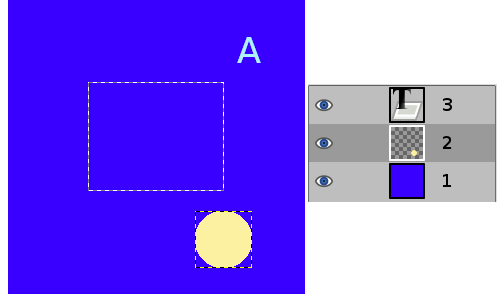
An image with a selection, layer #1 (background) is active, layer #2 is cropped to content, layer #3 is a text layer.
We click on the yellow circle: layer #2 becomes the source. We want to send this source to the middle of the selection: the Relative to option is set to “Selection”.
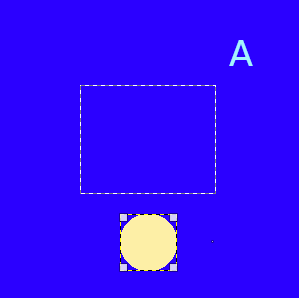
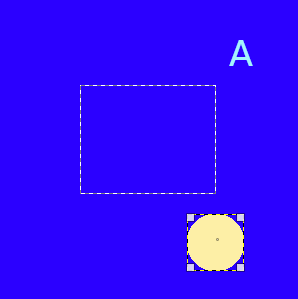
clicked

clicked
These options are used when you have several targets and want to arrange them. Here, layers selected with Shift + Click are called “targets” . But they are actually sources. “Relative to” options are active to set the target. These transformations are usually relative to “Image”.
These options work as Align options, but you can add an offset and new options are available to distribute sources evenly.
: to distribute left edges of sources
on the left edge of the target (the image).
: to distribute centers of sources
with center of the target horizontally.
: to distribute right edges of
sources on right edge of the target.
 : to distribute sources evenly
horizontally.
: to distribute sources evenly
horizontally.
: to distribute top edges of sources
on top edge of target.
: to distribute centers of sources
with center of target.
: to distribute bottom edges of
sources with bottom edge of target.
 : to distribute sources evenly
vertically.
: to distribute sources evenly
vertically.
This offset can be positive or negative and is expressed in pixels. Distribute add it to the left edges, horizontal centers, right edges, top edges, vertical centers, or bottoms of sources.
Figura 14.121. Example for the “Distribute” commands
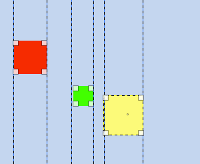
Base image: three layers.
(Distribute right edges of targets) will
be used.

GIMP-2.10 shows relative coordinates (horizontal or vertical) when moving guides and sample points. Coordinates are relative to the start of moving.

Figura 14.122. Origin
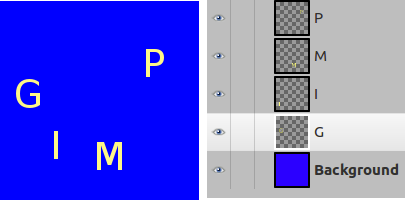
We select them as sources with Shift + Click.

The default target (Relative to) is
“Image”. Offset = 0. We used the
(Distribute vertical centers of targets) command.

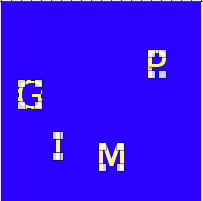
After using the (Distribute targets
evenly in the horizontal) with offset = 5.
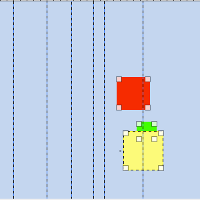
Figura 14.123. Alinhar usando a seleção de camadas por retângulo
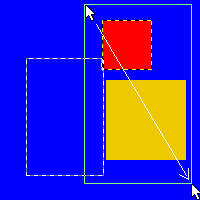
Nós clicamos à esquerda e acima da camada vermelha, e arrastamos o mouse de forma que as camadas vermelha e amarela estivessem dentro do retângulo de seleção.
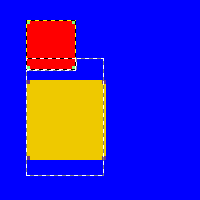
“Selection” is the reference. After a click
on the
button, both layers align with the left side of the
selection.