| 6.7. Slagskygge | ||
|---|---|---|

|
6. Lys- og skyggefiltra |  |
| 6.7. Slagskygge | ||
|---|---|---|
|
|
6. Lys- og skyggefiltra | |
Figur 17.123. Eksempel på bruk av filteret «slagskygge»
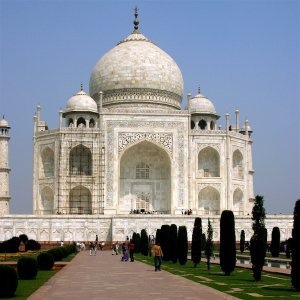
Originalbiletet
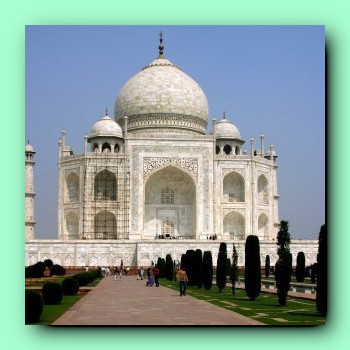
Using the GEGL «Drop Shadow»
With this GEGL filter you can add a drop-shadow to an image, a selection or a text. You may choose the color, position, and size of the shadow.
Du har tilgang til dette filteret frå biletmenyen via → →
This filter is normally disabled. You must add an Alpha channel to your image to use it.
![[Notat]](images/note.png)
|
Notat |
|---|---|
|
These options are described in Del 2, «Common Features». |
Desse boksane bestemmer kor mange pikslar skyggelaget skal flyttast horisontalt (forskyv X) og vertikalt (forskyv Y). Store tal vil gi lange skyggar, medan små tal gir korte skyggar.
Forskyvinga kan også vere negativ. Med X < 0 vert skyggen flytt mot venstre og med Y < 0 oppover.
Out of sheer curiosity, you can see the drop shadow layer clearly by setting blur radius to 0 and moving the drop shadow with X and Y.
After creating the shadow, a Gaussian blur with the specified radius is applied to the shadow layer, resulting in the realistic appearance of the drop shadow.
The shadow may have any color. Just click on the color swatch, and select a color when the color selector pops up or use the eye-dropper.
Shadow opacity. It defaults to 0.500, but you may select any other value from 0 (full transparency) to 2.00 (full opacity) here.
The result of this filter can be larger than the original image. With the default Adjust option, the layer will be automatically resized as necessary when the filter is applied. With the Clip option the result will be clipped to the layer boundary.
This GEGL Drop Shadow filter is surprising: if you apply the filter directly to the image as you do with the legacy filter, you get nothing!
To get the same result as the legacy filter:
Open your original image.
Open a new image, a little bigger than your original image, filled with transparency.
Copy your original image and paste it into the new image. A floating selection is created in the layer dialog.
Anchor the floating selection.
Menus/Layer/Crop to content.
Menus/Layer/Layer boundary size: set layer size to the same size than your image and filled with transparency; click on the button. Then click on the button.
Open the Drop Shadow dialog: the drop shadow is displayed in the on-canvas preview. You can change the default options values.
Eventually, add a new layer, with the same size as the image and filled with the color you want to give to the background. Move this layer to the bottom of the layer stack.
Click on the to apply filter.
Applying filter to a selection:
Open your original image.
Open a new image, the same size as your original image, filled with transparency.
Create the selection
Copy the selection and paste it into the new image. A floating selection is created in the layer dialog.
Anchor the floating selection.
Menus/Layer/Crop to content.
Menus/Layer/Layer to image size (with transparency).
Open the Drop Shadow dialog: the drop shadow is displayed in the on-canvas preview. You can change the default options values.
Eventually, add a new layer, with the same size as the image and filled with the color you want to give to the background. Move this layer to the bottom of the layer stack.
You can also use your original image as background: undo the selection, copy the image and paste it as new layer in the new image. Move the new layer to the bottom of the layer stack.
Click on the to apply filter.
Applying filter to a text:
The procedure is more simple to create a drop shadow for a text: create the text and apply the Drop Shadow filter directly.


