| 8. Menyen «Fargar» | ||
|---|---|---|

|
Kapittel 16. Menyar |  |
| 8. Menyen «Fargar» | ||
|---|---|---|
|
|
Kapittel 16. Menyar | |
I denne bolken kan du finna hjelp om postane i menyen .
![[Notat]](images/note.png)
|
Notat |
|---|---|
|
Kan hend du finn andre punkt på denne menyen enn dei som vert omtalte her. Desse er ikkje ein del av GIMP, men er lagt inn av programtillegg ("plug-ins") du, eller andre, har installert. Du kan finna nærare informasjonar om desse funksjonane i dokumentasjonen til programtillegget. |
Dei GEGL-baserte filtera i -menyen har fleire innstillingar felles. Nokre av desse instillingane vert viste berre i spesielle samanhengar.

Forvala er ein rask måte å velja tidlegare lagra innstillingar for filteret du brukar. Viss du har lagra forval tidlegare, kan du velja dei frå lista eller du kan du lagra dei gjeldande innstillingane ved å trykkja knappen «+».
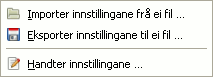
Knappen ![]() opnar ein fanemeny:
opnar ein fanemeny:
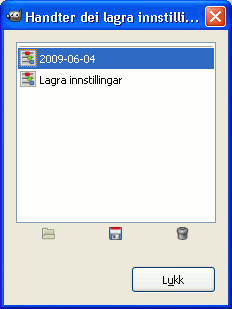
som let deg Importera innstillingar frå fil eller Eksporter innstillingar til fil og gje deg tilgang til dialogvindauget for å handsama innstillingane for lagring:
|
|
Notat |
|---|---|
|
Nedtrekkslista for inngangstypar er synleg berre når eit utval er aktivt og filteret tillét at du vel inngang. |
Bruk utvalet som inngang: Viss dette valet er merkt, vil filteret bruka berre pikslar inne i utvalet som inngang for filteret.
Bruk heile laget som inngang: Viss denne er merkt, vert heile laget brukt som inngang for filteret. Utgangen vil påverka berre utvalet. Laget utføre utvalet vert uendra.
|
|
Notat |
|---|---|
|
Nedtrekkslista for klipping er synleg berre når det gjeldande laget har ein alfakanal, ingen utval er aktive og filteroperasjonen kan endra lagstorleiken. |
Denne innstillinga bestemmer kva som skal gjerast når resultatet av filteret vert større enn det opphavlege laget.
Juster: Storleiken på laget vert endra automatisk når det er nødvendig. Dette er standard.
Klipp: Resultatet vert klipt til laggrensene.
Når du utvidar dette valet ved å klikka plussen (+) kan du velja kva blandemodus og gjennomsikt som skal brukast når du tek i bruk filteret. Desse arbeider på same måten som innstillingane for lagblanding.

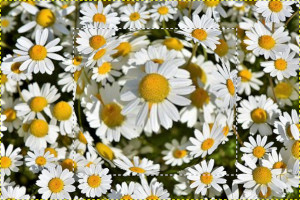
Førehandsvis: dette valet er som standard merkt av og viser endringane direkte på lerretet..
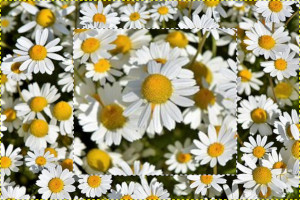
Delt vising: viss det er merkt av for denne, vert biletvindauget delt i to. Den venstre sida viser filtereffekten medan den høgre delen viser originalbiletet utan filteret.
|
|
Notat |
|---|---|
|
Du kan klikka og dra delelinja for å flytta ho. Trykk Ctrl-tasten medan du dreg for å gjera linja vassrett eller for å setja ho tilbake til loddrett. |