| 8. Le menu « Couleurs » | ||
|---|---|---|

|
Chapitre 16. Menus |  |
| 8. Le menu « Couleurs » | ||
|---|---|---|
|
|
Chapitre 16. Menus | |
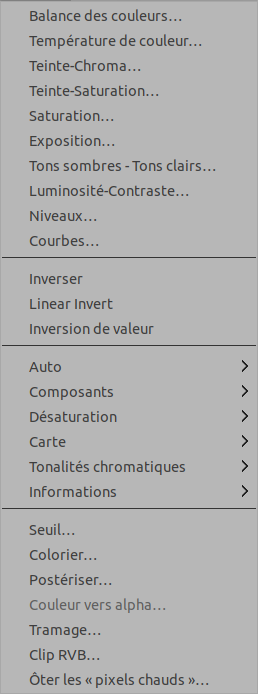
Cette section décrit le menu qui contient diverses commandes permettant d’agir sur les couleurs.
![[Note]](images/note.png)
|
Note |
|---|---|
|
Vous pouvez trouver, dans ce menu, des commandes qui ne sont pas décrites. Elles n’appartiennent pas en propre à GIMP, mais ont été ajoutées par des greffons (plug-ins). Vous trouverez leur description dans la documentation du greffon correspondant. |
The GEGL based filters in the menu have several options in common. Some of these options are only shown under certain conditions.

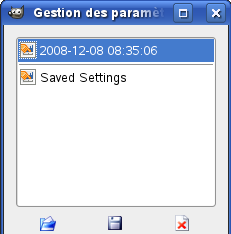
Presets give you a quick way to select previously saved settings for the filter you are using. If you have saved presets before, you can select them from the list, or else you can save the current settings by pressing the « + » button.
The
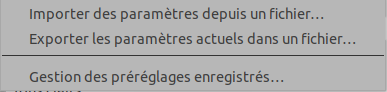
![]() button opens a tab menu:
button opens a tab menu:
qui vous permet d’ Importer les paramètres depuis un fichier ou Exporter les paramètres dans un fichier, et vous donne accès à la boîte de dialogue Gestion d’enregistrement des paramètres :
|
|
Note |
|---|---|
|
The input type dropdown list is only visible when a selection is active, and the filter allows choosing the input. |
Use the selection as input If this option is selected, the filter only uses pixels inside the selection as input for the filter.
Use the entire layer as input If this option is selected, the input of the filter is the entire layer. The output will only affect the selection. The layer outside the selection remains unchanged.
|
|
Note |
|---|---|
|
The clipping dropdown list is only visible when the current layer has an alpha channel, no selection is active, and the filter operation can change the layer size. |
This setting determines what to do when the result of this filter is larger than the original layer.
Adjust The layer will be automatically resized as necessary when the filter is applied. This is the default.
Clip The result will be clipped to the layer boundary.
When you expand this option by clicking the +, you can choose the blend Mode to be used when applying the filter, and the Opacity. These work the same as the layer blending options.

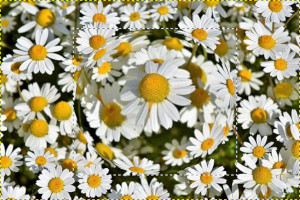
Aperçu : cette option est cochée par défaut et affiche les modifications directement à l’écran.
Split view: if this option is checked, the image window is divided in two parts. On the left side it shows the effect of the filter applied, and on the right side it shows the image without filter.
|
|
Note |
|---|---|
|
You can click-and-drag the line that divides the preview to move it, and Ctrl-click to make the line horizontal, or to switch it back to vertical. |