| 2.3. Ellipse Selection | ||
|---|---|---|

|
2. Selectie Gereedschappen |  |
| 2.3. Ellipse Selection | ||
|---|---|---|
|
|
2. Selectie Gereedschappen | |
The Ellipse Selection tool is designed to select circular and elliptical regions from an image, with high-quality anti-aliasing if you want it. For information on selections and how they are used in GIMP see Selections; for information on features common to all selection tools see Selection Tools.
This tool is also used for rendering a circle or ellipse on an image. To render a filled ellipse, create an elliptical selection, and then fill it using the Bucket Fill tool. To create an elliptical outline, the simplest and most flexible approach is to create an elliptical selection and then stroke it. However, the quality of anti-aliasing with this approach is rather crude. A higher quality outline can be obtained by creating two elliptical selections with different sizes, subtracting the inner one from the outer one; however this is not always easy to get right. The command → makes it easy.
You can access the Ellipse Selection Tool in different ways:
From the image menu bar → → ;
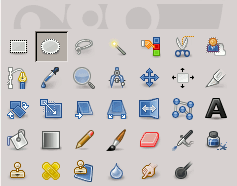
Door te klikken op het gereedschaps pictogram
 in de Gereedschapskist,
By using the keyboard shortcut E.
![[Opmerking]](images/note.png)
|
Opmerking |
|---|---|
|
Zie Selectie Gereedschappen voor meer informatie over de sneltoetsen die alle selectie gereedschappen op de zelfde manier beinvloeden. In de rest van dit hoofdstuk worden alleen de effecten besproken die specifiek zijn voor het Rechthoekselectie gereedschap. |
Pressing the key after starting your selection, and holding it down until you are finished, causes your starting point to be used as the center of the selected ellipse, instead of a corner of the rectangle that may contain it. Note that if you press the Ctrl key before starting to make the selection, the resulting selection will be subtracted from the existing selection.
Pressing the Shift key after starting your selection, and holding it down until you are finished, constrains the selection to be a circle. Note that if you press the Shift key before starting to make the selection, the resulting selection will be added to the existing selection.
Pressing both keys combines the two effects, giving you a circular selection centered on your starting point.
When this tool is selected the mouse pointer comes with a circle icon as soon as it is over the image. A drag-and-drop allows you to get an ellipse (or a circle) within a rectangular box. When the mouse button is relaxed, a dotted line (“marching ants”) outlines the elliptic selection. It's not necessary to adjust the selection with care; you can resize it easily later.
When the pointer is moving on the canvas, the pointer and selection aspects change. You can change the size of the selection by using handles. See Tool handling within the rectangular chapter.
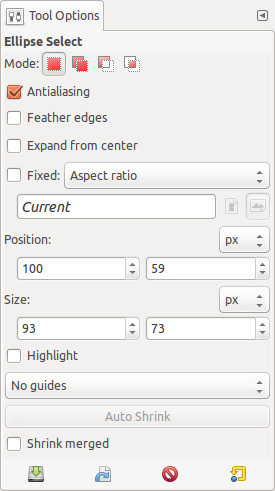
Gereedschap opties van je actieve gereedschap worden normaliter getoond in een venster onder de gereedschapskist. Als dat venster er niet is kun je hem oproepen via het menu → → dat de opties van het actieve gereedschap laat zien.
|
|
Opmerking |
|---|---|
|
See Selection Tools Options for help with options that are common to all these tools. Only options that are specific to this tool are explained here. |
Common select options.
All these options work exactly the same way, they were described for the rectangular selection already. See for Paragraaf 2.2.4, “Tool Options” details.