| 3.3. Gaussian Blur | ||
|---|---|---|

|
3. Vervagen filters |  |
The Gaussian Blur plug-in acts on each pixel of the active layer or selection, setting its Value to the average of all pixel Values present in a radius defined in the dialog. A higher Value will produce a higher amount of blur. The blur can be set to act in one direction more than the other by clicking the Chain Button so that it is broken, and altering the radius. GIMP supports two implementations of Gaussian Blur: FIR and RLE. They both produce the same results, but each one can be faster in some cases.
![[Opmerking]](images/note.png)
|
Opmerking |
|---|---|
|
Deze opties staan beschreven in Paragraaf 2, “Algemene Eigenschappen”. |
Here you can set the blur intensity. By altering the ratio of horizontal to vertical blur, you can give the effect of a motion blur.
Auto: Try to select the right filter automatically.
FIR: stands for “Finite Impulse Response”. For photographic or scanned images.
RLE: stands for “run-length encoding”. RLE Gaussian Blur is best used on computer-generated images or those with large areas of constant intensity.
Abyss policy (border management) is treated with Abyss policy.
Should the output extent be clipped to the input extent: this option removes unwanted pixels created on borders by blurring.
Afbeelding 17.13. Example

Right-up corner of the image, zoom x800

“Clip to the input extent” unchecked

“Clip to the input extent” checked
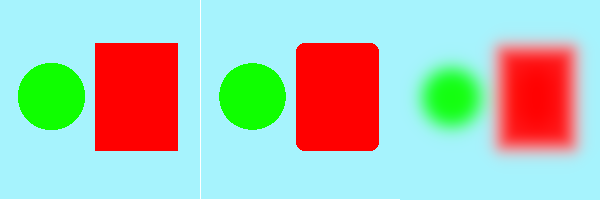
The Gaussian Blur filter doesn't preserve edges in the image:

Left: Origin
Middle: Median
Right: Gaussian