| 3. Legacy Layer Modes | ||
|---|---|---|

|
8장. 이미지 합치기 |  |
| 3. Legacy Layer Modes | ||
|---|---|---|
|
|
8장. 이미지 합치기 | |
Since GIMP 2.10 layer modes have changed. The old perceptual layer modes are still available for backwards compatibility. They are called “legacy layer modes”. These legacy layer modes will be used when loading images made before the introduction of the new, mostly linear, layer modes.
For more information on layer modes in general, see the default Layer Modes.
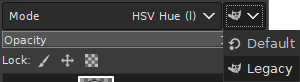
If you need to stay compatible with older GIMP versions or you need to use the legacy layer modes for other reasons, look for the icon to the right of the layer modes selection. This drop down menu will let you choose between Default and Legacy. If you choose the latter, the layer modes list will only show the legacy layer modes and all modes will have “(legacy)” behind their name (the selected mode will use the short version “(l)”).
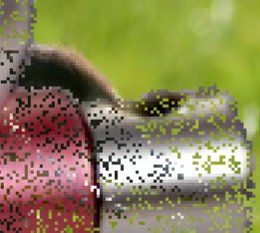
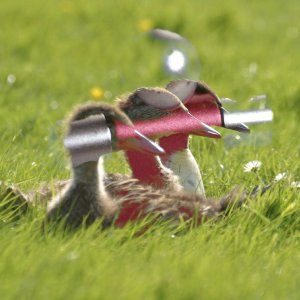
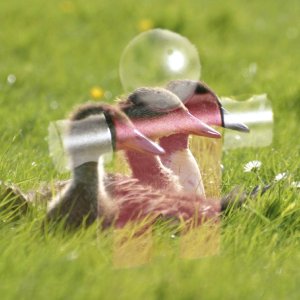
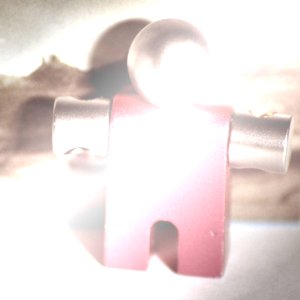
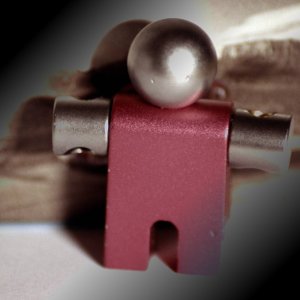
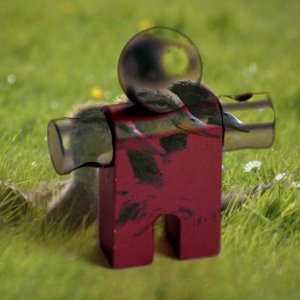
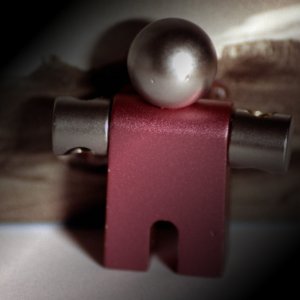
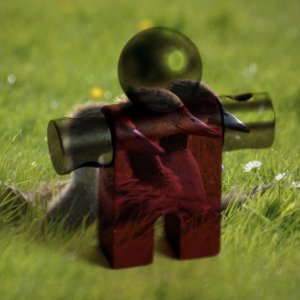
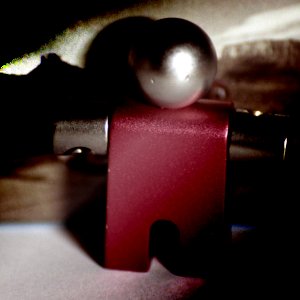
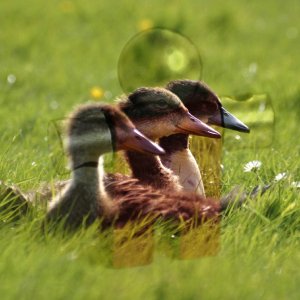
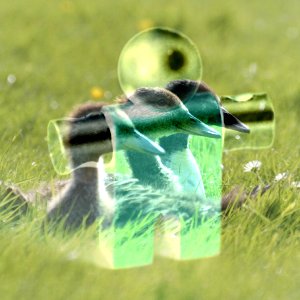
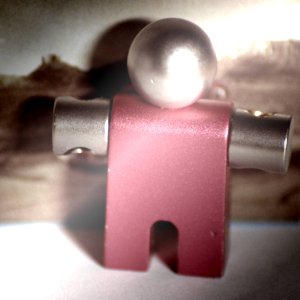
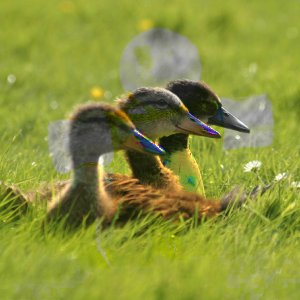
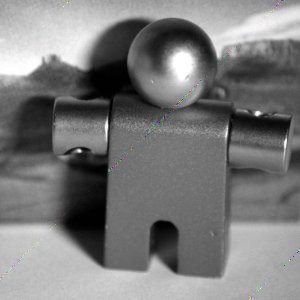
그림 8.48. Images (masks) used for the layer mode examples
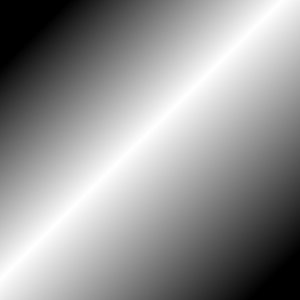
마스크 1
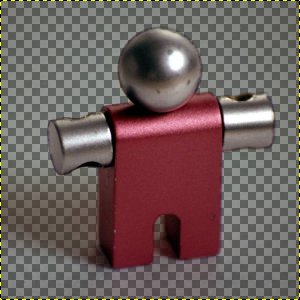
Mask 2 (note: this image is not the actual mask used, but a screenshot of the mask with the checkerboard pattern showing the transparent parts in GIMP)
In the descriptions of the layer modes below, the equations are also shown. This is for those who are curious about the mathematics of the layer modes. You do not need to understand the equations in order to use the layer modes.
이러한 공식들은 약어 수식으로, 예를 들어
means, “For each pixel in the upper (Mask) and lower (Image) layer, add each of the corresponding color components together to form the E resulting pixel's color.” Pixel color components must always be between 0 and 255.
![[참고]](images/note.png)
|
참고 |
|---|---|
|
Unless the description below says otherwise, a negative color component is set to 0 and a color component larger than 255 is set to 255. |
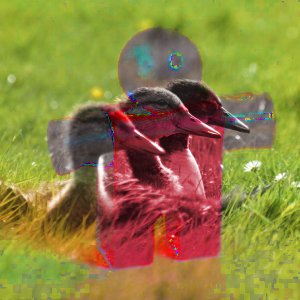
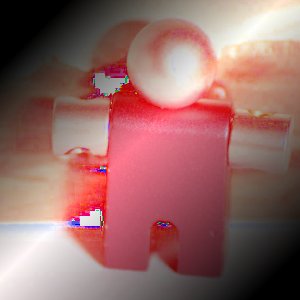
The examples below show the effects of each of the legacy modes. Note that for simplicity we will omit “(legacy)” when mentioning the layer modes here.
각 모드에 따른 결과는 레이어의 색상에 의해 좌우되기 대문에, 이 예제들의 결과는 절대적인 것이 아닙니다. 이것은 단지 모드가 어떻게 동작하는지에 대한 설명을 위한 것입니다. 직접 테스트해보기를 원한다면, 약간 변형된 비슷한 이미지를 가지고 해보는 것이 좋습니다.(레이어를 복사한 다음, 블루어, 이동, 회전, 비율 조정, 색상 반전 등을 통해 이미지를 변형합니다.) 그런 후에 레이어 모드를 바꿔가면서 그 변화를 확인합니다.
Normal Layer Modes
In this group, only “Normal” is normal.
그림 8.50. Example for layer mode “Normal”

두 이미지가 같은 농도로 서로 혼합되었습니다.
불투명도 100%의 상위 레이어를 “일반” 모드로 하위 레이어와 혼합시킨 모습입니다.
일반 모드는 레이어 모드의 기본값입니다. 상위 레이어는 하위 레이어를 전부 덮습니다. 이 모드에서 하위 레이어에 어떠한 것이 있는지 알려면, 상위 레이어에 투명한 부분이 있어야만 합니다.
공식 :
그림 8.51. Example for layer mode “Dissolve”

두 이미지가 같은 농도로 서로 혼합되었습니다.
불투명도 100%의 상위 레이어를 “분해” 모드로 하위 레이어와 혼합시킨 모습입니다.
분해 모드는 상위 레이어를 분해하여 부분적으로 투명한 영역에 무작위 패턴의 픽셀을 뿌려줍니다. 이는 레이어 모드와 페인팅 모드에서 모두 유용한 모드입니다.
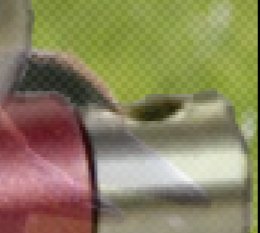
이 모드는 특히 이미지의 경계를 드러내는데, 이는 확대된 스크린샷에서 쉽게 볼 수 있습니다. 왼쪽의 이미지는 “보통” 모드(enlarged)의 이미지이고, 오른쪽 이미지는 “분해” 모드의 이미지로 픽셀이 어떻게 분산되는지를 잘 보여주고 있습니다.
Lighten Layer Modes
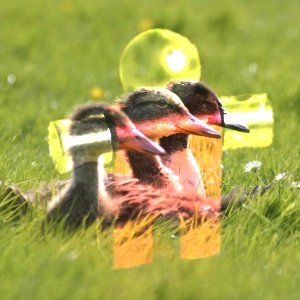
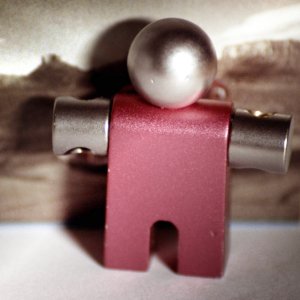
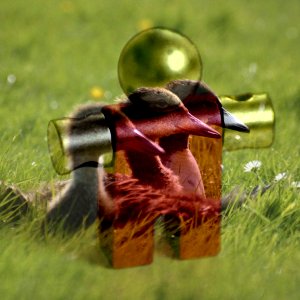
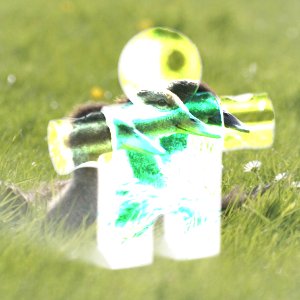
그림 8.53. Example for layer mode “Lighten only”
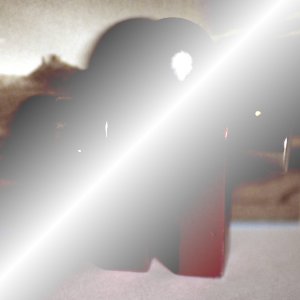
마스크 1 을 불투명도 100%로 하여 상위 레이어로 사용하였습니다.
마스크 2 를 불투명도 100%로 하여 상위 레이어로 사용하였습니다.
모드는 상위 레이어와 하위 레이어의 각 픽셀값을 대조하여 작은 값을 취합니다. 따라서 한 레이어가 검정색 이미지이면 최종 이미지에는 변화가 없고, 하얀색 이미지이면 최종 이미지는 하얀색 이미지가 됩니다.
공식 :
이 모드는 상호적인 성격을 갖으므로, 두 레이어의 위치에는 영향을 받지 않습니다.
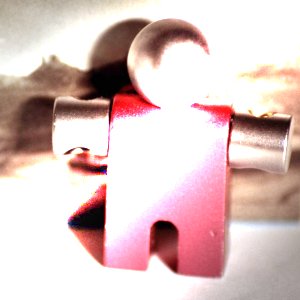
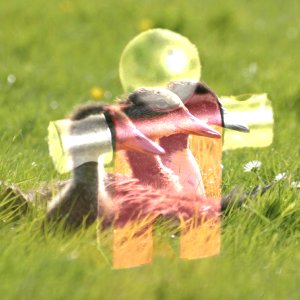
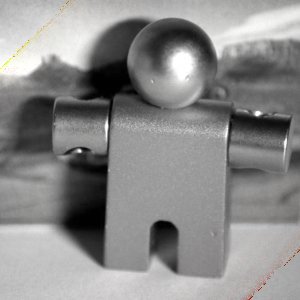
그림 8.54. Example for layer mode “Screen”

마스크 1 을 불투명도 100%로 하여 상위 레이어로 사용하였습니다.
마스크 2 를 불투명도 100%로 하여 상위 레이어로 사용하였습니다.
스크린 모드는 두 레이어의 픽셀값들을 각각 255에서 뺀 다음, 두 값을 곱한 뒤 255로 나눈 값을 다시 255에서 뺀 값을 취합니다. 이 모드를 적용하면, 이미지는 밝아지고, 때때로 “빛바랜” 느낌을 주기도 합니다. 하지만 한쪽 레이어가 검정색 레이어일 경우에는 아무 변화도 일어나지 않고, 흰색 레이어일 경우에는 흰색 이미지로 됩니다. 그리고 어두운 계열의 색상일수록 조금더 투명해지게 됩니다.
공식 :
이 모드는 상호적인 성격을 갖으므로, 두 레이어의 위치에는 영향을 받지 않습니다.
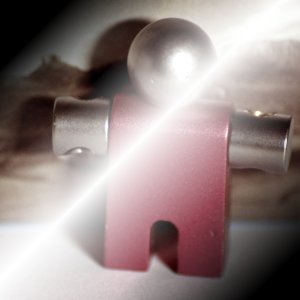
그림 8.55. Example for layer mode “Dodge”
마스크 1 을 불투명도 100%로 하여 상위 레이어로 사용하였습니다.
마스크 2 를 불투명도 100%로 하여 상위 레이어로 사용하였습니다.
닷지(Dodge) 모드는 하위 레이어의 픽셀값에 256을 곱한뒤, 이를 상위 레이어 픽셀값을 반전시킨 값으로 나눈 값을 취합니다. 이 모드를 적용하면, 이미지는 밝하지며, 몇몇 색상은 반전되기도 합니다.
사진 보정에서 닷지(Dodge)는 어두운 방에서 찍은 사진의 특정 부분 노출값을 증가시켜 줄때 사용됩니다. 이를 적용하면 그림자 속에 숨어있던 부분들이 드러납니다. 하지만 그레이스케일의 이미지에서 이러한 용도로 사용한다면, 레이어 모드보다 페인팅 도구 중 닷지(Dodge)/번(Burn) 도구를 사용하는 것이 좋습니다.
공식 :
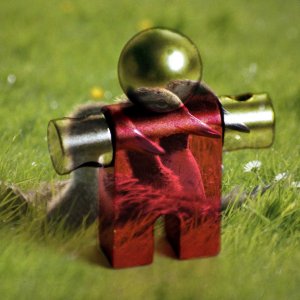
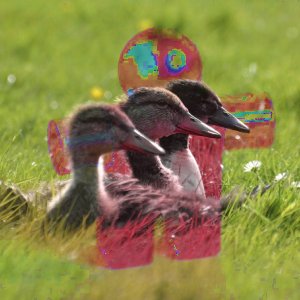
그림 8.56. Example for layer mode “Addition”
마스크 1 을 불투명도 100%로 하여 상위 레이어로 사용하였습니다.
마스크 2 를 불투명도 100%로 하여 상위 레이어로 사용하였습니다.
더하기 모드는 상위 레이어와 하위 레이어의 픽셀값들을 서로 더한 것입니다. 이 모드를 적용하면 이미지는 밝아집니다. 공식에서 보듯, 모든 픽셀은 255 를 최대값으로 갖으므로 그보다 큰 값은 255로 조정됩니다.
공식 :
이 모드는 상호적인 성격을 갖으므로, 두 레이어의 위치에는 영향을 받지 않습니다.
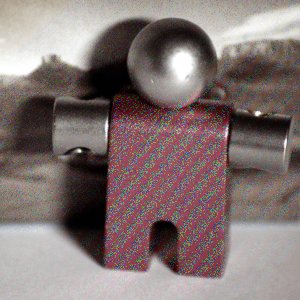
Darken Layer Modes
그림 8.57. Example for layer mode “Darken only”
마스크 1 을 불투명도 100%로 하여 상위 레이어로 사용하였습니다.
마스크 2 를 불투명도 100%로 하여 상위 레이어로 사용하였습니다.
모드는 상위 레이어와 하위 레이어의 각 픽셀값을 대조하여 작은 값을 취합니다. 따라서 한 레이어가 휜색 이미지이면 최종 이미지에는 변화가 없고, 검정색 이미지이면 최종 이미지는 검정색 이미지가 됩니다.
공식 :
이 모드는 상호적인 성격을 갖으므로, 두 레이어의 위치에는 영향을 받지 않습니다.
그림 8.58. Example for layer mode “Multiply”
마스크 1 을 불투명도 100%로 하여 상위 레이어로 사용하였습니다.
마스크 2 를 불투명도 100%로 하여 상위 레이어로 사용하였습니다.
곱하기 모드는 상위 레이어와 하위 레이어의 각 픽셀의 색상값을 서로 곱한 뒤 255로 나눈 값을 취합니다. 결과는 일반적으로 어두운 이미지가 되지만 흰색 레이어와 곱하기를 하면 아무런 변화가 없습니다(1 * I = I). 그리고 검은색 레이어와 곱하기를 하면, 이미지는 완전히 검정색으로 칠해집니다(0 * I = 0).
공식 :
이 모드는 상호적인 성격을 갖으므로, 두 레이어의 위치에는 영향을 받지 않습니다.
그림 8.59. Example for layer mode “Burn”
마스크 1 을 불투명도 100%로 하여 상위 레이어로 사용하였습니다.

마스크 2 를 불투명도 100%로 하여 상위 레이어로 사용하였습니다.
번(Burn) 모드는 하위 레이어의 픽셀값을 반전시킨 후 256을 곱하고, 상위 레이어의 픽셀값에 1을 더한 값으로 나눈 뒤, 다시 반전시킨 값을 취합니다. 이 모드를 적용하면, 이미지가 어두워지고, 때로는 “곱하기” 모드를 적용한 것과 비슷해집니다.
사진 보정에서 번(Burn)은 어두운 방에서 찍은 사진의 특정 부분 노출값을 감소시켜 줄때 사용됩니다. 이를 이용하면 밝은 부분에 있던 자세한 부분들이 드러납니다. 그레이스케일 이미지에서는 레이어 모드보다 페인팅 도구 중 태우기 도구를 이용하는 것이 좋습니다.
공식 :
Contrast Layer Modes
그림 8.60. Example for layer mode “Overlay”

마스크 1 을 불투명도 100%로 하여 상위 레이어로 사용하였습니다.
마스크 2 를 불투명도 100%로 하여 상위 레이어로 사용하였습니다.
Overlay mode in theory inverts the pixel value of the lower layer, multiplies it by two times the pixel value of the upper layer, adds that to the original pixel value of the lower layer, divides by 255, and then multiplies by the pixel value of the original lower layer and divides by 255 again.
Due to a bug [5] the actual equation is equivalent to Soft light. This will not be fixed for the legacy layer mode. However, even if you explicitly use legacy layer mode, GIMP will still set the default Overlay layer mode. Images that have the legacy Overlay mode set for a layer, will have that changed to legacy Soft light, since that's what it effectively is.
그림 8.61. Example for layer mode “Soft light”
마스크 1 을 불투명도 100%로 하여 상위 레이어로 사용하였습니다.

마스크 2 를 불투명도 100%로 하여 상위 레이어로 사용하였습니다.
부드러운 빛 모드는 이름과는 달리 “강한 빛” 모드와 큰 관계가 없습니다. 이 모드는 경계를 부드럽게 만들지만 색상에는 변화를 주지 않습니다. 구 버전의 김프에서는 “덧씌우기” 모드와 “부드러운 빛” 모드가 같습니다.
다소 복잡한 공식으로 Rs 는 스크린 모드의 결과입니다. :
그림 8.62. Example for layer mode “Hard light”
마스크 1 을 불투명도 100%로 하여 상위 레이어로 사용하였습니다.
마스크 2 를 불투명도 100%로 하여 상위 레이어로 사용하였습니다.
강한 빛 모드는 어두운 색상과 밝은 색상에 대한 두 가지 공식으로 되어있어 다소 복잡합니다. 상위 레이어의 픽셀 중 값이 128보다 크면, 해당 픽셀은 첫번째 공식을 따라 색상이 합쳐집니다. 값이 128보다 작은 픽셀은 두 개 레이어의 픽셀값을 곱한 뒤 두 배를 한 값을 256으로 나눈 값을 가지게 됩니다. 이 모드는 사진에서 밝은 색상과 날카로운 경계를 만들때 사용됩니다.
The equation is complex and different according to the value >128 or < 128:
Inversion Layer Modes
그림 8.63. Example for layer mode “Difference”
마스크 1 을 불투명도 100%로 하여 상위 레이어로 사용하였습니다.
마스크 2 를 불투명도 100%로 하여 상위 레이어로 사용하였습니다.
차이점 모드는 하위 레이어의 픽셀값에서 상위 레이어의 픽셀값을 뺀 뒤, 그 값의 절대값을 취합니다. 원본 이미지가 어떤 상태였던 간에 결과물은 조금 이상하게 보일 것입니다. 이는 이미지의 구성 요소를 반전시킬 때 사용합니다.
공식 :
이 모드는 상호적인 성격을 갖으므로, 두 레이어의 위치에는 영향을 받지 않습니다.
그림 8.64. Example for layer mode “Subtract”
마스크 1 을 불투명도 100%로 하여 상위 레이어로 사용하였습니다.
마스크 2 를 불투명도 100%로 하여 상위 레이어로 사용하였습니다.
빼기 모드는 하위 레이어의 픽셀값에서 상위 레이어의 픽셀값을 뺀 값을 취합니다. 이 모드를 적용하면 일반적으로 이미지는 어두워집니다. 음수값을 갖게 되는 픽셀은 모두 0으로 조정됩니다.
공식 :
그림 8.65. Example for layer mode “Grain extract”

마스크 1 을 불투명도 100%로 하여 상위 레이어로 사용하였습니다.
마스크 2 를 불투명도 100%로 하여 상위 레이어로 사용하였습니다.
질감 드러내기 모드는 순수한 질감을 가진 레이어를 만들기 위해 일반 레이어로부터 “거친 질감”을 추출하는 것과 같습니다. 하지만 보통은 이미지에 올록볼록한 느낌을 주는데 많이 쓰입니다. 이 모드는 하위 레이어의 픽셀값에 128을 더한 뒤 상위 레이어의 픽셀값을 뺀 값을 취합니다.
공식 :
그림 8.66. Example for layer mode “Grain merge”
마스크 1 을 불투명도 100%로 하여 상위 레이어로 사용하였습니다.
마스크 2 를 불투명도 100%로 하여 상위 레이어로 사용하였습니다.
공식 :
공식 :
그림 8.67. Example for layer mode “Divide”
마스크 1 을 불투명도 100%로 하여 상위 레이어로 사용하였습니다.
마스크 2 를 불투명도 100%로 하여 상위 레이어로 사용하였습니다.
나누기 모드는 하위 레이어의 각 픽셀값에 256을 곱한 뒤, 상위 레이어의 각 픽셀값으로 나눈 값을 취합니다(255에 1을 더해 분모가 0이 되는 것을 피합니다). 이 모드를 적용하면 이미지는 밝아지며, 때때로는 “태운 것” 처럼 보이기도 합니다.
공식 :
HSV Components Layer Modes
그림 8.68. Example for layer mode “HSV Hue”
마스크 1 을 불투명도 100%로 하여 상위 레이어로 사용하였습니다.
마스크 2 를 불투명도 100%로 하여 상위 레이어로 사용하였습니다.
HSV Hue mode uses the Hue of the upper layer and the Saturation and Value of the lower layer to form the resulting image. However, if the Saturation of the upper layer is zero, the Hue is taken from the lower layer, too.
그림 8.69. Example for layer mode “HSV Saturation”
마스크 1 을 불투명도 100%로 하여 상위 레이어로 사용하였습니다.
마스크 2 를 불투명도 100%로 하여 상위 레이어로 사용하였습니다.
HSV Saturation mode uses the Saturation of the upper layer and the Hue and Value of the lower layer to form the resulting image.
그림 8.70. Example for layer mode “HSL Color”
마스크 1 을 불투명도 100%로 하여 상위 레이어로 사용하였습니다.
마스크 2 를 불투명도 100%로 하여 상위 레이어로 사용하였습니다.
HSL Color mode uses the Hue and Saturation of the upper layer and the Lightness of the lower layer to form the resulting image.
그림 8.71. Example for layer mode “HSV Value”
마스크 1 을 불투명도 100%로 하여 상위 레이어로 사용하였습니다.
마스크 2 를 불투명도 100%로 하여 상위 레이어로 사용하였습니다.
HSV Value mode uses the Value of the upper layer and the Saturation and Hue of the lower layer to form the resulting image. You can use this mode to reveal details in dark and light areas of an image without changing the Saturation.