| 3.5. グラデーション | ||
|---|---|---|

|
3. 描画ツール |  |
| 3.5. グラデーション | ||
|---|---|---|
|
|
3. 描画ツール | |
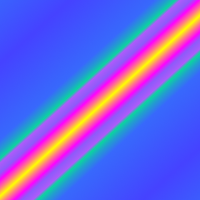
This tool fills the selected area with a gradient from the foreground and background colors by default, but there are many options. To make a gradient, drag the cursor in the direction you want the gradient to go and you release the mouse button when you feel you have the right position and size of your gradient. The softness of the gradient depends on how far you drag the cursor. The shorter the drag distance, the sharper it will be.
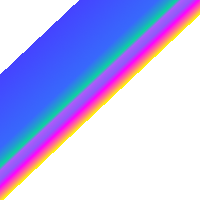
If you click and drag outside the selection, only a part of the gradient will appear in the selection.
このツールを使ってできることは目をみはるほど多数あり、 はじめはちょっと面喰うかもしれません。 オプションのうち最も大事なのが「グラデーション」と「形状」です。 ツールオプションの グラデーション ボタンを押すとグラデーションを選択できるウィンドウが現れますから、 ここで GIMP が提供する数々の多彩なグラデーション柄を選べますが、 あなた独自のグラデーションを構成することもできます。 グラデーションについてのもっと詳しい情報は、 「グラデーション」 や 「グラデーションダイアログ」 にあります。
形状 には線形、 双線型、 放射状、 四角形、 円錐形 (対称)、 円錐形 (非対称)、 形状広がり (角張った)、 形状広がり (球面)、 形状広がり (くぼみ)、 螺旋 (時計回り)、 螺旋 (反時計回り) の 11 のオプションがあります。 これらは後で詳しく述べます。 形状 オプションは選択範囲の輪郭に沿ってグラデーションをかけるものであり、 うねった形にも対応できる非常に面白い機能です。 「形状」グラデーションはマウスでドラッグする距離に拠らないところがほかの形状に対するのとは異なります。 後者が選択範囲内でマウスポインターをドラッグしてグラデーションをかけるのに対して、 「形状」の方はクリックする場所もドラッグの仕方も問題にしません。
![[ヒント]](images/tip.png)
|
ヒント |
|---|---|
|
モードメニューにある オプションを選んで、 (完全透過でも構いませんから) 同じようにすれば、 素晴らしい渦巻模様ができて、 カーソルをドラッグする度に増えて変化します。 |
このツールを起用する方法はつぎのいずれかです。
From the image-menu: → → .
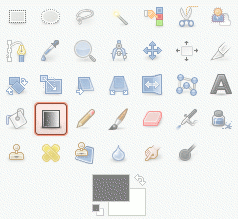
By clicking the tool icon
 .
.
By clicking on the G keyboard shortcut.
一般的にはこのツールを起用すると、 そのツールオプションがツールボックスの下に繋げられたウィンドウ上に現れます。 そのようなウィンドウが見あたらないときは、 画像ウィンドウのメニューより → → と辿れば今使っているツールのツールオプションウィンドウが開きます。
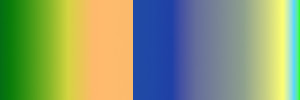
A variety of gradient patterns can be selected from the drop-down list. The tool causes a shading pattern that transitions from foreground to background color or introduces others colors, in the direction the user determines by drawing a line in the image. For the purposes of drawing the gradient, clicking on the reverses the gradient direction with the effect, for instance, of swapping the foreground and background colors.
On the right hand, a button to open the Gradient Editor dialog.
Perceptual RGB: When this option is chosen, the Blend Color Space is sRGB. This is the default.
Linear RGB: When this option is chosen, the Blend Color Space is linearized sRGB (defined by the sRGB primaries and a linear tone reproduction curve). This results in gradients that resemble the physical behavior of light. This option should be used if the color, as measured with a colorimeter, should change linearly with the distance from the color stops within the gradient.
CIE Lab: When this option is chosen, the Blend Color Space is CIE L*a*b*. This perceptionally uniform color space is used to model human perception of color blending.
GIMP には 11 種類の形状があり、 引き出しリストから選べるようになっています。 それぞれの形状を詳しく解説します。
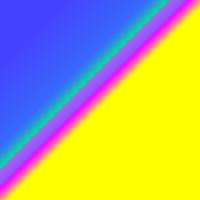
この場合のグラデーションは引かれた線の始点に描画色を置き、 直線的に終点の背景色まで色を変化させてゆきます。
この形状は引かれた線の長さに基づいて決められた距離で、 始点から双方向に向かいます。 たとえば筒状の表現に向いています。
このグラデーションは同心円状に、 中心の描画色から外周の背景色へと描かれます。 指向性照明のないときの球体のように見えます。
四角形、 形状広がり (角張った)、 形状広がり (球面)、 形状広がり (くぼみ) の 4 つの形状は正方形上の変種です。 いずれも正方形の中心に描画色を置いていますが、 正方形の中心は線を引いたときの始点とし、 線の長さが対角線の半分と同じになります。 これら 4 つのオプションはグラデーションの算出規則の変化によるもので、 その違いを見分けるには試してみるのが一番です。
円錐形 (対称) 形状は円錐の頂点を上から見下ろしたような感じの効果があり、 引いた線の向きから背景色で彩られているように見えます。
円錐形 (非対称) は 円錐形 (対称) に似ていますが、 引かれた線の部分が「円錐」の尾根筋のように見えるところが違います。
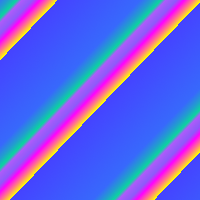
螺旋 形状は渦巻を描くもので、 引いた線の長さで繰り返しの幅が決められます。
None as default.
Sawtooth Wave: the Sawtooth pattern is achieved by beginning with the foreground, transitioning to the background, then starting over with the foreground.
Triangular Wave: starts with the foreground, transitions to the background, then transitions back to the foreground.
Truncate: areas before and after endpoints are truncated.
ディザー効果の十分な説明が 用語集 で読めます。
これは斜線や曲線上での際だった色変化で起こるぎざぎざの現象を抑え、 より高度な方法で平滑化します。 ともかく試してみないことには選びようがないオプションですね。
オフセット 値はグラデーションの「傾斜」の増加を可能にします。 クリックした始点と色変化が起こる位置を分けてその間の距離を定めます。 線形以外の形状にはこのオプションが適用されません。
![[警告]](images/warning.png)
|
警告 |
|---|---|
|
The option must be activated (with Shift also) before starting drawing gradient. |
When this option is checked, gradient tool works as in GIMP 2.8: the gradient line disappears as soon as you release the mouse button. You can't edit color stops before applying the gradient fill.
When this option is checked, gradient tool works as in GIMP 2.8: the custom gradient is not created automatically and must be created manually. The option can be activated before starting drawing gradient or if the active gradient is not the custom gradient. Allows changing user-writable gradients directly rather than creating copies of them.
All the Gradient Editor dialog features are available directly on canvas. You can create and delete color stops, select and shift them, assign colors to color stops, change blending and coloring for segments between color stops, create color stops from midpoints.
Select a gradient in the gradient dialog. Click and drag on canvas. A line is drawn and the gradient is displayed. You can edit this gradient by moving the mouse pointer on this line. As soon as you try to edit gradient, GIMP creates a custom gradient, which is a copy of the selected gradient. It becomes the active gradient and will be preserved across sessions. Here, we use the Abstract3 gradient.
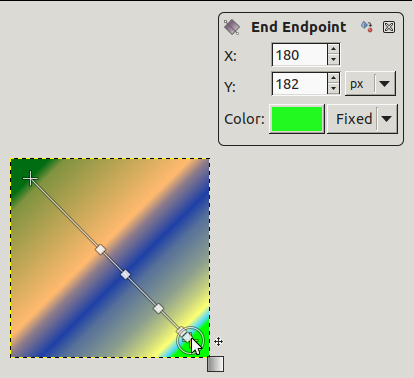
The Abstract3 gradient, with endpoints
At both ends of the line, you can see a Start endpoint and an End endpoint. Click and drag an endpoint (the mouse pointer is accompanied with a moving cross) to move it where you want on your screen. A small window appears showing data about the selected endpoint : the position of the mouse (coordinate origin is the upper left corner of image or selection), the starting (left) and the ending (right) color of the gradient.
End point moved
![[注記]](images/note.png)
|
注記 |
|---|---|
|
In you only move endpoints, the custom gradient is not created yet. |
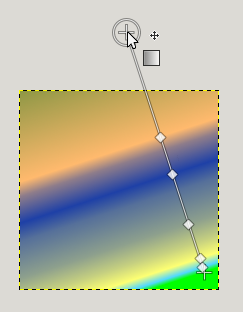
On the line, you can see several small squares. These are Stops that divide gradient into segments. You can edit segments separately. Click and drag stops to move them (the active endpoint takes a yellow color). As soon as you move a stop, the custom gradient is created. The small data window shows a button that allow you to remove the active stop.
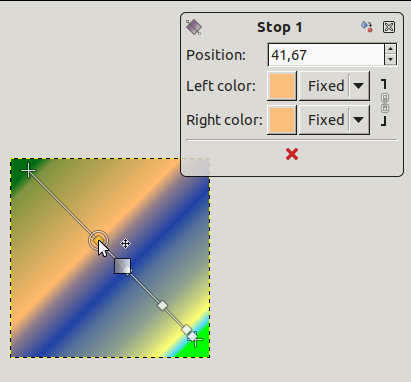
Stop point moved and data window
If you move the mouse pointer on the line, a
Midpoint shows up. Then, the small data window
has two buttons :  to create
a new stop at midpoint, and
to create
a new stop at midpoint, and  to center
midpoint.
to center
midpoint.

For Stops and Midpoints, Position refers to the gradient line: 0 is start endpoint, 100 is end endpoint.
Blending: you can change the blending mode between two stops, using the drop-down list. The Step option creates a hard-edge transition between the two adjacent color stops at the midpoint.
Changing color: in stop and end data windows, you have color buttons with a drop-down list. The default option is Fixed; this means that color choice will be independent from foreground and background colors. Click on a color button to open a color selector.
Ctrl キーは制限つきの直線を引くのに使われます。 線の傾きは 15 度刻みの方向のいずれかのみ選べます。
Alt or Ctrl+Alt to move the whole line.
The Gradient Editor still exists: 「グラデーションエディター」.