| 13.2. バンプマップ... | ||
|---|---|---|

|
13. マップフィルター |  |
| 13.2. バンプマップ... | ||
|---|---|---|
|
|
13. マップフィルター | |
図17.288 「バンプマップ」の使用例

左図は起伏をつける前の対象画像。 中央はバンプマップ。 黒いところほど掘り下げ白いところほど盛り上げることを意図するグレースケール画像である。 右図はバンプマップ後の対象画像。 フィルターは陰だけでなく影もつけている。
This filter creates a 3D effect by embossing an image (the card) and then mapping it to another image. Bump height depends on pixel luminosity and you can set light direction. See Emboss for more information about embossing. You can bump map any type of image, unlike the Emboss filter.
![[注記]](images/note.png)
|
注記 |
|---|---|
|
These options are described in 「Common Features」. |
Clicking on this button opens a small file browser with two panels. On the left panel, images present on your screen are listed: the active image is selected. On the right panel, you see the layers list of the active image: double click on the layer you want to use as a map for bump-mapping; the file browser is closed and a layer thumbnail appears in the Aux Input button.
The right panel has a 「Channel」 tab: TODO
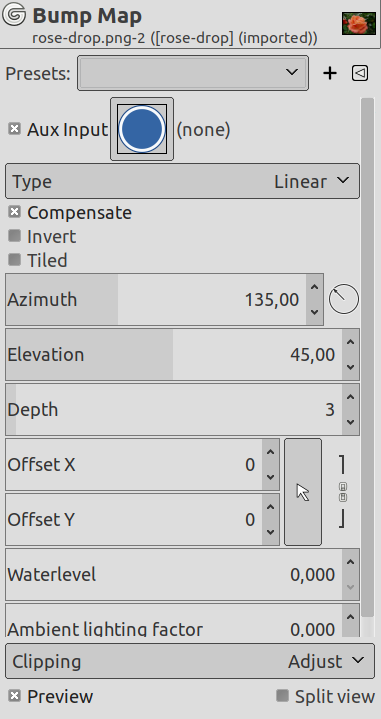
このオプションではマップ化画像を生成する過程で使われる処理方法をつぎのなかから選べます。
起伏の高さは光度と一次関数的な比例関係になります。
Bump height is a spherical function of luminosity.
起伏の高さは光度と正弦関数的な関係になります。
バンプマップ処理は画像を暗くしがちです。 このオプションを有効にすればそのような暗化を補正できます。
既定なら明るい画素は盛り上げを、 暗い画素は掘り下げを意味します。 このオプションはその効果を逆転します。
このオプションを有効にすると画像がウェブページなどで反復連続で表示できるよう浮き彫りの断絶をなくします。 画像の縁の起伏は反対側の辺とつながるようにつけられ、 並べても継ぎ目が目立ちません。
このスライダーで光の射してくる方角を 0.00 度 (右-東から) から 360.00 度 (同) まで反時計回りの範囲で設定できます。
このスライダーで光の射角を 0.50 度 (水平線上) から 90.00 度 (天頂) までの範囲で指定できます。
このスライダーで起伏の底部と頂部の高度差を設定できます。 値を高くすれば起伏は大きくなります。 値の範囲は 1 から 65 までです。
これらのスライダーで対象画像からマップ化画像への相対位置を水平方向(右に正) に X オフセット で、 垂直方向 (下に正) に Y オフセット で設定できます。
マップ化しておく画像に透過部分があると、 その部分は黒いと見做されバンプマップ処理では掘り下げられることになります。 このスライダーはその穴にあたかも水を張ったかのように嵩上げします。 水位を最高の 255 に引き上げると穴は完全に消えます。 反転バンプマップ オプションを有効にしている場合は透過部分が明るい領域と見做され、 水位の値はその峰を切り下げる役目になります。
このスライダーは包み込むような光の強さを調節します。 高い値をとると影が薄れ浮き彫りは減ります。
We shall emboss an image with a text.
Open your main image.
Create the map: here a white text on black background.

The image and the map
Edit/Copy the map. Activate the image and Edit/Past as/New Layer. Right click on the new layer and apply Layer to Image Size to make the layer the same size as the image.
The map layer being active, apply a Gaussian Blur. Here, the default 1.5 pixels is used.
Make the map layer invisible and activate the image layer.
Open the 「Bump Map」 filter. Click on the button and double-click on the text layer in the right panel.

Bump Map filter applied. Depth = 3. Ambient lighting factor = 0.326.