| 8.55. Llindar | ||
|---|---|---|

|
8. El menú «Colors» |  |
| 8.55. Llindar | ||
|---|---|---|
|
|
8. El menú «Colors» | |
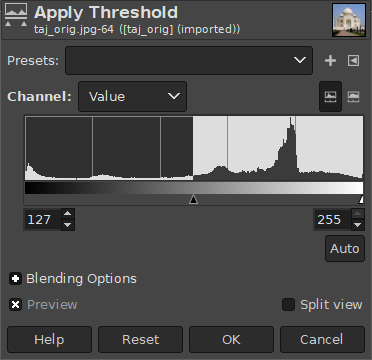
The Threshold filter transforms the current layer or the selection into a black and white image, where white pixels represent the pixels of the image where the value for the chosen Channel is in the threshold range, and black pixels represent pixels with a value outside the threshold range.
Podeu utilitzar-la per a realçar una imatge en blanc i negre (per exemple, un text escanejat) o per a crear màscares de selecció.
![[Nota]](images/note.png)
|
Nota |
|---|---|
|
As this filter creates a black and white image, the anti-aliasing of the original image disappears. If this poses a problem, use the Levels tool instead. |
There are different possibilities to activate this:
You can access it from the image menu through → ,
or by clicking the
 icon in the Toolbox if Threshold has been enabled as a tool (which is
disabled by default). For this,
please refer to Secció 1.13, «Caixa d'eines».
icon in the Toolbox if Threshold has been enabled as a tool (which is
disabled by default). For this,
please refer to Secció 1.13, «Caixa d'eines».
«Presets» are a common feature for several Colors commands. You can find its description in Secció 8.1.1, «Característiques comunes dels colors».
This allows you to select which channel(s) will be used to apply the Threshold. The default is Value, which will use all color channels, but you can also choose to use a single channel: Red, Green, Blue and Alpha (only available when the layer has an alpha channel), Luminance, or RGB.
These two buttons to the right of the Channel selection let you choose the type of histogram shown.
The Threshold tool provides a visual graph, a histogram, of the intensity value of the active layer or selection. You can set the threshold range either using the minimum and maximum input boxes, or by clicking and dragging on the graph. It allows you to select a part of the image with some intensity from a background with another intensity. Pixels inside the range are white, and the others are black. Adjust the range to get the selection you want in white on black background. The button can be used to automatically adjust the threshold.
These are common features described in Secció 8.1.1, «Característiques comunes dels colors».
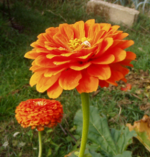
That's not always the case, but an element you want to extract from an image can stand out well against the background. In this case, you can use the Threshold tool to select this element as a whole. Grokking the GIMP described a method based on a channel mask, but now, using the Quick mask is easier.
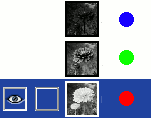
First start decomposing your image into its RGB and HSV components by using the Decompose filter. A new grayscale image is created and the components are displayed as layers in the Layer dialog. These layers come with a thumbnail but it is too small for an easy study. You can, of course, increase the size of this preview with the dialog menu (the small triangular button), but playing with the «eyes» is more simple to display the wanted layer in the decompose image. Select the layer that isolates the element the best.
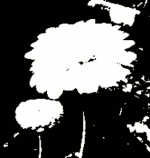
Crideu l'eina llindar des de la imatge descomposta. Si moveu el cursor negre, ajusteu el llindar per a aïllar el millor element que vulgueu extreure. Probablement això no serà perfecte: millorarem el resultat amb la màscara de selecció que crearem.
![[Avís]](images/warning.png)
|
Avís |
|---|---|
|
Assegureu-vos que heu seleccionat la capa adequada quan agafeu l'eina Llindar: quan s'ha obert, no podeu canviar a una altra capa. |
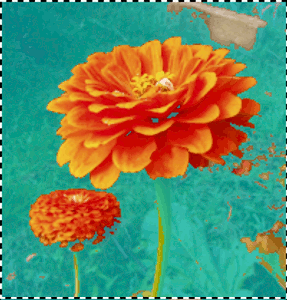
Figura 16.253. La capa seleccionada després d'ajustar el llindar
Tenim el millor contorn per a la nostra flor. Hi ha diversos objectes vermells que hem de treure.
Assegureu-vos que la imatge que mostra la capa seleccionada estigui activa i copieu-la al porta-retalls amb Ctrl+C.
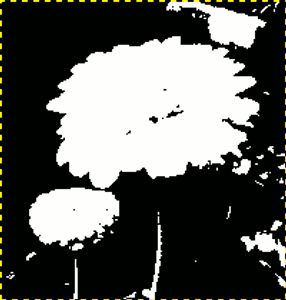
Ara, activa la imatge original. Feu clic al botó al cantó inferior esquerre de la finestra de la imatge: la imatge es recobreix amb una màscara translúcida vermella (per defecte). Aquest color vermell no s'adapta bé a la imatge amb molt de vermell: aneu al diàleg del canal, activeu el canal «Màscara ràpida» i canvieu aquest color amb l'. Torneu a la imatge original. Premeu Ctrl+V per a enganxar la capa copiada anteriorment.
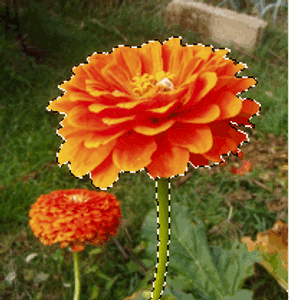
Heus ací. La màscara de selecció està preparada: podeu millorar la selecció de forma habitual. Quan la selecció estigui a punt, desactiveu la Màscara Ràpida fent clic de nou al botó: podreu veure el caminet de formiguetes al voltant de la selecció.
Vam utilitzar la Lupa per a treballar a nivell de píxel, la Selecció Lliure per a eliminar grans àrees no desitjades, el llapis (per a aconseguir límits durs), pintura negra per a eliminar zones seleccionades, pintura blanca per a afegir zones seleccionades, especialment per a la tija.