| 3.11. Вставить как | ||
|---|---|---|
 |
3. Меню «Правка» |  |
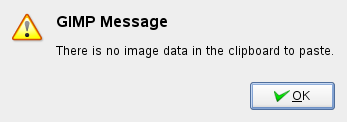
This command pastes the clipboard contents. Of course, you must use the «Copy» command before, so that you have something in the clipboard. Else you will be prompted a warning:

or, if there is something you have forgotten, it will be pasted! There is no way to empty the clipboard.
This command leads to the sub-menu:
The command creates a new image and pastes the image data from the Clipboard into it. If the data is not rectangular or square in shape, any regions outside the selection are left transparent (an alpha channel is automatically created). Of course, you have to copy your selection before you use this command, so that you get an image with the same dimensions as the selection.
This command has the same action as the → → command.
The command creates a new layer in the active image and pastes the image data from the Clipboard into it. If the data are not rectangular or square in shape, any regions that do not extend to the edge of the canvas are left transparent (an Alpha channel is automatically created). Of course, you have to Copy your selection before you use this command.
This command opens a dialog window which lets you name the new brush. The brush appears in the Brushes dialog.
Brush name is the name as it will be in the «Brushes» Dialog.
The new brush is saved as File name (with
extension .gbr) in your
personal brushes folder.
Spacing: When the brush draws a line, it actually stamps the brush icon repeatedly. If brush stamps are very close, you get the impression of a solid line.
This command opens a dialog window which allows you to name your new pattern. The pattern appears in the Patterns dialog.
Pattern name is the name as it will be in the Pattern Dialog.
The new pattern is saved as File name (with
extension .pat) in your
personal patterns folder.