| Hoofdstuk 4. Getting Unstuck | ||
|---|---|---|
 |
Deel I. Getting Started |  |
| Hoofdstuk 4. Getting Unstuck | ||
|---|---|---|
| |
Deel I. Getting Started | |
Hmmmm, de zaak lijkt vast te zitten. U probeert met een gereedschap een bewerking uit te voeren, maar er gebeurd eenvoudig niets en niets lijkt te helpen. Na enige tijd breekt het zweet uit en bekruipt u het onheimelijke gevoel dat er niets anders op zit dan het programma af te schieten en de laatste bewerkingen waar u zo uw best op heeft gedaan, kwijt te raken. Niet echt wenselijk dus.
Well, hold on a second. This happens pretty frequently, even to people who've used GIMP for a long time, but generally the cause is not so hard to figure out (and fix) if you know where to look. Lets be calm, and go through a checklist that will probably get you GIMPing happily again.
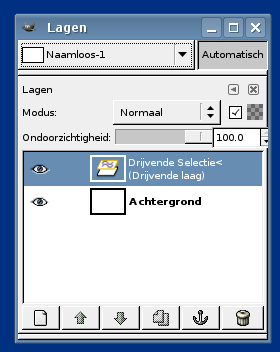
How to tell: If there is a floating selection, many actions are impossible until the floating section is anchored. To check, look at the Layers dialog (making sure it's set to the image you're working on) and see whether the top layer is called “Floating Selection”.
Oplossing: Veranker de selectie of zet hem om in een normale (niet drijvende-) laag. Meer hulp hierbij willen we in het hoofdstuk over Drijvende selecties beschikbaar maken.
Afbeelding 4.2. Een probleem met de zichtbaarheid van de selectie.
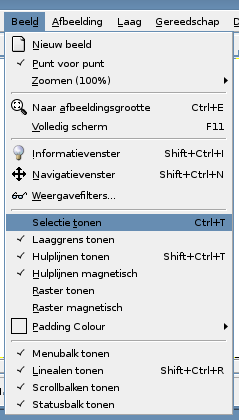
Vergewis u ervan of in het -menu wel aangevinkt staat.
How to tell: If this is the problem, merely reading this will already have made you realize it, probably, but to explain in any case: sometimes the flickering line that outlines the selection is annoying because it makes it hard to see important details of the image, so GIMP gives you the option of hiding the selection, by unchecking in the menu. It is easy to forget that you have done this, though.
Oplossing: Als het vakje bij uit het niet aangevinkt staat dient u dat dus aan te vinken door er op te klikken.
Afbeelding 4.3. Oplossen door te selecteren
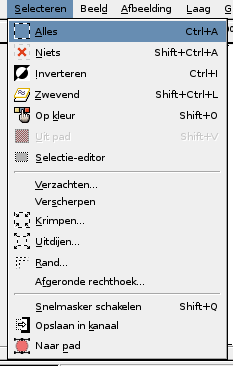
Door op in het -menu te klikken kunt u zorgen dat alles geselecteerd staat.
How to fix: If doing this has destroyed a selection that you wanted to keep, hit Ctrl+Z (undo) a couple of times to restore it, and then we'll figure out what the problem is. There are a couple of possibilities. If you couldn't see any selection, there may have been a very tiny one, or even one that contained no pixels. If this was the case, it surely is not a selection that you wanted to keep, so why have you gotten this far in the first place? If you can see a selection but thought you were inside it, it might be inverted from what you think. The easiest way to tell is to hit the Quick Mask button: the selected area will be clear and the unselected area will be masked. If this was the problem, then you can solve it by toggling Quick Mask off and choosing Invert in the menu.
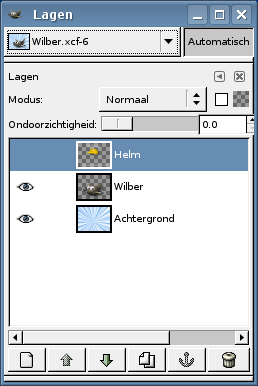
Afbeelding 4.4. De onzichtbaarheid van een laag oplossen
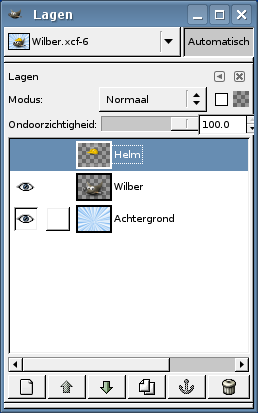
Het lagen dialoogvenster met de zichtbaarheid van de actieve laag uitgeschakeld.
How to tell: The Layers dialog gives you ability to toggle the visibility of each layer on or off. Look at the Layers dialog, and see if the layer you are trying to act on is active (i.e., darkened) and has an eye symbol to the left of it. If not, this is your problem.
How to fix: If your intended target layer is not active, click on it in the Layers dialog to activate it. (If none of the layers are active, the active drawable might be a channel -- you can look at the Channels tab in the Layers dialog to see. This does not change the solution, though.) If the eye symbol does not appear, click in the Layers dialog at the left edge to toggle it: this should make the layer visible. See the Help section for the Layers Dialog if you need more help.
Afbeelding 4.5. Een transparante laag oplossen
Het lagen dialoogvenster met de ondoorzichtigheid van de actieve laag op nul gesteld.
How to tell: When the opacity is set 0 on the layer, you cannot see anything which you draw on it. Look the Opacity slider, and see which side the slider placed at. If it is at the leftmost side, that is your problem.
Wat is het probleem?: Als u een laag bewerkt waarvan ondoorzichtigheid nul is, zult u niets zien gebeuren. Deze situatie kunt u herkennen als de schuifknop van de Ondoorzichtigheid in het Lagen dialoogvenster helemaal naar links geschoven is.
How to tell: In GIMP, layers don't need to have the same dimensions as the image: they can be larger or smaller. If you try to paint outside the borders of a layer, nothing happens. To see if this is happening, look for a black-and-yellow dashed rectangle that does not enclose the area you're trying to draw at.
Oplossing: U kunt de laag vergroten. Dit kunt u met twee opdrachten aan de onderkant van het -menu doen; om de laag op iedere gewenste grootte in te stellen en om ze precies even groot als de afbeelding te maken.
How to tell:GIMP can handle three different color modes: RGB(A), Indexed and Grayscale. The indexed colormode uses a colormap, where all used colors on the image are indexed. The color picker in GIMP however, let you choose RGB colors. That means, if you try to paint with a different color than it is indexed in the colormap, you end up in very undetermined results (e.g. it paints with the wrong color or you can't paint).
Oplossing: Het is het beste om in GIMP altijd de RGB-kleurenmodus te gebruiken. Met de Modus-menukeuze uit het smenu kunt u een andere kleurenmodus kiezen.