| 2.7. Intelligent Scissors | ||
|---|---|---|
 |
2. Herramientas de selección |  |
| 2.7. Intelligent Scissors | ||
|---|---|---|
| |
2. Herramientas de selección | |
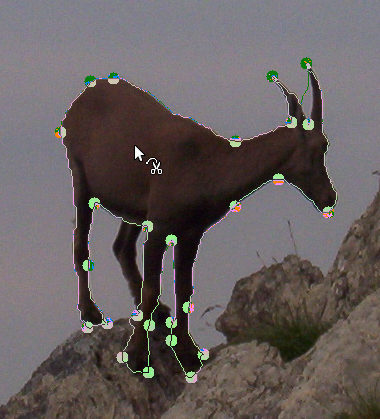
Esta herramienta es una pieza interesante: tiene algunas características en común con el lazo, otras con las rutas, y características propias. Es útil cuando intenta seleccionar una región que está bien delimitada por cambios de color. Para emplear las tijeras, Ud. hace clic sobre el borde de la región que intenta seleccionar, determinando un conjunto de "nodos de control". La herramienta produce una curva continua que pasa por los nodos de control, siguiendo el borde de alto contraste que intenta hallar. Si Ud. tiene suerte, la ruta que halla la herramienta se corresponderá con el contorno del área que intenta seleccionar.
Desafortunadamente, a veces parecen haber algunos problemas con el algoritmo que determina el borde a seguir, y el resultado tiende a ser bastante crudo en muchos casos. Una buena manera de corregirlo es pasar al modo de máscara rápida y emplear herramientas de pintura para limpiar las partes problemáticas. En general, la gente encuentra más útil a la herramienta de rutas que a las tijeras, porque aunque no posee la capacidad de seguir los bordes, su curva persiste hasta que Ud. decide borrarla, y puede cambiarla en cualquier momento.
You can access to the Intelligent Scissors Tool in different ways:
From the image menu bar → → ,
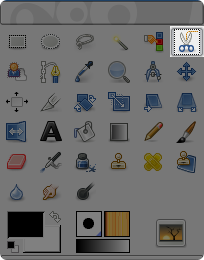
by clicking on the tool icon
 in the ToolBox,
by using the keyboard shortcut I.
The default behavior of the Shift, Ctrl, and Alt keys is described in Sección 2.1.1, “Key modifiers (Defaults)” for all selection tools.
There is, however, one key modifier that has a special behavior if you use it while editing a selection, that is after you have added the first node:
By default, the auto-edge snap feature is enabled: whenever you click and drag the mouse pointer, the Scissors tool finds the point of the maximal gradient (where the color change is maximal) for placing a new control node or moving an existing node.
Holding down this key while clicking and dragging disables this feature, and the control node will be placed at the position of the mouse pointer.
Cada vez que se hace un clic izquierdo con el ratón, se crea un punto de control, que se conecta con el punto de control anteriormente colocado, por una curva que intenta seguir bordes de la imagen. Para finalizar, haga clic sobre el primer punto de control (el cursor cambia para indicar cuándo se halla en el punto correcto). Puede ajustar la curva arrastrando los puntos de control. Cuando esté satisfecho, haga clic en cualquier lugar dentro de la curva para convertirla en una selección.
As said above when you click with this tool you drop points. The
selection boundary is driven by these control points. During creation you
can move each one by clicking and dragging, except the first and the last
one. The selection is closed when you are clicking the last point over
the first one. When the selection is closed the pointer shape
changes according to its position: inside
 ,
on the boundary
,
on the boundary
 ,
and outside
,
and outside
 .
You can adjust the selection creating new points by clicking on the
boundary or by moving each control points (merged first and last
point). The selection is validated when you click inside.
.
You can adjust the selection creating new points by clicking on the
boundary or by moving each control points (merged first and last
point). The selection is validated when you click inside.
You have to notice that you can get only one selection; if you create a second selection, the first one is erased when you validate the second one.
![[Aviso]](images/warning.png)
|
Aviso |
|---|---|
|
Be sure not to click inside the curve until you are completely done adjusting it. Once you have converted it into a selection, undoing takes you back to zero, and you will have to to start constructing the curve again from scratch if you need to change it. Also be sure not to switch to a different tool, or again all of your carefully created control nodes will be lost. (But you still can transform your selection into a path and work it with the Path tool.) |
To move the selection, see Moving selections.
Normally, tool options are displayed in a window attached under the Toolbox as soon as you activate a tool. If they are not, you can access them from the image menu bar through → → which opens the option window of the selected tool.
![[Nota]](images/note.png)
|
Nota |
|---|---|
|
Diríjase a la sección Herramientas de selección para conocer las opciones que son comunes a todas las herramientas de este grupo. Aquí sólo se explican las opciones específicas a la herramienta de selección rectangular. |
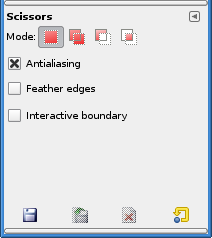
Si se activa esta opción, al arrastrar un punto de control mientras se lo ubica, se muestra el camino que tomará la curva. Si no está activada, el punto se muestra conectado al anterior por una línea recta mientras lo arrastra, y no verá el camino resultante hasta que libere el botón del ratón. En sistemas lentos, si los puntos están muy alejados, desactivar esta opción puede hacer que la herramienta trabaje más rápido.