| 2.4. Diálogo Mapa de colores | ||
|---|---|---|
 |
2. Diálogos relacionados con la estructura de la imagen |  |
| 2.4. Diálogo Mapa de colores | ||
|---|---|---|
| |
2. Diálogos relacionados con la estructura de la imagen | |
Este diálogo le permite editar el mapa de colores de una imagen indizada. Si el modo de la imagen activa es RGB o "a escala de grises" en vez de indizado, este diálogo se muestra vacío porque no tendría utilidad. Es un diálogo empotrable, y se puede activar de dos maneras:
The “Colormap” dialog is a dockable dialog; see the section Sección 2.3, “Diálogos empotrables” for help on manipulating it.
You can access it:
from the image menu: → → ;
from the Tab menu in any dockable dialog by clicking on
 and selecting
→ .
and selecting
→ .
In the menu, there is a list of detached windows which exists only if at least one dialog remains open. In this case, you can raise the “Colormap” dialog from the image-menu: → .
In an Indexed image, instead of being assigned a color directly (as happens in RGB and Grayscale images), colors are assigned to pixels by an indirect method, using a look-up table called a colormap.
To determine the color that should be shown for that pixel, GIMP looks up the index in the image's colormap. Each indexed image has its own private colormap. In GIMP, the maximum number of entries in a colormap is 256. For a maximum-sized colormap, each index from 0 to 255 is assigned an arbitrary RGB color. There are no rules restricting the colors that can be assigned to an index or the order they appear in: any index can be assigned any color.
It is important to realize that the colors in the colormap are the only colors available for an indexed image (that is, unless you add new colors to the colormap). This has a major effect on many GIMP operations: for example, in a pattern fill, GIMP will usually not be able to find exactly the right colors in the colormap, so it will approximate them by using the nearest color available. This is sometimes referred to as Quantization. If the colormap is too limited or poorly chosen, this can easily produce very poor image quality.
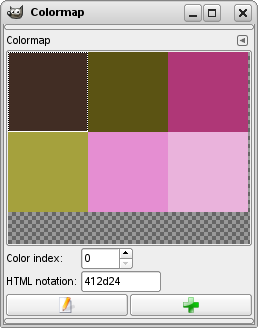
The Colormap dialog allows you to alter the colormap for an image, either by creating new entries, or by changing the colors for the existing entries. If you change the color associated with a given index, you will see the changes reflected throughout the image, as a color shift for all pixels that are assigned that index. The entries are numbered with 0 in the upper left corner, 1 to its right, etc.
Empleo del diálogo Mapa de colores
Click sobre una entrada de color
This sets GIMP's background color to the color you Ctrl-click on, as shown in the Toolbox color area.
Doble clic sobre una entrada de color
Índice de colores
Notación HTML
Editar el color
 Este botón está ubicado en la esquina inferior izquierda del diálogo. Hace aparecer un selector de color, que le permite cambiar el color de la entrada actualmente seleccionada. El efecto es similar a hacer doble clic sobre la entrada, pero no cambia el color de frente del GIMP.
Añadir color
![[Sugerencia]](images/tip.png)
|
Sugerencia |
|---|---|
|
If you make a mistake, you can undo it by focusing the pointer in the image whose colormap you have changed, and then pressing Ctrl+Z or choosing → in the image menu. |
![[Nota]](images/note.png)
|
Nota |
|---|---|
|
This dialog provides the most commonly used methods for altering the colormap for an indexed image. The color tools, such as Brightness/Contrast, Hue/Saturation, etc, do not operate on indexed images. There are a few plug-ins that do so, including the “Normalize”, “VColor Enhance”, and “Stretch Contrast” operations, and it is possible to create others as well. |
|
|
Nota |
|---|---|
|
Este diálogo le proporciona los métodos que más se utilizan para cambiar los colores de una imagen indizada. Las herramientas de color, como Brillo/Contraste o Tono/Saturación, no pueden usarse en este tipo de imágenes. Y sólo unos pocos filtros pueden emplearse. |
The Colormap context menu
Figura 14.15. If you paint an indexed image with a color which is not in the Colormap, GIMP will use the most similar color of the Colormap.
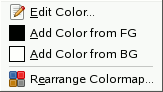
Edit color
Add from FG
Add from BG
Rearrange Colormap