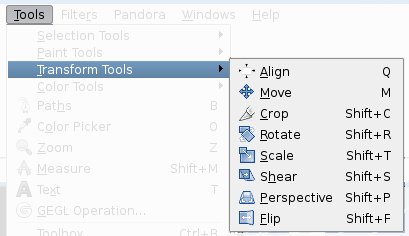
| 4. Transform Tools | ||
|---|---|---|
 |
Chapter 13. Tools |  |
| 4. Transform Tools | ||
|---|---|---|
| |
Chapter 13. Tools | |
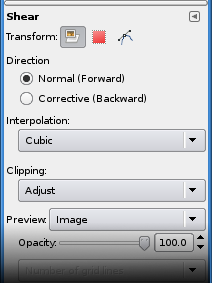
Inside the Transformation tool dialog, you will find eight tools to modify the presentation of the image or the presentation of an element of the image, selection, layer or path. Each transform tool has an Option dialog and an Information dialog to set parameters.
Some options are shared by several transform tools. We will describe them here. More specific options will be described with their tool.
GIMP offers you three buttons which let you select which image element the transform tool will work on.
![[Note]](images/note.png)
|
Note |
|---|---|
|
Remember that the Transform option persists when you quit the tool. |
When you activate the first button
 the tool works on the active layer. If no selection exists in
this layer, the whole layer will be transformed.
the tool works on the active layer. If no selection exists in
this layer, the whole layer will be transformed.
When you activate the second button
 the tool works on the selection contour only (the whole layer
contour if no selection).
the tool works on the selection contour only (the whole layer
contour if no selection).
When you activate the third button,
 the tool works on the path only.
Direction sets which way or direction a layer is transformed:
The “Normal (Forward)” mode will transform the image or layer as one might expect. You just use the handles to perform the transformation you want. If you use a grid (see below), the image or layer is transformed according to the shape and position you put the grid into.
“Corrective (Backward)” inverts the direction. Primarily used with the Rotation tool to repair digital images that have some geometric errors (a horizon not horizontal, a wall not vertical...). See Section 4.5, “Rotate”.
This drop-down list lets you choose the method and thus the quality of the transformation:
The color of each pixel is copied from its closest neighboring pixel in the original image. This often results in aliasing (the “stair-step” effect) and a coarse image, but it is the fastest method. Sometimes this method is called “Nearest Neighbor”.
The color of each pixel is computed as the average color of the four closest pixels in the original image. This gives a satisfactory result for most images and is a good compromise between speed and quality. Sometimes this method is called “Bilinear”.
The color of each pixel is computed as the average color of the eight closest pixels in the original image. This usually gives the best result, but it naturally takes more time. Sometimes this method is called “Bicubic”.
The Lanczos3 method uses the Sinc mathematical function and performs a high quality interpolation.
You can set the default interpolation method in the Tools Options Preferences dialog.
After transformation, the image can be bigger. This option will clip the transformed image to the original image size.
You can choose between several ways to clip:
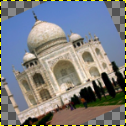
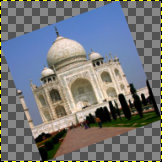
Figure 13.94. Original image for examples
Original image
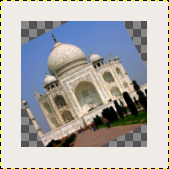
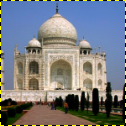
Rotation applied with “Adjust”
Rotation applied with “Adjust” and canvas enlarged to layer size
With Adjust: the layer is enlarged to contain all the rotated layer. The new layer border is visible; the whole layer becomes visible by using the → command.
With Clip: all what exceeds image limits is deleted.
Figure 13.96. Example for Crop to result

Rotation 45° with Crop to result
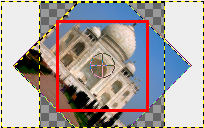
The crop limit is marked with red. No transparent area is included.
If this option is selected, the image is cropped so that the transparent area, created by the transform operation in corners, will not be included in the resulting image.
This option works like the one described before, but makes sure, that the aspect ratio is maintained.
GIMP lets you select among four Preview possibilities:
Puts a frame to mark the image outline, with a handle on each corner. Movements will affect this frame only on the Preview, but the result of the transformation will concern either the content or the boundaries of the selection according to the selected Affect mode.
Puts a grid on the image, with four handles. Movements will affect this grid only on the Preview, but the result of the transformation will concern either the content or the boundaries of the selection according to the selected Transform mode.
Here, the preview is a copy of the image superimposed on the image, with an outline. Movements affect this copy and the underlying image appears.
Both turn at the same time.
Options with grid activate a drop-list with two options: Number of Grid Lines will allow control over the total number of displayed grid lines. Use the slider to set the number of grid lines. Grid Line Spacing allows control over the distance between the grid lines. Use the slider to set the distance.
This slider lets you set the preview opacity.
|
|
Note |
|---|---|
|
When rotating a path, Preview options are not valid: only Outline is active. |