| 6.6. Text | ||
|---|---|---|
 |
6. Other |  |
| 6.6. Text | ||
|---|---|---|
| |
6. Other | |
The Text tool places text into an image. When you click on an image with this tool the Text Editor dialog is opened where you can type your text, and a text layer is added in the Layer Dialog. In the Text Option dialog, you can change the font, color and size of your text, and justify it, interactively.
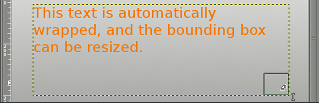
A new possibility appeared with GIMP-2.6: click-dragging the mouse pointer on the canvas draws a rectangular frame that you can enlarge and move as you do with rectangular selections. The text you type in the Text Editor is displayed in this frame and automatically adapted to the frame size. You can adjust this frame whenever you like.
When the mouse pointer is around the center of the frame, it
comes with a small crosshair
 .
Click-and-drag to move the frame and its contents (the text shows up when
you release the mouse button). The text remains at the same place in the
frame.
.
Click-and-drag to move the frame and its contents (the text shows up when
you release the mouse button). The text remains at the same place in the
frame.
You can access this tool in several ways:
In the image menu through → ,
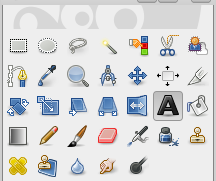
by clicking the tool icon
 in Toolbox,
or by using the T keyboard shortcut.
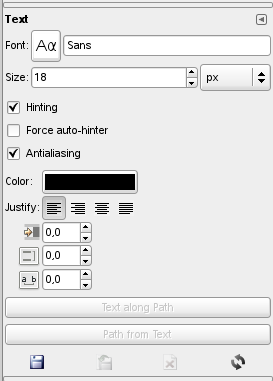
Normally, tool options are displayed in a window attached under the Toolbox as soon as you activate a tool. If they are not, you can access them from the image menu bar through → → which opens the option window of the selected tool.
Click on the fonts button to open the font selector of this tool, which offers you a list of installed X fonts.
At the bottom of the font selector you find some icons which act as buttoms for:
resizing the font previews,
selecting list view or grid view,
opening the font dialog.
Choose a font from the installed fonts. When you select a font it is interactively applied to your text.
![[Tip]](images/tip.png)
|
Tip |
|---|---|
|
You can use the scroll wheel of your pointing device (usually your mouse) on the fonts button in order to quickly change the font of your text (move the pointer on the fonts button, and don't click, just use the wheel button). |
This control sets the size of the font in any of several selectable units.
Uses the indices of adjustment to modify the characters in order to produce clear letters in small font sizes.
Auto Hinter tries to automatically compute information for better representation of the character font.
Antialiasing will render the text with much smoother edges and curves. This is achieved by slight blurring and merging of the edges. This option can radically improve the visual appearance of the rendered typeface. Caution should be exercised when using antialiasing on images that are not in RGB color space.
Color of the text that will be drawn next. Defaults to black. Selectable from the color picker dialog box that opens when the current color sample is clicked.
|
|
Tip |
|---|---|
|
You can also click-and-drag the color from the Toolbox color area onto the text. |
Causes the text to be justified according to any of four rules selectable from the associated icons.
Controls the indent spacing from the left margin, for the fist line.
Controls the spacing between successive lines of text. This setting is interactive: it appears at the same time in image text. The number is not the space between lines itself, but how many pixels must be added to or subtracted from this space (the value can be negative).
Controls the spacing between letters. Also in this case the number is not the space itself between letters, but how many pixels must be added to or substracted from this space (the value can be negative).
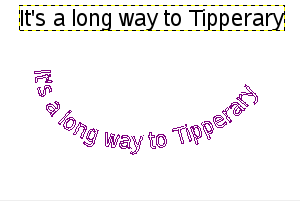
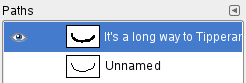
This option is enabled only if a path exists. When your text is created, then create or import a path and make it active. If you create your path before the text, the path becomes invisible and you have to make it visible in the Path Dialog.
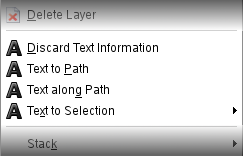
This command is also available from the “Layer” menu:
Figure 13.177. The Text to Path command among text commands in the Layer menu
This group of options appears only if a layer text exists.
If you want to use a text which already exists, make it active in the Layer dialog, select the Text tool and click on the text in the image window.
Click on the button. The text is bent along the path. Letters are represented with their outline. Each of them is a component of the new path which appears in the Path dialog. All path options should apply to this new path.
This tool creates a selection path from the selected text. Every letter is surrounded with a path component. So you can modify the shape of letters by moving path control points.
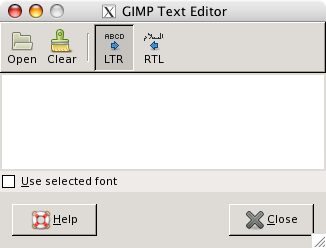
This dialog window is opened when you click on the image with the Text Tool. There, you can enter the text which shows up in real time in the frame on top of the canvas.
You can correct the text you are writing and you can change the text font with the Font Editor.
As soon as you start writing, a Text layer is created in the Layer
Dialog. On an image with such a layer (the image you are working on, or
a .xcf image), you can resume
text editing by activating this text layer then clicking on it (double
click). Of course, you can apply to this text layer the same functions
you use with other layers.
To add another text to your image click on a non-text layer: a new Text Editor will appear and a new text layer will be created. To pass from a text to another one activate the corresponding text layer and click on it to activate the editor.
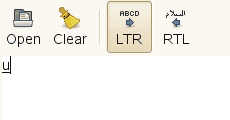
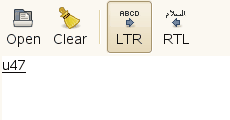
You can get Unicode characters with Ctrl+Shift+U plus hexadecimal Unicode code of the desired char, for example:
Of course this feature is more useful for entering special (even exotic) characters, provided that the required glyphs for these characters are supplied by the selected font — only few fonts support Klingon. ;-)
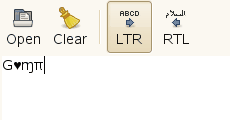
Unicode 0x47 (“G”), 0x2665, 0x0271, 0x03C0
The Text Editor options
 Load text from file
Text can be loaded from a text file by clicking the folder icon in the text editor. All the text in the file is loaded.
Clicking this icon clears the editor and the associated text on the image.
This option causes text to be entered from left to right, as is the case with most Western languages and may Eastern languages.
This option allows text to be entered from right to left, as is the case with some Eastern languages, such as Arabic (illustrated in the icon).
Default doesn't use the font you have selected in the Options dialog. If you want to use it, check this option.
![[Note]](images/note.png)
|
Note |
|---|---|
|
See also Section 5, “Text”. |