| 2.5. Fuzzy selection (Magic wand) | ||
|---|---|---|
 |
2. Selection Tools |  |
| 2.5. Fuzzy selection (Magic wand) | ||
|---|---|---|
| |
2. Selection Tools | |
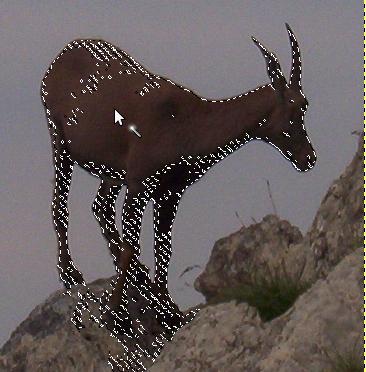
The Fuzzy Select (Magic Wand) tool is designed to select areas of the current layer or image based on color similarity.
When using this tool, it is very important to pick the right starting point. If you select the wrong spot, you might get something very different from what you want, or even the opposite.
The Wand is a good tool for selecting objects with sharp edges. It is fun to use, so beginners often start out using it a lot. You will probably find, however, that the more you use it, the more frustrated you become with the difficulty of selecting exactly what you want, no more, no less. More experienced users find that the Path and Color Select tools are often more efficient, and use the Wand less. Still, it is useful for selecting an area within a contour, or touching up imperfect selections. It often works very well for selecting a solid-colored (or nearly solid-colored) background area.
Note that as the selected area expands outward from the center, it does not only propagate to pixels that touch each other: it is capable of jumping over small gaps, depending on Threshold option. To increase/decrease Threshold, during the use of Fuzzy Selection, after the first button-press, dragging the pointer downward (or to the right) or upward (or to the left).
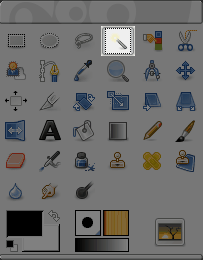
You can access to the Magic Wand Tool in different ways:
From the image menu bar → → ,
by clicking on the tool icon
 in the ToolBox,
by using the keyboard shortcut U.
The Fuzzy Select tool does not have any special key modifiers, only the ones that affect all selection tools in the same way. See Section 2.1, “Common Features” for help with these.
It starts selecting when you click at a spot in the image, and expands outwards like water flooding low-lying areas, selecting contiguous pixels whose colors are similar to the starting pixel. You can control the threshold of similarity by dragging the mouse downward or to the right: the farther you drag it, the larger you get the selected region. And you can reduce the selection by dragging upwards or to the left.
To move the selection see Moving selections.
Normally, tool options are displayed in a window attached under the Toolbox as soon as you activate a tool. If they are not, you can access them from the image menu bar through → → which opens the option window of the selected tool.
![[Note]](images/note.png)
|
Note |
|---|---|
|
See Selection Tools for help with options that are common to all these tools. Only options that are specific to this tool are explained here. |
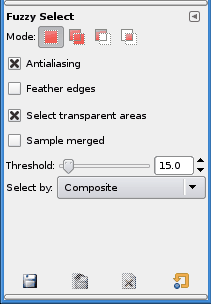
Common select options.
These options affect the way the Magic Wand expands the selection out from the initial point.
This option gives the Magic Wand the ability to select areas that are completely transparent. If this option is not checked, transparent areas will never be included in the selection.
This option becomes relevant when you have several layers in your image, and the active layer is either semi-transparent or is set to another Layer Mode than Normal. If this is the case, the colors present in the layer will be different from the colors in the composite image. If the “Sample Merged” option is unchecked, the wand will only react to the color in the active layer when it creates a selection. If it is checked it will react to the composite color of all visible layers. For further information, see the glossary entry Sample Merged.
This slider determines the range of colors that will be selected at the moment you click the pointer on the initial point, before dragging it: the higher the threshold, the larger the resulting selection. After the first button-press, dragging the pointer downward or to the right will increase the size of the selection; dragging upward or to the left will decrease it. Thus, you have the same set of possibilities regardless of the Threshold setting: what differs is the amount of dragging you have to do to get the result you want.
With this option you can choose which component of the image GIMP shall use to calculate the similarity.
The components you can choose from are , , , , and .