| 2. Creating and Using Selections | ||
|---|---|---|
 |
Chapter 7. Painting with GIMP |  |
| 2. Creating and Using Selections | ||
|---|---|---|
| |
Chapter 7. Painting with GIMP | |
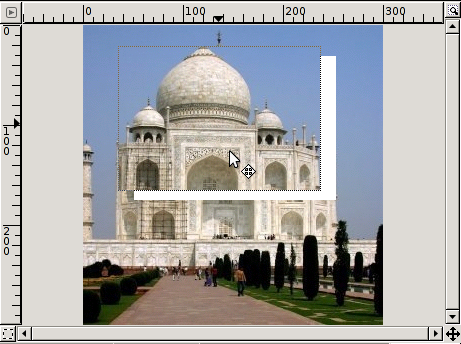
After creating a rectangular, elliptic or free selection, or when you are using the Magic wand, the default mouse pointer is the moving cross. Click-and-drag then allows you to move the selection and its contents, while the initial position remains empty.
If you only want to move the selection border and not its contents, then press the Alt key and click-and-drag the selection.
![[Note]](../images/note.png)
|
Note |
|---|---|
|
Sometimes the Alt key is used by the window manager and you move the image window instead of the selection. If this is the case, you have two possibilities:
|
Moving a selection without emptying its initial position is more complicated: while pressing the Ctrl key, move the mouse pointer a little bit, then also press the Alt key, then click-and-drag the selection. This can be done more easily by using the Move tool in Selection mode.
Moving a selection automatically creates a floating layer (floating selection). See Floating selection . The mouse pointer then looks like an anchor when it is outside of the selection. This means that the selection will be permanently anchored at the place you choose when you click the mouse button.
As soon as this floating selection is created in the Layer dialog (and you can create it with Selection/Float), you can use the keyboard arrow keys to move the selection horizontally or vertically.