| 12.11. Stencil Chrome | ||
|---|---|---|

|
12. Decor Filters |  |
| 12.11. Stencil Chrome | ||
|---|---|---|
|
|
12. Decor Filters | |
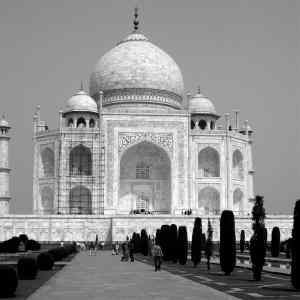
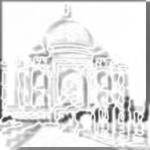
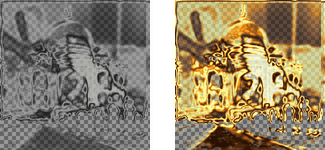
This filter provides a state of the art chrome effect. The source image must be an image in grayscale mode, containing a single layer without alpha channel. This layer is used as mask («stencil») for the chrome effect.
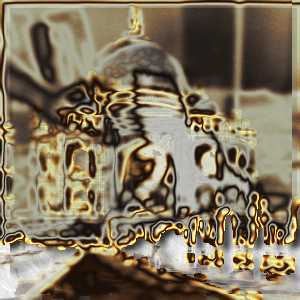
The filter creates a new image with the chrome effect applied to the source image or, if a selection exists, to the selection of the source image (a nice background is added too).
This filter is found in the image window menu under → → .
![[Підказка]](images/tip.png)
|
Підказка |
|---|---|
|
If this command remains grayed out although the image is in grayscale mode, check for an Alpha channel and delete it. |
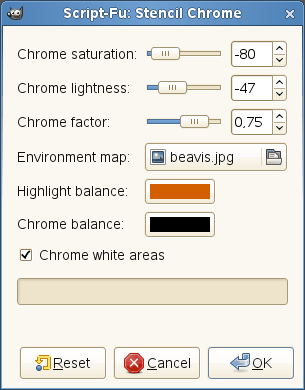
Use this option to control how saturation and lightness of the «Chrome» layer are adjusted. Negative values decrease saturation and lightness respectively.
This factor lets you adjust offsets, feather radius, and brush size used to construct the «Chrome» and «Highlight» layer (and the «Drop Shadow» as well).
Change with caution, decreasing this value may make the chrome effect worse. The default factor 0.75 seems to be a good choice.
The environment map is an image that is added as some kind of «noise» to the source. The effect is best to see if you use a simple map with some obvious shapes:
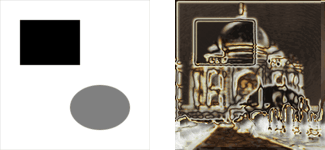
Using a simple environment map
The environment map must be an image in grayscale mode too. Size doesn't matter, the environment map is scaled to the size of the source image.
This color is used to modify the color balance of the «Highlight» layer: the amount of red, green, and blue colors is increased according to the corresponding values of the specified option.
Avoid colors with red, green or blue value > 230.
Same as above, but modifies the color balance of the «Chrome» layer.
If checked (this is the default), the source image is used as mask. If unchecked, the inverted source image is used.
The following section provides a brief and simplified description of how the script (actually this filter is a Script-Fu) creates the chrome effect.
If you apply the filter to your source images and then look at the layer dialog of the resulting image, you will see that there are two main layers which make up the chrome effect: the «Chrome» layer and the «Highlight» layer. These layers are created as follows:
The script constructs a somewhat simplified and blurred layer from the source image (from the inverted source image if Chrome white areas is unchecked).
The Chrome factor controls the appearance of this layer.
The (scaled) environment map is blurred and merged into the above layer with 50% opacity. (Do you spot the cat in the introducing example?)
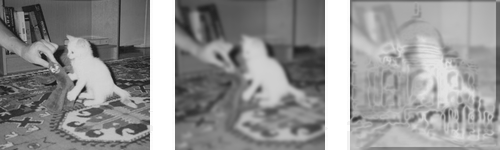
Merging the environment map
The brightness (value) of the layer is modified according to a spline-based intensity curve.
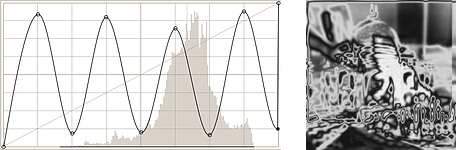
Modifying the intensity curve
A layer mask is added, initialized with the source image (the «Chrome Stencil»). This is the «Chrome» layer before the final step.
The «Highlight» layer is a copy of the «Chrome» layer where the layer mask is stroked with a white brush.
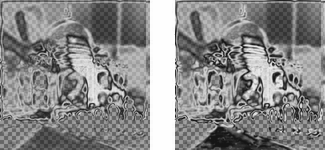
Chrome and Highlight base
For both layers the color balance is modified (according to Highlight balance and Chrome balance), increasing the amount of red, green, and blue, with emphasis on highlights.
Additionally, saturation and lightness of the «Chrome» layer are modified (controlled by Chrome saturation and Chrome lightness).
Chrome and Highlight layer
Now add a drop shadow and a background layer and you get the Example image for the «Stencil Chrome» filter.