| 6.6. Světelné efekty | ||
|---|---|---|

|
6. Filtry efekty se světlem |  |
| 6.6. Světelné efekty | ||
|---|---|---|
|
|
6. Filtry efekty se světlem | |
Obrázek 17.122. The same image, before and after applying Lighting filter
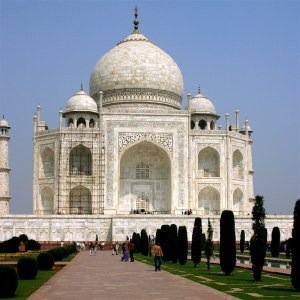
Original image

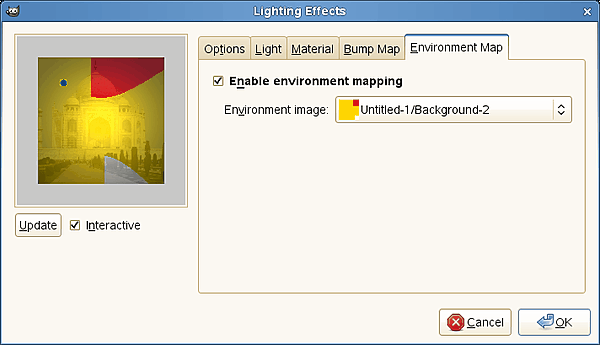
Filter „Lighting Effects“ applied
tento filtr naleznete v nabídce .
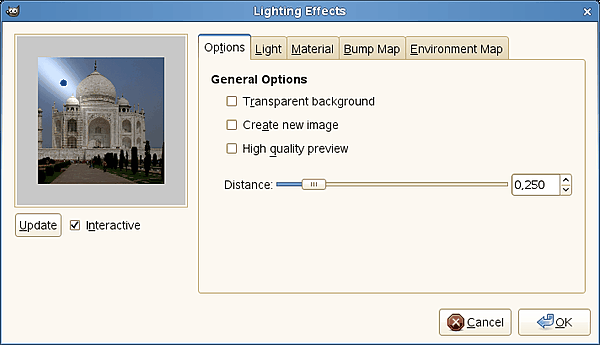
Je-li zaškrtnuta volba Interaktivní, je nastavení filtru interaktivně promítáno v náhledu. Kliknutím na tlačítko Budiž filtr na obrázek aplikujete.
If Interactive is not checked, changes are displayed in preview only when you click on the button. This option is useful with a slow computer.
Any other options are organized in tabs:
Výsledný obrázek bude průhledný v oblastech nulové výšky mapy vyvýšení (výška je nulová v černých oblastech mapy vyvýšení)-
Aplikace filtru vytvoří nový obrázek.
Pro rychlé počítače.
You can specify the distance of the light source from the center of the image with this slider. The range of values is from 0.0 to 2.0.
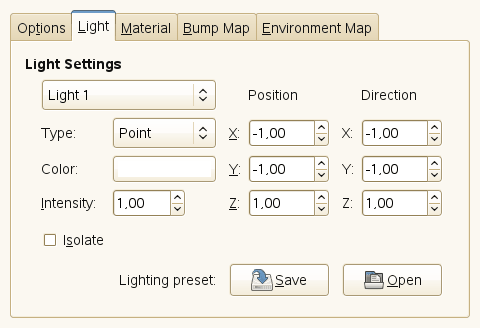
In this tab, you can set light parameters. With Light 1 ... Light 6 you can create six light sources and work on each of them separately.
The filter provides several light types in a drop-down list:
Displays a blue point at center of preview. You can click and drag it to move light all over the preview.
The blue point is linked to preview center by a line which indicates the direction of light.
This deletes the light source (light may persist...).
Barva světla. Kliknutím na barevnou plochu se otevře standardní dialog pro výběr barev.
With this option, you can set light intensity.
Určuje polohu zdroje světla pomocí třech souřadnic: X pro vodorovnou polohu, Y pro svislou polohu, a Z pro vzdálenost zdroje (čím větší, tím méně světla). Hodnoty se mohou pohybovat v rozmezí -1 až +1.
This option should allow you to fix the light direction in its three X, Y and Z coordinates.
With this option, you can decide whether all light sources must appear in the Preview, or only the source you are working on.
You can save your settings with the and get them back later with the .
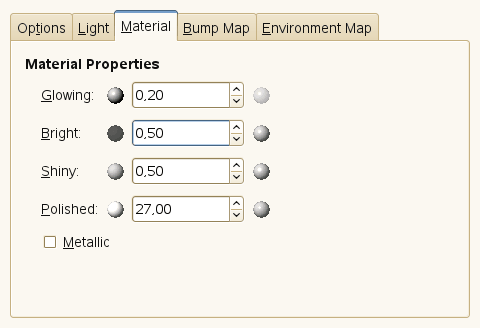
Tyto volby se netýkají přímo světla, ale světla odráženého od objektů.
Small spheres, on both ends of the input boxes, represent the action of every option, from its minimum (on the left) to its maximum (on the right). Help pop ups are more useful.
With these option, you can set the amount of original color to show where no direct light falls.
With this option, you can set the intensity of original color when hit directly by a light source.
This option controls how intense the highlight will be.
With this option, higher values make the highlight more focused.
When this option is checked, surfaces look metallic.
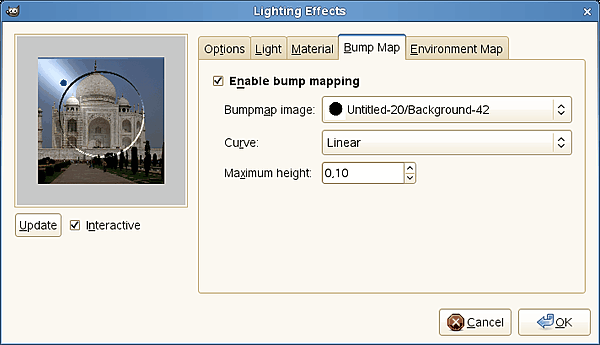
In this tab, you can set filter options that give relief to the image. See Bump mapping .
Společně s mapováním prostředí umožňuje tato volba zajímavé mapování vyvýšení. Jako mapy vyvýšení lze používat pouze obrázky v odstínech šedi (světlé oblasti jsou vyvýšeny, tmavé zůstávají beze změny). Pokud tedy chcete použít barevný obrázek, musíte ho nejdříve převést do odstínů šedi. (<Obrázek>/Režim/Odstíny šedi). Pokud tuto volbu aktivujete, budou povoleny následující možnosti:
You have to select there the grayscale image that will act as a bump map. See Bump Map plug-in for additional explanations.
This option defines the method that will be used when applying the bump map; that is, the bump height is a function of the specified curve. Four curve types are available: Linear, Logarithmic, Sinusoidal and Spherical.
Maximální vyvýšení.
Zaškrtnutím této volby aktivujeté následující volby:
You have to select there a RGB image, present on your screen. Please note that for this option to work you should load another image with GIMP before using it.
An example can be found at [BUDIG01].