In Web sensitive images are frequently used to get some effects when defined areas are enabled by the pointer. Obviously the most used effect is a dynamic link to another web page when one of the sensitive areas is clicked on. This “filter” allows you to design easily sensitive areas within an image. Applications for website design have this as a standard function. In GIMP, you can do this in a similar way.
This plug-in lets you design graphically and friendly all areas you want to delimit over your displayed image. You get the relevant part of html tags that must be merged into the right place in your page html code. You can define some actions linked to these areas too.
This is a complex tool which is not completely described here (it works about like Web page makers offering this function). However we want to describe here some of the most current handlings. If you want, you can find a more complete description in Grokking the GIMP with the link [GROKKING02].
The menu bar is similar to the main menu, only a few menus or menu entries are different:
- File
-
- Save, Save As
-
Contrary to other filters, this plug-in doesn't make an image but a text file. So you must save your work in a text format.
![[Tip]](images/tip.png)
Tip With → you can preview this text file content.
- Open, Open recent
-
In the plug-in you can open the saved text file. The areas defined in your file will be loaded and overdisplayed; if the displayed image is not the original one or not with the same size, GIMP will ask you for adapting the scale.
- Edit
- View
-
This menu offers you special functions:
- Area List
-
Here you can hide or show the selection area.
- Source…
-
Here you see the raw data as you would save it to or read it from a file.
- Color, Gray
-
You can select the image mode here and work with a Grayscale display.
- Mappings
-
You will seldom use this menu, since you can more easily access selection tools by clicking on icons on the left of the working area.
- Arrow
-
The arrow here represents the Move tool. When activated tool is selected, you can select and move an area on the image.
With a polygon, you can use the arrow to move one of the red points. Right-click on a segment between two red points to open a pop-up menu that offers, with several others, the possibility to add a new point. If you right-click on a red point, you can remove it.
- Rectangle, Circle, Polygon
-
These tools let you create various shape areas: click on the image, move the pointer, and click again.
- Edit Map Info…
-
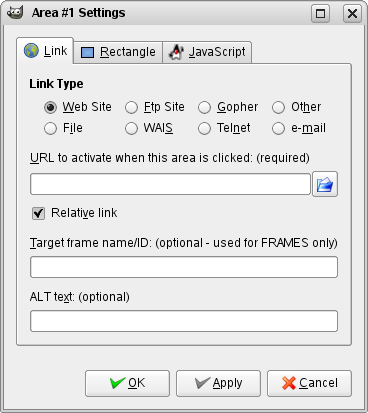
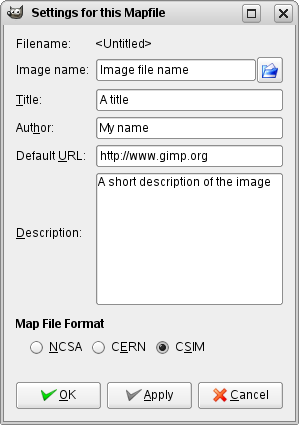
With this simple dialog you can enter some items, which will be written to the resulting output file; either as comments (Author, Description) or as attribute values of the HTML tags (Image name, Title, Default URL).
- Tools
-
With the “Tools” menu you can create guides and even regularly spaced rectangular areas.
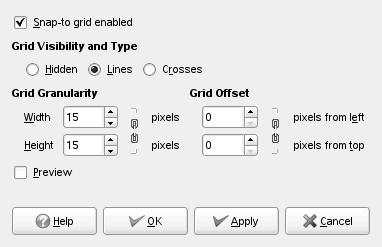
- Grid, Grid Settings…
-
Here you can enable and disable the image grid or configure some grid properties.
- Use GIMP Guides…, Create Guides…
-
The guide lines are created at the border of the image but can be moved around by clicking on the red squares on each line something similar to the GIMP guide lines. By using the guides you are able to create active rectangles in the image.
- Create guides
-
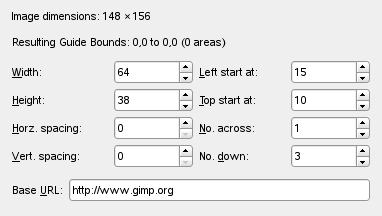
Instead of creating geometrical shapes to select the active areas you may use an array of rectangles, each representing an active area, by clicking on the “Create guides”. In the menu popping up you set the width and height of the rectangles, the space between them, the number of rows and columns, and the upper and left startpoint for the array. All measures are in pixels. If you are not satisfied with the result you may adjust each rectangle by moving the red squares as usual.
Most entries here are just shortcuts for some functions already described. Exceptions:
- Move Area to Front, Move Area to Bottom
-
Here you can move an area entry to the bottom or top of the area list.
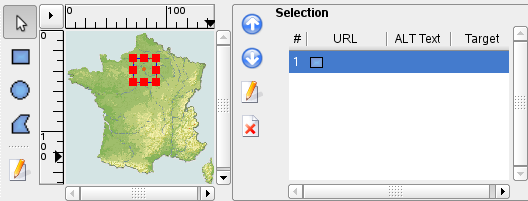
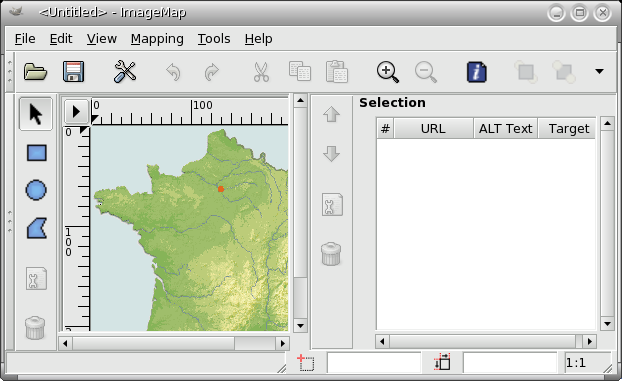
In the main area of the image map window, on the left side, you will find your working area where you can draw all the shapes areas you want with the relevant tools.
Beside the working area there are vertically displayed icons, one for pointing, three for calling tools to generate various shape areas, one to edit zone properties, and finally one to erase a selected zone; you can call these functions from the Mappings menu too.
![[Caution]](images/caution.png)
|
Caution |
|---|---|
|
Note that the areas should not overlap. |
On the right is a display area, as a property list of the created areas. A click on one item of the list selects automatically the corresponding shape in the working area, then you can modify it.
Beside the display is an icon vertical set; its use is obvious but a help pop-up gives you some information about each function.
Unfortunately, the arrow symbols for moving a list entry up or down do not work here. But of course you carefully avoided to create overlapping areas, so you do not use these functions at all.


