| 6.8. ドロップシャドウ... | ||
|---|---|---|

|
6. 照明と投影フィルター |  |
| 6.8. ドロップシャドウ... | ||
|---|---|---|
|
|
6. 照明と投影フィルター | |
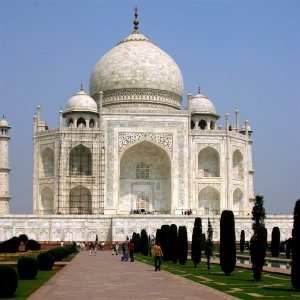
With this GEGL filter you can add a drop-shadow to an image, a selection or a text. You may choose the color, position, and size of the shadow.
You can find this filter in the image menu through → → .
This filter is normally disabled. You must add an Alpha channel to your image to use it.
![[注記]](images/note.png)
|
注記 |
|---|---|
|
These options are described in 「Common Features」. |
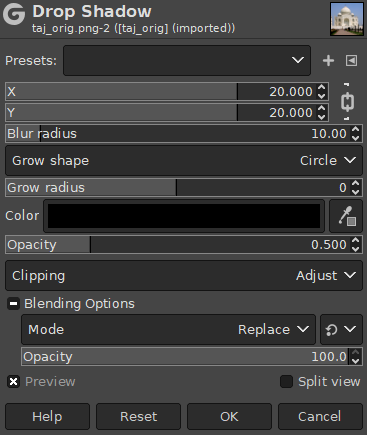
ドロップシャドウが描かれたレイヤーは対象となる選択範囲もしくはレイヤーの真下から水平に X ピクセル、 垂直に Y ピクセル移動します。 したがって元画像からの相対的な位置を X と Y のオフセットで設定できます。 ここに高い値を指定すれば仮想上の光源はどこか水平方向や垂直方向に遠く離れているような効果をもたらし、 逆に低い値を指定すれば画像の至近距離から照らしているように見えます。
オフセット値は負の数も可能であり、 X < 0 にすれば影が画面の左側に落ち、 Y < 0 にすれば影は画面の上側に落ちます。
Out of sheer curiosity, you can see the drop shadow layer clearly by setting blur radius to 0 and moving the drop shadow with X and Y.
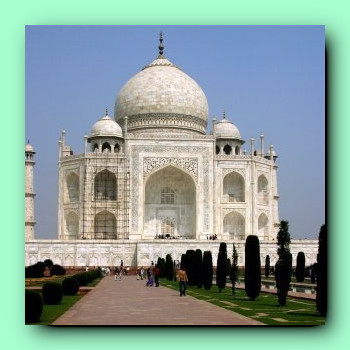
After creating the shadow, a Gaussian blur with the specified radius is applied to the shadow layer, resulting in the realistic appearance of the drop shadow.
You can choose the shape that will be used to expand or contract the shadow. The choices should be self explanatory: Circle (default), Square, or Diamond.
The distance to expand the shadow before blurring. A negative value will contract the shadow instead.
You can choose the color of the shadow here. Just click on the color swatch, and select a color when the color selector pops up, or use the eye-dropper to pick a color from the image.
Shadow opacity. It defaults to 0.500, but you may select any other value from 0 (full transparency) to 2.00 (full opacity) here.
This GEGL Drop Shadow filter is surprising: if you apply the filter directly to the image as you do with the legacy filter, you get nothing, unless you have transparent areas in your image.
To get the same result as the legacy filter:
Open your original image.
Open a new image, a little bigger than your original image, filled with transparency.
Copy your original image and paste it into the new image. A floating selection is created in the layer dialog.
Anchor the floating selection.
Menus/Layer/Crop to content.
Menus/Layer/Layer boundary size: set layer size to the same size than your image and filled with transparency; click on the button. Then click on the button.
Open the Drop Shadow dialog: the drop shadow is displayed in the on-canvas preview. You can change the default options values.
Eventually, add a new layer, with the same size as the image and filled with the color you want to give to the background. Move this layer to the bottom of the layer stack.
Click on the to apply filter.
Applying filter to a selection:
Open your original image.
Open a new image, the same size as your original image, filled with transparency.
Create the selection
Copy the selection and paste it into the new image. A floating selection is created in the layer dialog.
Anchor the floating selection.
Menus/Layer/Crop to content.
Menus/Layer/Layer to image size (with transparency).
Open the Drop Shadow dialog: the drop shadow is displayed in the on-canvas preview. You can change the default options values.
Eventually, add a new layer, with the same size as the image and filled with the color you want to give to the background. Move this layer to the bottom of the layer stack.
You can also use your original image as background: undo the selection, copy the image and paste it as new layer in the new image. Move the new layer to the bottom of the layer stack.
Click on the to apply filter.
Applying filter to a text:
The procedure is more simple to create a drop shadow for a text: create the text and apply the Drop Shadow filter directly.