| 6.6. Теkst | ||
|---|---|---|
 |
6. Inne narzędzia |  |
| 6.6. Теkst | ||
|---|---|---|
| |
6. Inne narzędzia | |
Narzędzie nakłada tekst na obraz. Klikając na obrazie narzędziem, pojawia się Okno edytora tekstu, pozwalające na wprowadzenie tekstu, i tworzona jest nowa warstwa w oknie Warstw. W Oknie opcji narzędzia można zmienić czcionkę, kolor i rozmiar tekstu, a także odległość od krawędzi. Efekt zmiany parametrów jest od razu pokazywany na obrazie.
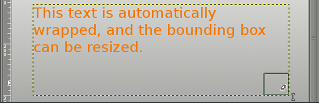
A new possibility appeared with GIMP-2.6: click-dragging the mouse pointer on the canvas draws a rectangular frame that you can enlarge and move as you do with rectangular selections. The text you type in the Text Editor is displayed in this frame and automatically adapted to the frame size. You can adjust this frame whenever you like.
When the mouse pointer is around the center of the frame, it
comes with a small crosshair
 .
Click-and-drag to move the frame and its contents (the text shows up when
you release the mouse button). The text remains at the same place in the
frame.
.
Click-and-drag to move the frame and its contents (the text shows up when
you release the mouse button). The text remains at the same place in the
frame.
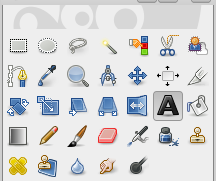
Narzędzie można aktywować na kilka sposobów:
In the image menu through → ,
by clicking the tool icon
 in Toolbox,
przy pomocy skrótu klawiszowego T.
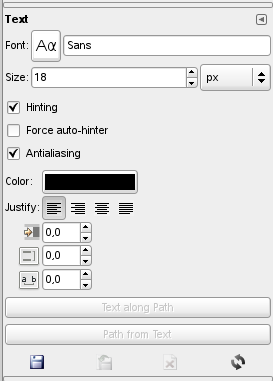
Normally, tool options are displayed in a window attached under the Toolbox as soon as you activate a tool. If they are not, you can access them from the image menu bar through → → which opens the option window of the selected tool.
Click on the fonts button to open the font selector of this tool, which offers you a list of installed X fonts.
At the bottom of the font selector you find some icons which act as buttoms for:
resizing the font previews,
selecting list view or grid view,
opening the font dialog.
Choose a font from the installed fonts. When you select a font it is interactively applied to your text.
![[Podpowiedź]](images/tip.png)
|
Podpowiedź |
|---|---|
|
You can use the scroll wheel of your pointing device (usually your mouse) on the fonts button in order to quickly change the font of your text (move the pointer on the fonts button, and don't click, just use the wheel button). |
Оkreśla rozmiar czcionki dla dowolnej jednostki miary.
Wykorzystuje indeksy zmian, aby zmienić litery dla lepszego ich przedstawienia przy małej czcionce.
Tylko automatyczny hinting stara się automatycznie wyliczyć informację dla lepszego pokazania czcionki.
Wygładzanie pokazuje tekst z bardziej miękkim konturem. Jest to możliwe dzięki lekkiemu rozmywaniu granic. Opcja ta może o wiele ulepszyć widok tekstu. Jeśli modelem koloru nie jest RGB, to wygładzanie należy stosować ostrożnie.
Оkreśla kolor tekstu. Domyślnym kolorem jest czarny. Po kliknięciu pola pojawia się okno wyboru koloru.
|
|
Podpowiedź |
|---|---|
|
Można również przeciągnąć kolor z paska narzędzi na tekst. |
Wyrównuje tekst zgodnie z wybraną ikoną.
Określa odległość od lewej krawędzi.
Оkreśla odległość pomiędzy sąsiadującymi wersami. Efekt zmiany tej opcji od razu widoczny jest na obrazie. Wartość opcji to nie tylko sama odległość, а liczba pikseli, którą należy dodać lub odjąć od tej odległości. Wartość może być ujemna.
Controls the spacing between letters. Also in this case the number is not the space itself between letters, but how many pixels must be added to or substracted from this space (the value can be negative).
Opcja jest aktywna tylko, gdy istnieje ścieżka. W tym celu należy stworzyć lub importować ścieżkę, a nastepnie aktywować ją.
Następnie należy wybrać narzędzie Tekst i wprowadzić tekst. Aby skorzystać z już istniejącego tekstu należy aktywować jego warstwę w oknie warstw, aktywować Tekst i kliknąć na tekst w oknie obrazu.
Rysunek 13.177. The Text to Path command among text commands in the Layer menu
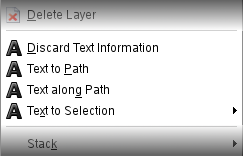
This group of options appears only if a layer text exists.
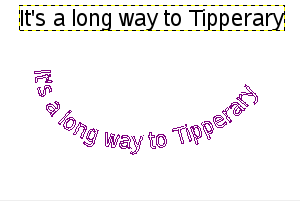
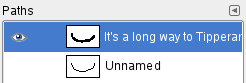
Kliknięcie przycisku spowoduje umieszczenie tekstu za ścieżką. Litery przedstawiane są jako obwódka. Każda z nich jest częścią nowej ścieżki powstałej w oknie Ścieżek. Dla nowopowstałej ścieżki powinny się pojawić wszystkie opcje ścieżek.
Click on the button. The text is bent along the path. Letters are represented with their outline. Each of them is a component of the new path which appears in the Path dialog. All path options should apply to this new path.
Narzędzie to tworzy ścieżkę zaznaczenia z zaznaczonego tekstu. Кażda litera otoczona jest składową ścieżki. Można zmienić formę litery, przemieszczając punkty kontrolne ścieżki.
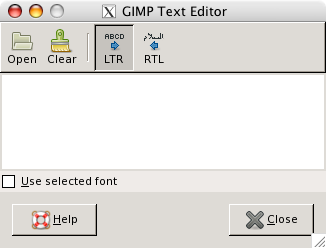
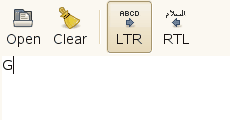
This dialog window is opened when you click on the image with the Text Tool. There, you can enter the text which shows up in real time in the frame on top of the canvas.
Тekst można zmienić w edytorze, а czcionkę w edytorze czcionki.
As soon as you start writing, a Text layer is created in the Layer
Dialog. On an image with such a layer (the image you are working on, or
a .xcf image), you can resume
text editing by activating this text layer then clicking on it (double
click). Of course, you can apply to this text layer the same functions
you use with other layers.
Aby dodać tekst do obrazu, należy kliknąć nie tekstową warstwę. Pojawi się wtedy nowy edytor i utworzona zostanie nowa warstwa. Aby przejść z jednego tekstu na drugi, należy aktywować odpowiednią warstwę tekstową i kliknąć go. Aktywowany będzie wtedy odpowiedni edytor.
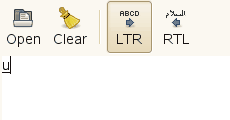
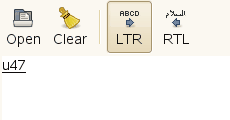
You can get Unicode characters with Ctrl+Shift+U plus hexadecimal Unicode code of the desired char, for example:
Of course this feature is more useful for entering special (even exotic) characters, provided that the required glyphs for these characters are supplied by the selected font — only few fonts support Klingon. ;-)

Unicode 0x47 („G”), 0x2665, 0x0271, 0x03C0
Opcje edytora tekstowego
 Wczytanie tekstu z pliku
Text can be loaded from a text file by clicking the folder icon in the text editor. All the text in the file is loaded.
Wciśnięcie przycisku usuwa tekst z edytora i z obrazu.
Opcja ta pozwala wprowadzać tekst od lewej do prawej, jak w większości języków zachodnich i wielu języków wschodnich.
Opcja pozwala wprowadzać tekst od prawej do lewej, jak w niektórych językach wschodnich, np. arabskim (pokazany na ikonie).
Default doesn't use the font you have selected in the Options dialog. If you want to use it, check this option.
![[Uwaga]](images/note.png)
|
Uwaga |
|---|---|
|
Zobacz też Tekst i czcionka. |