| 2.7. Intelligent Scissors | ||
|---|---|---|
 |
2. Narzędzia zaznaczania |  |
| 2.7. Intelligent Scissors | ||
|---|---|---|
| |
2. Narzędzia zaznaczania | |
Narzędzie to będzie przydatne do zaznaczenia obszaru o dużej zmianie koloru na jego brzegach. Korzystając z narzędzia, tworzona jest seria punktów kontrolnych na brzegu obszaru, który chcemy zaznaczyć. Następnie narzędzie tworzy jednolitą krzywą, która towarzyszy znalezionym krawędziom o dużej kontrastowości. Przy odrobinie szczęścia, krzywa zaznaczy ten obszar, który zamiarzaliśmy zaznaczyć.
Niestety, w logice śledzenia krawędzi zdarzają się błędy, i rezultat nie jest zbyt dokładny. Aby usunąć błędy w zaznaczeniu, należy przejść na tryb szybkiej maski i wykorzystać narzędzie rysownicze na części, którą chcemy poprawić. Reasumując, większość użytkowników za bardziej przydatne uważa Ścieżki, gdyż mimo, że nie znajdują one krawędzi samodzielnie, ale istnieją dopóki nie zostaną usunięte i zawsze można je zmienić.
You can access to the Intelligent Scissors Tool in different ways:
From the image menu bar → → ,
by clicking on the tool icon
 in the ToolBox,
by using the keyboard shortcut I.
The default behavior of the Shift, Ctrl, and Alt keys is described in Sekcja 2.1.1, „Key modifiers (Defaults)” for all selection tools.
There is, however, one key modifier that has a special behavior if you use it while editing a selection, that is after you have added the first node:
By default, the auto-edge snap feature is enabled: whenever you click and drag the mouse pointer, the Scissors tool finds the point of the maximal gradient (where the color change is maximal) for placing a new control node or moving an existing node.
Holding down this key while clicking and dragging disables this feature, and the control node will be placed at the position of the mouse pointer.
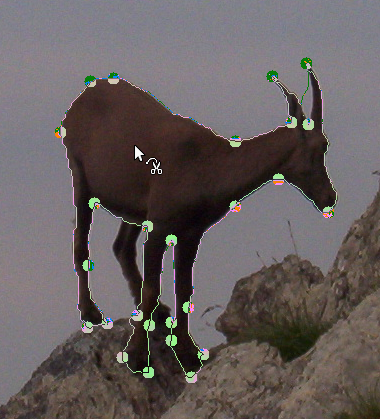
Кażde kliknięcie LPM tworzy nowy punkt kontrolny, który jest połączony z poprzednią krzywą, która stara się iść wzdłuż granicy obrazu. Aby zakończyć operację, należy kliknąć pierwszy punk kontrolny (kursor odpowiednio się zmienia). Krzywą można poprawić poprzez przesuwanie punktów kontrolnych lub tworzenie nowych punktów. Kiedy operacja jest zakończona, należy kliknąć wewnątrz krzywej, aby przekształcić ją na zaznaczenie.
As said above when you click with this tool you drop points. The
selection boundary is driven by these control points. During creation you
can move each one by clicking and dragging, except the first and the last
one. The selection is closed when you are clicking the last point over
the first one. When the selection is closed the pointer shape
changes according to its position: inside
 ,
on the boundary
,
on the boundary
 ,
and outside
,
and outside
 .
You can adjust the selection creating new points by clicking on the
boundary or by moving each control points (merged first and last
point). The selection is validated when you click inside.
.
You can adjust the selection creating new points by clicking on the
boundary or by moving each control points (merged first and last
point). The selection is validated when you click inside.
You have to notice that you can get only one selection; if you create a second selection, the first one is erased when you validate the second one.
![[Ostrzeżenie]](images/warning.png)
|
Ostrzeżenie |
|---|---|
|
Be sure not to click inside the curve until you are completely done adjusting it. Once you have converted it into a selection, undoing takes you back to zero, and you will have to to start constructing the curve again from scratch if you need to change it. Also be sure not to switch to a different tool, or again all of your carefully created control nodes will be lost. (But you still can transform your selection into a path and work it with the Path tool.) |
To move the selection, see Moving selections.
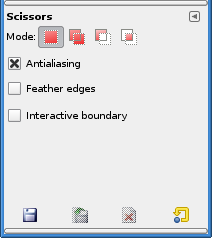
Normally, tool options are displayed in a window attached under the Toolbox as soon as you activate a tool. If they are not, you can access them from the image menu bar through → → which opens the option window of the selected tool.
![[Uwaga]](images/note.png)
|
Uwaga |
|---|---|
|
Оpis opcji wspólnych dla wszystkich narzędzi zaznaczania znajduje się na Narzędzia zaznaczania. Poniżej opisane zostały jedynie opcje charakterystyczne dla Zaznaczenia prostokątnego. |
Przy zaznaczonym polu przeciąganie kontrolnego węzła pokaże ścieżkę zaznaczenia. Jeśli pole nie zostało zaznaczone, to węzły są łączone linią prostą w trakcie przesuwania i końcowa krzywa pojawia się dopiero po puszczeniu LPM. Jest to pomocne przy pracy na wolnych komputerach.