| 5.5. Sample Points Dialog | ||
|---|---|---|
 |
5. Misc. Dialogs |  |
| 5.5. Sample Points Dialog | ||
|---|---|---|
| |
5. Misc. Dialogs | |
While the Color Picker can display color information about one pixel, the “Sample Points” dialog can display the data of four pixels of the active layer or the image, at the same time. Another important difference is that the values of these points are changed in real time as you are working on the image.
The “Sample Points” dialog is a dockable dialog; see the section Paragraaf 2.3, “Koppelen van dialoogvensters” for help on manipulating it.
You can access it:
from the image menu: → → .
from the Tab menu in any dockable dialog by clicking on
 and selecting
→ .
and selecting
→ .
To create a sample point, Ctrl-click on one of the two measure rules of the image window and drag the mouse pointer. Two perpendicular guides appear. The sample point is where both guides intersect. You can see its coordinates in the lower left corner and the information bar of the image window. Release the mouse button.
By default, this sample point comes with a round mark and an order number. You can cancel these marks by unchecking the Show Sample Points option in the View menu.
The “Sample Points” dialog should automatically open when you create a sample point. This is not the case; you have to open it manually.
You can delete a sample point, as you do with guides, by click-and-dragging it up to a rule. Order numbers are automatically re-arranged in the dialog window; the most recent are moved one rank up.
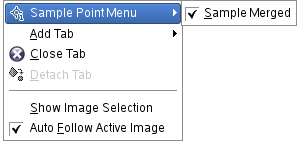
By default, sampling is performed on all layers. If you want to sample on the active layer only, uncheck the Sample merged option in the tab menu:
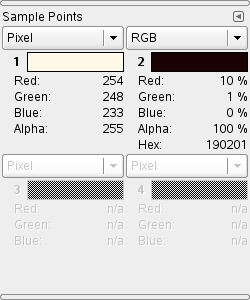
The informations of four sample points are displayed in this window. You can create more, which will be existing and not shown. To show them, you have to delete displayed points.
The color of the sampled point is displayed in a swatch box.
In the drop-down list, you can choose between:
This choice displays the Red, Green, Blue and Alpha values of the pixel, as numbers between 0 and 255.
This choice displays the Red, Green, Blue and Alpha values of the pixel, as percentages. It also shows the hexadecimal value of the pixel's color.
This choice displays the Hue, in degrees, as well as the Saturation, Value and Alpha of the pixel, as percentages.
This choice displays the Cyan, Magenta, Yellow, Black and Alpha values of the pixel, as percentages.
Data are supplied for every channel in the chosen color model. The Alpha is present only if the image holds an Alpha channel.
Hexa appears only with the RGB mode. That's the hexadecimal code of the HTML Notation.