| 2.2. Hulplijnen | ||
|---|---|---|
 |
2. Raster en Hulplijnen |  |
| 2.2. Hulplijnen | ||
|---|---|---|
| |
2. Raster en Hulplijnen | |
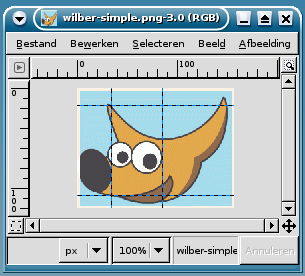
In addition to the image grid, GIMP also gives you a more flexible type of positioning aid: guides. These are horizontal or vertical lines you can temporarily display on an image while you are working on it.
To create a guide, simply click on one of the rulers in the image window and pull out a guide, while holding the pressed. The guide is then displayed as a blue, dashed line, which follows the pointer. As soon as you create a guide, the “Move” tool is activated and the mouse pointer changes to the Move icon.
You can also create a guide with the New Guide command, which allows you to precisely place the guide on the image, the New Guide (by Percent) command, or the New Guides from Selection command.
You can create as many guides as you like, positioned wherever you like. To move a guide after you have created it, activate the Move tool in the Toolbox (or press the M key), you can then click and drag a guide. To delete a guide, simply drag it outside the image. Holding down the Shift key, you can move everything but a guide, using the guides as an effective alignment aid.
The behavior of the guides depends upon the Move (Affect) mode of the “Move” tool. When Layer mode is selected, the mouse pointer turns into a small hand as soon as it gets close to a guide. Then the guide is activated and it turns red, and you can move the guide or delete it by moving it back into the ruler. If Selection mode is selected, you can position a guide, but you cannot move it after that.
Op dezelfde manier als bij het raster kunt u de cursor naar de hulplijnen laten trekken door de menukeuzen → aan te vinken in de menubalk van het afbeeldingsvenster. Als u zoveel hulplijnen heeft dat sommige dingen wat onduidelijk worden kunt u ze verbergen door → aan- of uit te vinken in dezelfde menubalk(Of u gebruikt de Shift+Ctrl+T toetsencombinatie) Het is handig om ze meteen weer aan te zetten: Als u ze even uit laat zou het verwarrend kunnen zijn als u een nieuwe hulplijn wilt maken en u bent vergeten dat de hulplijnen uit staan en ze na het slepen meteen uit beeld verdwijnen.
If it makes things easier for you, you can change the default behavior for guides in the Image Windows Appearance page of the Preferences dialog. Disabling Show guides is probably a bad idea, though, for the reason just given.
You can remove the guides with the → → command.
![[Opmerking]](images/note.png)
|
Opmerking |
|---|---|
|
Een ander gebruik van de Hulplijnen is bij de uitbreiding; deze kan de hulplijnen gebruiken om de afbeelding in een verzameling deel-afbeeldingen te splitsen. |