| 4.6. Cambiar el modo | ||
|---|---|---|
 |
4. GIMP-Soluciones rápidas |  |
| 4.6. Cambiar el modo | ||
|---|---|---|
| |
4. GIMP-Soluciones rápidas | |
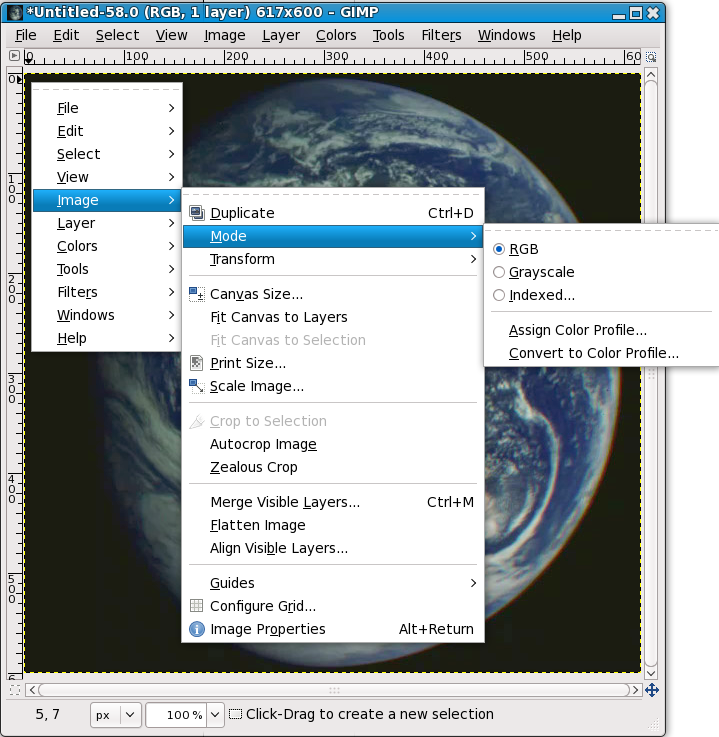
As with anything else, images come in different kinds and serve different purposes. Sometimes, a small size is important (for web sites) and at other times, retaining a high color depth in all its glory (a family portrait) is what you want. GIMP can handle all of this, and more, primarily by converting between three fundamental modes, as seen in this menu. In order to switch your image to one of these modes, you open it and follow that menu and click the mode you want.
RGB - This is the default mode, used for high quality rich color images. This is also the mode for most of your image work including scaling, cropping, and even flipping, as it gives the computer more information to work with. The extra information also makes RGB Mode the largest to store as a result.
A little bit of detail if you are interested. Each pixel or point when in this mode consists of three different components. R->Red, G->Green, B->Blue. Each of these in turn can have an intensity value of 0-255. So, at every pixel, what you see is an additive combination of these three components. All these combinations result in a way to represent millions of colors.
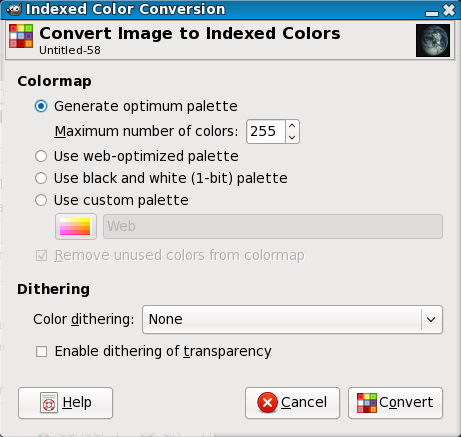
Indexed - This is the mode usually used when file size is of concern, or when you are working with images with few colors. It involves using a fixed number of colors, 256 or less, at each point to represent the color at that point. The defaults to attempting to figure out an "optimum palette" to best represent your image. Try it, you can undo it if you don't like the results, or use a custom palette or more colors.
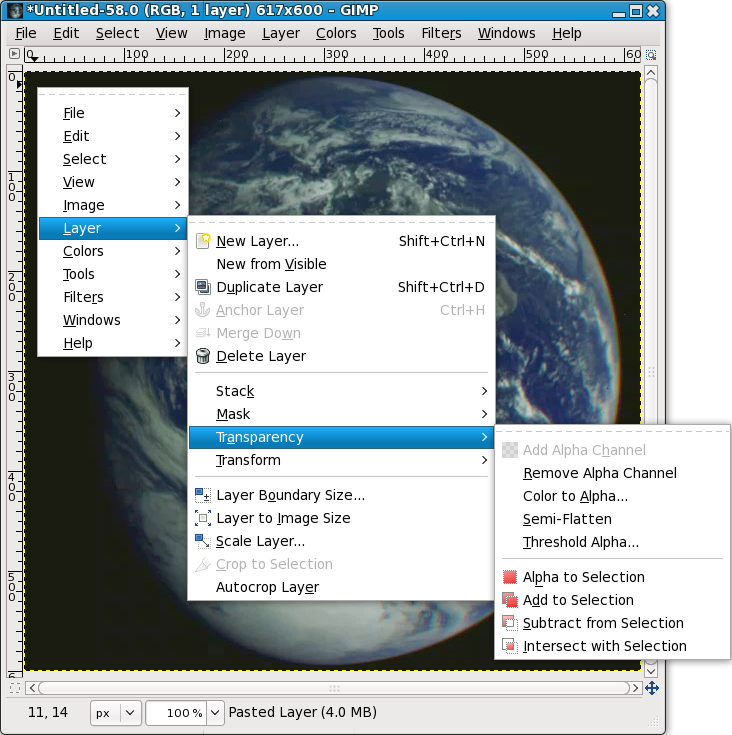
As you might expect, since the information needed to represent the color at each pixel is less, the file size is smaller. However, sometimes, there are options in the various menus that are "greyed" out for no apparent reason. This usually means that the filter or option cannot be applied when your image is in its current mode. Changing the mode to RGB, as outlined above, should solve this issue. If RGB mode doesn't work either, perhaps the option you're trying requires your layer to have the ability to be transparent. This can be done just as easily via → → .
Grayscale - In case you want to convert your brilliant color image to something that's black and white (with a lot of shades of grey), this is one of the easiest ways in which to do it. Some photos do look a lot fancier when displayed in grayscale. Again, if you're interested in some detail, this is achieved by taking the RGB values at the pixels in your image, and suitably weighted averaging them to get an intensity at that point.
There is no need to convert an image to a specific mode before saving it in your favourite format, as GIMP is smart enough to properly export the image.