| 2.8. Foreground Select | ||
|---|---|---|
 |
2. Selection Tools |  |
| 2.8. Foreground Select | ||
|---|---|---|
| |
2. Selection Tools | |
This tool lets you extract the foreground from the active layer or from a selection. It is based on the SIOX method (Simple Interactive Object Extraction). You can visit its Web page at [SIOX].
The creation of a selection with this tool works in a couple of steps:
Roughly select the foreground you want to extract. When you select this tool, the mouse pointer goes with the lasso icon. It actually works like the Fuzzy Select tool. Select as little as possible from the background.
As soon as you release the mouse button, the non selected part of the image is covered with a dark blue mask. If the selection is not closed, its ends will be linked automatically together by a straight line. The mouse pointer goes now with the Paint-brush icon for the next step.
Draw a line through the foreground: using the paintbrush, whose size can be changed in options, draw a continuous line in the selected foreground going over colors which will be kept for the extraction. The color used to draw the line is of no importance; not using the same color as foreground is better. Be careful not painting background pixels.
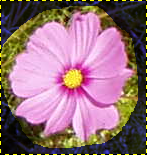
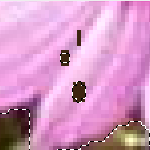
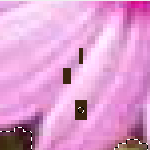
Figure 13.31. The line drawn on the foreground
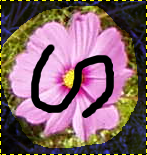
In this example, it is important that the line goes over the yellow capitulum of the flower.
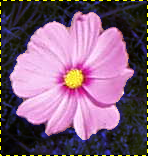
When you release the mouse button, all non-selected areas are in dark:
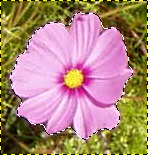
You still have to press the Enter key to get the wanted selection:
![[Note]](images/note.png)
|
Note |
|---|---|
|
Until you press Enter, you can't undo this selection by Ctrl+Z nor by → , and the Undo History is not concerned. To delete this selection, you must select another tool. |
You can activate the Foreground Select tool in two ways:
by clicking on the tool icon
 in the Toolbox,
through → → in the image menu.
This tool has no shortcut, but you can set one using → → → → →
By pressing the Ctrl key, you can switching between foreground and background selection painting.
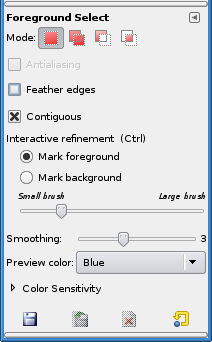
Normally, tool options are displayed in a window attached under the Toolbox as soon as you activate a tool. If they are not, you can access them from the image menu bar through → → which opens the option window of the selected tool.
|
|
Note |
|---|---|
|
See Selection Tools for help with options that are common to all these tools. Only options that are specific to this tool are explained here. |
If this option is enabled, only the area contiguous to the stroke will be selected. Otherwise all the areas with same colors will be selected.
Figure 13.35. “Contiguous” option effect

Two separated areas with the same color. On the left, only the left area is marked.

The Contiguous option is checked: only the area close to the painted line is selected.
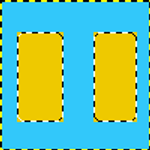
The Contiguous option is not checked: both areas, although they are separated, are selected.
Here are some options to work more precisely on your selection:
default option. The foreground color of the Toolbox is used to paint. Colors covered by the painted line will be used for extraction.
You can access this option either by clicking on the radio button or, more simply, by pressing the Ctrl key. The mouse pointer goes with a small eraser icon. The used color is the background color of Toolbox. The pixels of the selection which have the same color as the “erased” pixels will NOT be extracted.
This slider lets you adapt the size of the brush used to paint the line. A small brush fits well thin details.
The slider lets you remove small holes in your selection.
Figure 13.36. “Smoothing” option effect
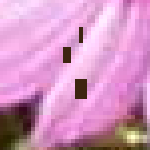
For this demonstration, small holes painted with the background color of the image have been added (left).
Smoothing = 0 : more than 1 pixel wide holes are not selected.
Smoothing = 7 : less than 3 pixels wide holes are selected.
You can select between Red, Green and Blue to mask the image background.
This option uses the L*a*b color model. If your image contains many pixels of the same color in different tones, you can increase the sensibility of the selection for this color.