| 7.2. Gradient Flare | ||
|---|---|---|
 |
7. Light and Shadow Filters |  |
| 7.2. Gradient Flare | ||
|---|---|---|
| |
7. Light and Shadow Filters | |
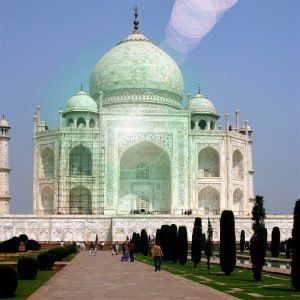
Gradient Flare effect reminds the effect you get when you take a photograph of a blinding light source, with a halo and radiations around the source. The Gradient Flare image has three components: Glow which is the big central fireball, Rays and Second Flares
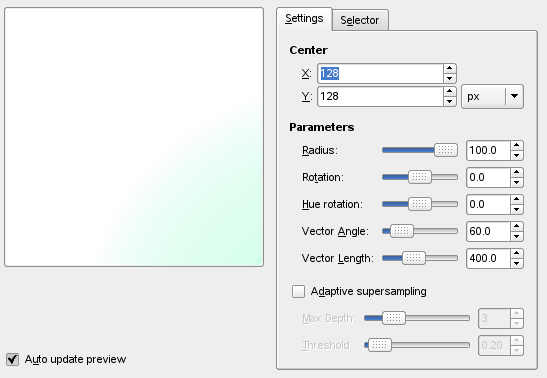
The Settings tab allows you to set manually the parameters while the Selector tab let you choose presets in a list.
When Auto Update Preview is checked, parameter setting results are interactively displayed in preview without modifying the image until you click on OK button.
You can set there X and Y (pixels) coordinates of glint. The coordinate origin is at the upper left corner
Radius: The radius of the effect. Don't be afraid to use the box with the digits instead the slider which is a bit limited.
Rotation: Turn the effect.
Hue Rotation: Change the tint (color) of the effect.
Vector Angle: Turn the Second flares.
Vector length: Vary the distance applied for the Second flares.
Settings of the anti-aliasing following parameters like Depth and Threshold.
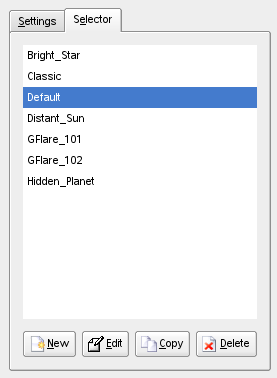
The Selector tab allows you to select a Gradient Flare pattern, to change it and save it.
When you click on this button, you create a new Gradient Flare pattern. Give it a name of your choice.
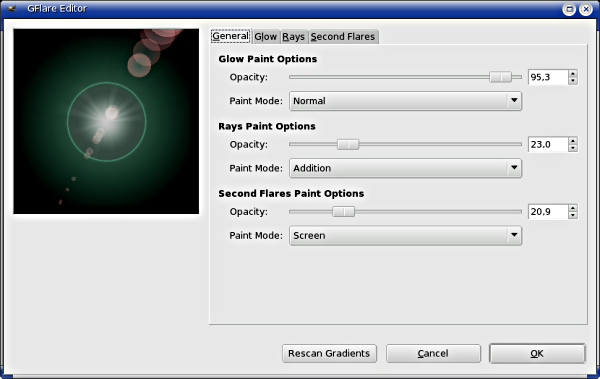
This button brings up the Gradient Flare Editor (see below).
This button allows you to duplicate selected Gradient Flare pattern. You can edit the copy without altering the original.
This button deletes the selected Gradient Flare pattern.
Opacity: Slider and input box allows you to reduce glow opacity (0-100).
Paint Mode: You can choose between four modes:
Normal: In this mode, the glow covers the image without taking into account what is beneath.
Addition: Pixel RGB values of glow are added to RGB values of the corresponding pixels in the image. Colors get lighter and white areas may appear.
Overlay: Light/Dark areas of glow enhance corresponding light/dark areas of image.
Screen: Dark areas of image are enlightened by corresponding light areas of glow. Imagine two slides projected onto the same screen.
Options are the same as for "Glow".
Options are the same as for "Glow".
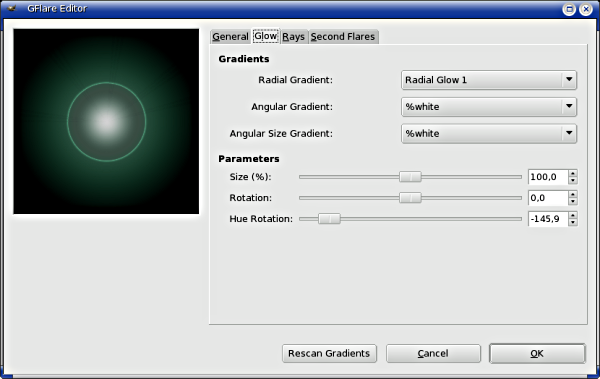
By clicking on the rectangular buttons, you can develop a long list of gradients. "%" gradients belong to the Editor.
Radial gradient: The selected gradient is drawn radially, from center to edge.
Angular gradient: The selected gradient develops around center, counter-clockwise, starting from three o'clock if "Rotation" parameter is set to 0. Radial and angular gradients are combined according to the Multiply mode: light areas are enhanced and colors are mixed according to CMYK color system (that of your printer).
Angular size gradient: This is a gradient of radius size which develops angularly. Radius is controlled according to gradient Luminosity: if luminosity is zero (black), the radius is 0%. If luminosity is 100% (white), the radius is also 100%.
Size (%): Sets size (%) of glow (0-200).
Rotation: Sets the origin of the angular gradient (-180 +180).
Hue rotation: Sets glow color, according to the HSV color circle (-180 +180).
The options are the same as for Glow.
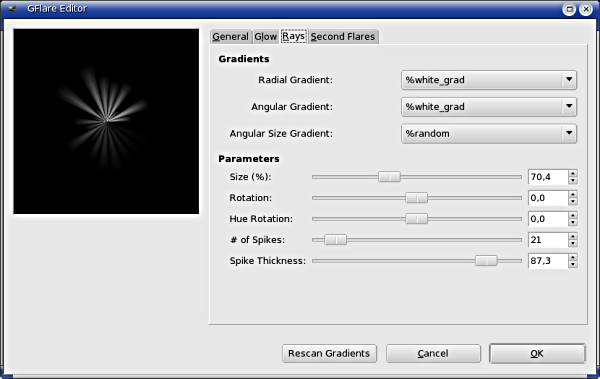
The first three options are the same as in Glow. Two are new:
# of spikes: This option determines the number of spikes (1-300) but also their texture.
Spike Thickness: When spikes get wider (1-100), they look like flower petals
The options are the same as for Glow.
Options are the same as in Glow.
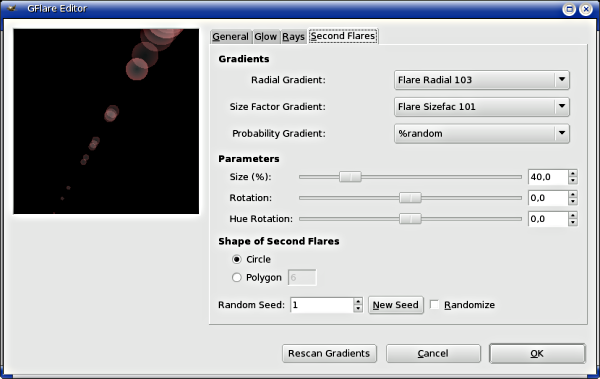
Second flares, these satellites of the main flare, may have two shapes: Circle and Polygon. You can set the Number polygon sides. The option accepts 1 side (!), not 2.
Random Seed: The random generator will use this value as a seed to generate random numbers. You can use the same value to repeat the same “random” sequence several times.
Randomize: When you click on this button, you produce a random seed that will be used by the random generator. It is each time different.