| 6.11. Convert to Color Profile | ||
|---|---|---|

|
6. Het menu “Afbeelding” |  |
| 6.11. Convert to Color Profile | ||
|---|---|---|
|
|
6. Het menu “Afbeelding” | |
The allows you to convert an image from its currently assigned ICC profile to another ICC profile.
In an ICC profile color managed editing application such as GIMP, every image has an assigned ICC color profile that (among other things) tells the Color Management System (in GIMP's case Little CMS) what color space to use when sending the image to the screen.
Sometimes it's convenient or necessary to convert an image from its currently assigned ICC color profile to another ICC color profile. For example:
Perhaps you want to convert the image from some other color space to GIMP's built-in sRGB color space.
Perhaps you want to convert the image to a printer profile before sending it out to a printing establishment.
Perhaps the currently assigned color space is not the right color space for the editing task at hand.
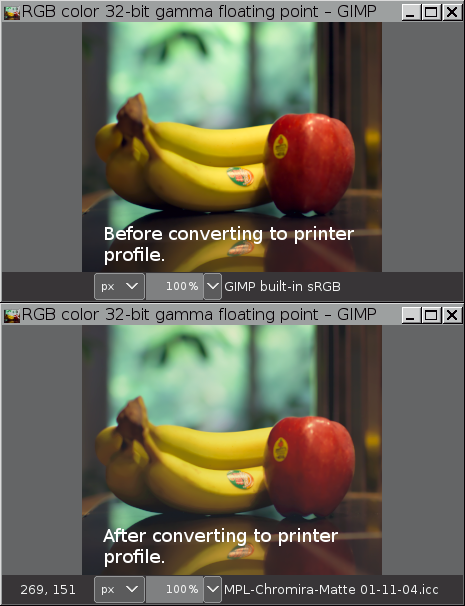
Let's say you have just finished editing an image. You edited the image in GIMP's built-in sRGB color space and now you want to convert a flattened copy of the image to a printer profile before sending it off to be printed. The screenshots below show the procedure:
Select “Image/Color Management/Convert to Color Profile” to bring up the dialog:
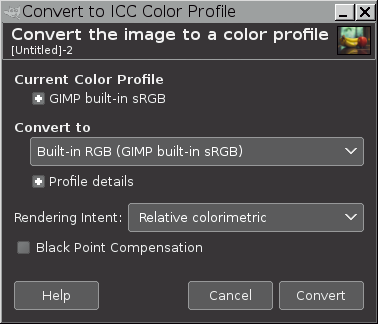
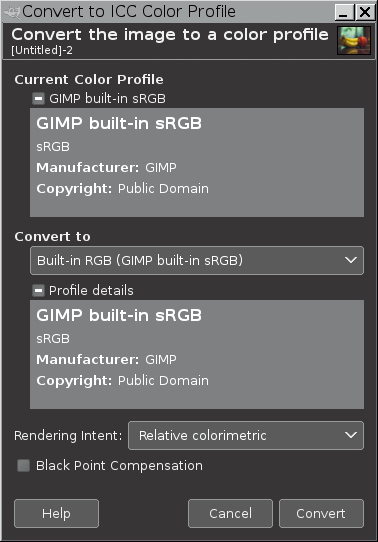
Under Current Color Profile is a description of the currently assigned color profile, in this case GIMP's built-in sRGB profile. Clicking on the "+" icon next to the description of the currently assigned profile displays the contents of various information tags in the assigned ICC profile.
Clicking on the "+" icons next to the words Profile details displays the contents of various information tags in the ICC profile that you pick as the profile to which the image will be converted. Until you've actually picked a new profile, the profile in the Convert to box defaults to a GIMP built-in sRGB profile.
The screenshot below shows example profile descriptions revealed by clicking on the "+" icons:
Between Convert to and Profile details is a drop-down box that allows you to pick a new profile. Clicking in the drop-down box brings up a list of recently used profiles (if any). At the bottom of the list is an option to Select color profile from disk...:

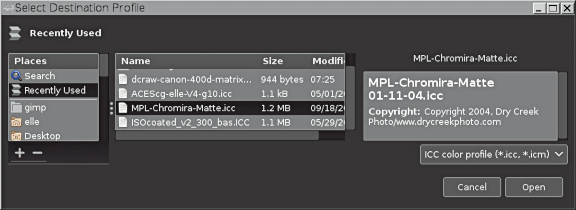
Clicking on Select color profile from disk... brings up the dialog for navigating to the disk location of the profile that you want to select from disk. The box has three panels:
The panel on the left allows you to navigate your on-disk folder structure to the folder of your choice.
The center panel initially shows another list of recently used profiles.
If you click on one of the recently used profiles, the right panel will show informational tags that are embedded in the selected profile.
As the desired profile is shown in the list of recently used profiles, the profile can be directly selected from the list of recently used profiles by clicking on the Open button in the lower right corner. Or as shown in the next screenshot,it can be selected by navigating to the profile's location on disk.
![[Opmerking]](images/note.png)
|
Opmerking |
|---|---|
|
"Destination profile" is the technical term for the profile to which you want to convert your image. Similarly, "source profile" refers to the current ICC color space (the color space the image is already in, before you convert it to the destination profile). |
As shown in the screenshot below, the left and center panels of the dialog allow you to navigate to where your ICC profiles are stored on disk, and then pick the desired destination ICC color profile, and the right panel displays informational tags embedded in the selected profile. Click on the Open button to select the "Destination Profile".
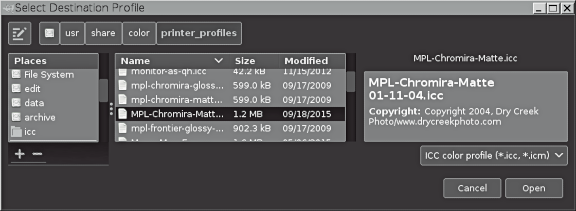
Clicking on the Open button returns you to the dialog, allowing you a chance to either convert to the selected profile or else pick a new profile:
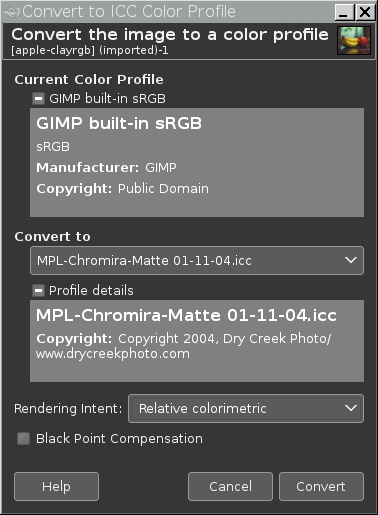
Once you are sure you've picked the right profile, the next step is to select the desired conversion options:

Selecting the desired conversion options requires two decisions:
Choose a rendering intent from the Rendering Intent drop-down box. The ICC profile rendering intents are:
Perceptual
Relative Colorimetric
Saturation
Absolute
Decide whether to use black point compensation:
To use black point compensation, the Black Point Compensation box should be checked.
To not use black point compensation, the Black Point Compensation box should be unchecked.
When you've picked the desired conversion options, click on the Convert button in the lower right corner, and the image will be converted to the selected destination profile, in the current example, an RGB printer profile: