| 5.13. 明度伝搬... | ||
|---|---|---|

|
5. 変形フィルター |  |
This filter works on color borders. It spreads pixels that differ in a specified way from their neighboring pixels.
![[注記]](images/note.png)
|
注記 |
|---|---|
|
These options are described in 「Common Features」. |
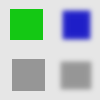
つぎの画像を用いた例で説明します。

画素は最寄りのより明度が高い画素の色に染まります。 したがって明るい部分が拡がります。
画素が最寄りのより明度の低い画素の色に染まります。 したがって暗い部分が拡がります。
色の境目で画素の値が上限下限のしきい値の範囲にあるときその上下の平均の値が伝搬されます。
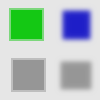
図17.89 中間明度をピークに

色の境目では徐々に色が変わる部分が薄く形象の周りをとり囲むように描き加えられた。 もとから徐々に色変りする境目にはこの様子は見られない。

Green area zoomed x800. A thin border (one pixel wide) has been added. Its value is the average between gray (90%) and green (78%) : (90 + 78) / 2 = 84.
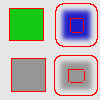
伝搬する部分はツーボックスの色標識に示される描画色で塗りつぶされます。 つぎの例ではツールボックスの色標識に示される描画色は赤とします。 1 ピクセル幅の細い赤の縁取りが形象につけ加わります。 徐々に色変りする方の形象ではそのような縁取りが色変りの端に現れます。 この図では内側にも縁取りが現れます。 これは形象が小さいことで両端のなだらかな色変りの部分が重なり合ってしまうことによる人工物現象です。
A color selector opens, with a color picker.
図17.90 Color to peaks

In this example, the selected color is Red. A thin border, one pixel wide, red, is added around objects. With smoothed objects, this border is located at the furthest limit of smoothing. Here, another border appears inside. This is an artifact due to the small size of the object which makes the smoothing area of opposite sides to overlap.
Only areas with the selected color will propagate. With this option, soft and fuzzy edges don't propagate well.
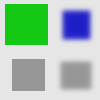
図17.91 Only color

In this example, the selected color is that of the green object. After applying filter several times, the green area is clearly enlarged.
これらのオプションは より白く (明度大) や より黒く (明度小) と似たはたらきをします。 前者は透明度のより低い部分の色が高いほうに伝搬し、 後者は透明度のより高い部分が低い方を染めます。 いずれのオプションも画像にアルファチャンネルが必要です。
A pixel will be propagated (spread) if the difference in value between the pixel and its neighbor is no smaller than the lower threshold and no larger than the upper threshold.
伝搬する量です。 高い率を設定すれば一度のフィルター適用でより多くの画素が染まります。
ひとつまたはそれ以上の伝搬方向を指定します。
If checked, the pixel's color channels (gray channel on grayscaled images) will be propagated. The option is checked by default, of course.
If checked, the pixel alpha value will be propagated, otherwise the pixel will get the alpha of the neighboring pixels.